Are you going on your first RV trip to a campsite and wondering if you can plug your camper into the outlet? Is there a way to test if it’s safe or not?
Yes, there is!
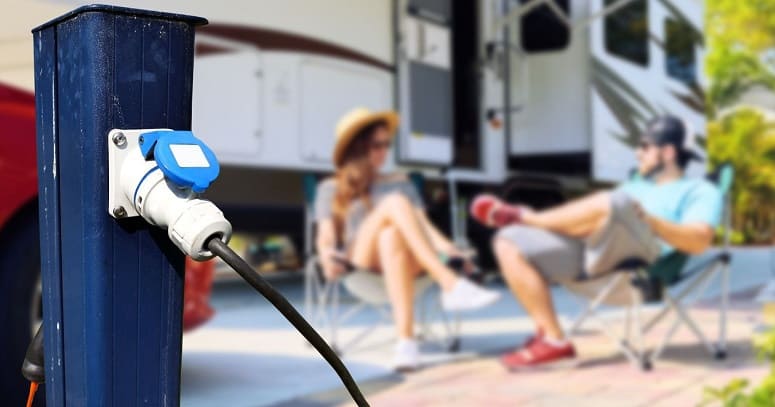
This is a very important question since it is, in fact, a matter of safety. When you park at an RV site, there are usually shore outlets where you plug in to get electricity.
It’s essential to test how much electricity is coming from these outlets, since too much or little can cause significant damage.
Shore outlets won’t always work correctly—some are old, others might malfunction. So if you want to learn how to test these outlets safely, then read on.
Today, I will give you some helpful tips and tricks so you can look like a pro on your next trip.
Is It Safe To Plug-In?
Malfunctioning outlets, or those that have been improperly wired, could mean the end of your camping trip. I know, I know—this sounds grave, but these outlets could have too many volts or too little, or even reversed polarity.
For starters, reversed polarity can give you a nasty shock if you come anywhere near it.
It’s a manufacturer error, where the wires aren’t connected correctly, so the “live” wire is now what’s closest to you.
What happens next is that the outside of your camper also becomes live, and anyone making contact with it will get a shock.
On the other hand, if the outlet has too few volts, it can be hard to notice. All your appliances will still work.
However, they’re now working much harder than they usually would, and will eventually suffer damage, perhaps stop working entirely.
And if the outlet has a high voltage, it could overload your camper’s electrical system, even burn up parts of it.
In the worst case scenario, it may cause a fire.
So, as you can see, it’s not always safe plugging your camper into a shore outlet. It’s vital that you test it beforehand—don’t assume it’s fine and take the chance.
Also, if you test the outlet and see that it is off, notify the camp staff and they should give you a new site to park.
Things You Should Know Before Testing
Before heading down to your local hardware store, asking for an outlet tester, there are a few details you should be aware of.
If you thought camping was going to be easy, think again.
There are many issues to be aware of and to keep track of. On the bright side, traveling in a camper will teach you some things, too.
But when it comes to electricity, there’s no room for error. It’s essential to know what to look for and what you are looking at, to make the safest choices before settling in for the night. Let’s go over some of those things now.
Know Your Volts, Amps, And Watts
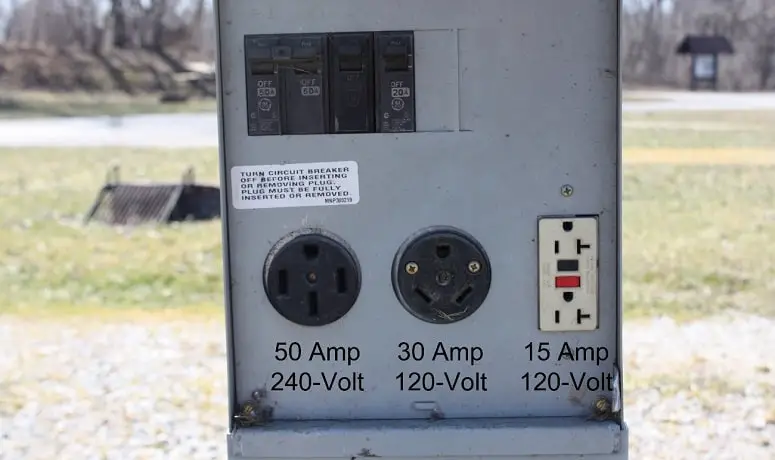
Let’s start with volts, amps, and watts.
The number of volts indicates the force that the electrical current has, whereas amps show you the amount of current. The wattage will indicate how much the power outlet can do.
Think of it as a stream of water running through a canal. If we say that the stream is the voltage and the canal is the amps.
A wide canal plus higher pressure from the current can do significant damage, whereas a small canal, and a slow current, won’t do much.
When you multiply the volts with the amps, you get the amount of wattage, indicating how much power you have to work with.
Understanding RV Electrical Systems
Not every RV is the same.
The electrical systems vary from model to model, but we can give you a general idea.
Trailers and fifth wheels generally have both a 12-volt deep-cycle (DC) battery and a 120-volt alternating current (AC) electrical system.
The AC system is the same as you would find in your home. And the DC battery is what you’ll find in your vehicle.
Motorhomes are a bit different, as most will only have a separate 12-volt DC system powering the vehicle.
The AC is what powers all your essentials on the trailer, such as plug-in outlets, kitchen appliances, air conditioners, and larger machines onboard.
The refrigerator, however, is usually powered by various systems, depending on the model. You can get three-way appliances. This means that the refrigerator can switch its power source between a battery or propane gas.
Then we have the circuit breaker. This is like your safety belt—it will limit the amount of electricity coming through to your appliances.
This is always the weakest link, meaning that it will break before too much damage occurs.
RVs can consume a lot of electricity, and if you’re trying to squeeze through more power than the wires can take, it can result in a fire.
You should have a circuit breaker for each group of appliances you have onboard. You can always mark them to know exactly where they lead.
Lastly, we have the stove fans, furnace, vents, water pumps, radio, and lights.
These are all powered by the DC system coming from your vehicle.
These will use the same fuse as your car but, before heading out, make sure you know where the fuses—and spares—are.
Helpful Tools
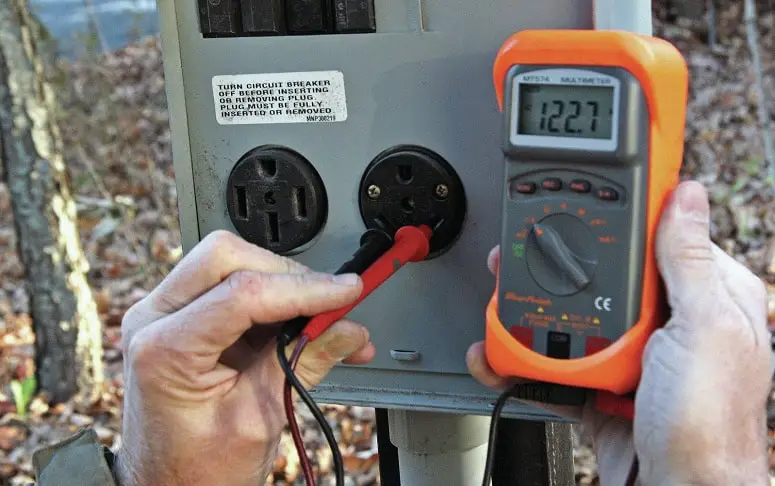
The tools you need to test the outlet are pretty easy to find.
You can usually get them at your local hardware store, or on Amazon.
Multimeter
A multimeter will help you measure voltage, current, and resistance.
There are several models, but I recommend that you get one with digital numbers. These are easier to read.
Non-Contact Tester
This tool can help you check if the power is on or off in the outlet by checking the current. These can also check if there is power in the wires if you place it on top.
Look for one that can detect low voltage—preferably as low as 90 volts.
Outlet Tester
An outlet tester will let you know if there’s a flaw in the outlet wiring, such as reversed polarity.
Although it may sound like complicated technology, these are super easy to use. Simply plug it in and it will tell you if the outlet is safe or not.
Voltage Meter
A voltage meter will tell you how many volts are coming from the outlet. Similar to the outlet tester, you simply plug it in and it will show the results.
There are different models available, some will have a color-coded display while others have a digital readout. Both work efficiently, so it’s up to you to see which you prefer.
It will convert the higher current to one suitable for your RV’s electrical system. Get one that is compatible with your RV and allows for outlet tester and voltage meter plug-ins.
Still, note that, even though you’re plugged into a 50 amp outlet, it doesn’t mean that you can use 50 amps in power. You are still limited to the 30 amps on your trailer.
How To Check Your RV’s Electrical System
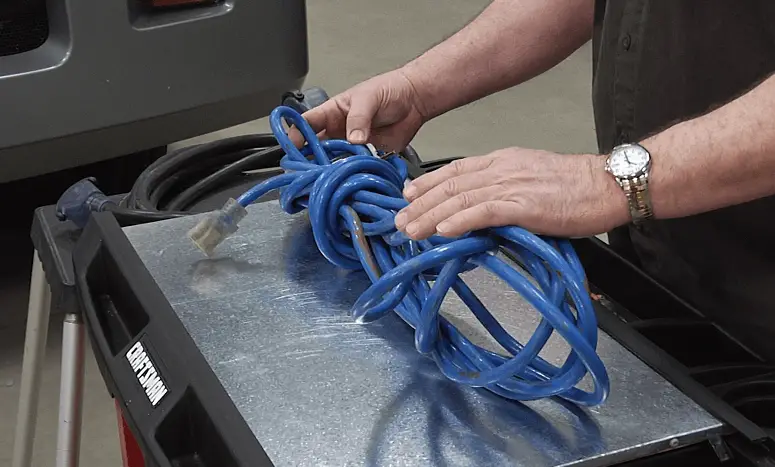
Checking your RV’s electrical system is just as important as checking the outlet at the campsite.
Before letting any electricity through, you want to make sure everything is working as it should.
Unfortunately, when wires malfunction or are improperly connected, you can end up charging the outside of your RV or starting a fire.
Check Electrical Cords
The best place to start is by inspecting the heavy-duty electrical cord.
This is the one that connects your camper to the campsite outlet.
Check your owner’s manual to know which type of outlet your RV has and match it to one at your site. For example, if you have a 30-amp power system, you should ask for a shore outlet with at least 30 amps.
If they have a 50-amp system, you can make it work with a step-down cord. This will convert the 50 amps to 30 amps for your camper.
Additional steps to take before plugging in:
- Check for damages: Inspect the cords and check for any signs of damage, such as cracks, cuts, or breaks. Feel for crumbling or stickiness, as this indicates severe wear.
- Make sure everything is intact: Grab the cord by the plug and check if it wiggles, or is bent, or if the ground prong is intact.
Fuse Boxes & Circuit Breakers
Check to make sure these will work in case of an overload of power. Remember that these should always be the weakest link in the system.
- Know their location: Be sure that you know where the fuse boxes and circuit breakers are. This is vital in case you need to shut them off or replace them.
- Mark the fuses: Mark each of the fuses and circuits, so you know what they control.
- Are they clean? Be sure to keep the fuse boxes and circuit breakers clean from dust as this can cause corrosion or deterioration.
- Are they all working? Check all the fuses and circuits by turning them off and on. If some aren’t working properly, make sure you bring replacements in case they break while you’re on the road.
Appliances
The last step is checking that all the appliances are working as they should.
- Check refrigerator and microwave: Make sure that the lights switch on when you open the appliance.
- Check your three-way refrigerator: Double check that you can switch it on between all its power sources—AC, DC, and propane.
- Check the ventilation behind the refrigerator: Make sure that the fan is working and the propane igniter is clean. Remove cobwebs, mud, wasps nests, and dust if any.
- Repeat the checks for the furnace ignition system: Make sure it’s working and give it a clean.
- Test your water pump, lights, and outlets.
How To Test The Shore Outlet
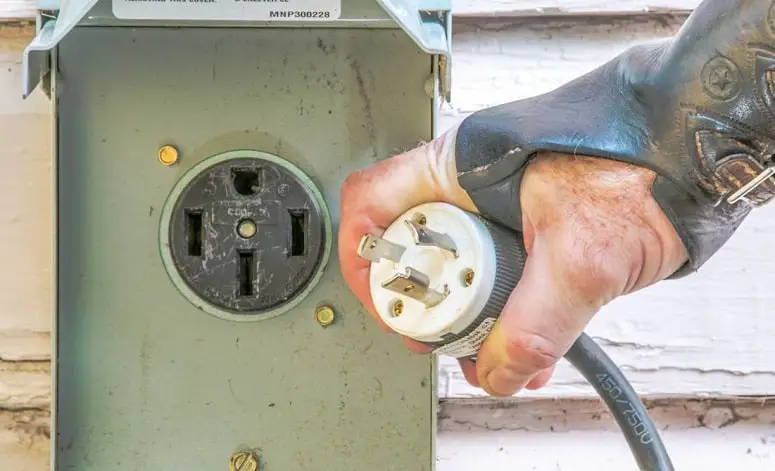
There are different ways to test the outlet, the method depends on the number of amps coming from it. But to give you a general idea, here’s what you’ll need to do:
- Step 1: Test the voltage coming from the outlet. Plug your voltage meter in the outlet and check the reading. The range should be between 108 volts and 125 volts to be safe.
- Step 2: Test for polarity. To test this, use your outlet tester. This plugs in, similarly to the voltage meter, and has six probable wiring conditions as well as indicator lights. These will let you know if the outlet is wired correctly or not.
- Step 3: Determine which side is hot. Place the non-contact checker in each slot. The hot side will be where you’ll see a current. The others should be still.
- Step 4: Grab the multimeter tester. Start by placing the black probe on the hot side, and red on the neutral—the reading should show as 120 volts. Next test between the hot side and the ground, which should also read as 120 volts.
- Step 5: Test the voltage between the ground and the neutral line. Do the same as above by placing the probes in the correct lines. This reading should be zero volts.
- Step 6: If there are no warnings, you are safe to plug in. However, if anything sounds an alarm, make sure you disconnect everything and notify the site manager or staff.
Ready, Set, Plug In!
Making sure everything is in order before plugging your RV in at a campsite is critical.
Improper wiring, too high voltage or too low voltage can cause a lot of damage, even cause shocks you or your fellow campers.
Before plugging in, make sure you check everything, including your onboard appliances, electrical cords, fuse boxes, and circuit breakers.
Next, use the helpful tools we talked about to check if the shore outlet is safe. Check for reverse polarity and incorrect voltage.
Do you have additional tips you feel should be included? Or do you have any extra questions?
Please let us know in the comments below, and don’t forget to share these tips with your RV friends.


