Ever parked your RV in Arizona in July?
It’s a scorcher. You can’t rely on some good shade and a cold drink to keep you cool, which is why you need the best RV air conditioner possible.
Whether it’s for extreme conditions or just to keep things cool and comfortable, having more BTUs with less of a power draw is important.
We’ve looked at all the technical and electrical specs of the best RV air conditioners on the market to give you this condensed guide, backed by intense research and hours of poring over user reviews.
Look At Our Top Pick
Dometic Rooftop RV Air Conditioners
- HIGH-PERFORMANCE DESIGN: The Brisk 13.5K BTU offers larger air...
- LIGHTER WEIGHT: EPP foam housing reduces weight and also improves...
- LASTING DESIGN: One of our most popular models, the Brisk has a custom...
Why is it better than the rest?
- Extremely reliable and their customer service is supposedly excellent
- 2-year protection plus warranty
- You have the option to upgrade from 13,500 to 15,000 BTUs
5 Best Air Conditioners For Your Rv
With that in mind, let’s now take a closer look at our top picks.


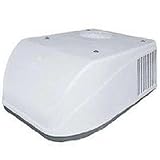

Let’s dive into the specifics and review each air conditioner individually. You can use the list below to jump and review specific models, or you can read along and go through all the information.
Best Overall: Dometic Rooftop RV Air Conditioners
- HIGH-PERFORMANCE DESIGN: The Brisk 13.5K BTU offers larger air...
- LIGHTER WEIGHT: EPP foam housing reduces weight and also improves...
- LASTING DESIGN: One of our most popular models, the Brisk has a custom...
Our all-around favorite, this Dometic RV AC unit is a solid, reliable choice. Its variable listing allows you to customize your order for your unique needs.
Despite its high-performance fan and motor, and 115-volt AC power, it operates quietly due to the dampening brackets used around its compressor, evaporator, and motor, which reduce noise and vibration.
The base pan made using the latest technology helps decrease its weight, which is an ideal feature for RVers who like their stuff light since they are traveling a lot.
It also boasts its new “15% increased airflow and improved cooling capacity” technology at a very reasonable price, making this our clear winner. If you’re on the fence, take a look at the reviews.
The great thing about selling sites like Amazon is the ability to read first-hand accounts from buyers just like you and their experiences with that specific product.
This product, in particular, is loaded with helpful reviews, customer pictures, and over 200 answered questions.
Pros
- These Dometic air conditioning units are extremely reliable and their customer service is supposedly excellent.
- Don’t overlook their 2-year protection plus warranty, too. Although the goal is to never need it, having that in your back pocket could help relieve some stress down the line.
Cons
- The only drawback to this unit is its height profile. As we’ll explain further down in this guide, a higher profile on a rooftop unit means more drag in the wind, lower energy efficiency, and higher gas costs at the pump.
Features
- It comes in color options of polar white or black, allowing you to match your RV’s paint job or optimize its heat absorption.
- You also have the option to upgrade from 13,500 to 15,000 BTUs for just an extra $80, a power difference that will make a huge difference for some RV setups.
Product Information
- Dimensions: 23 in x 29.18 in x 12.7 in
- BTU’s: 13,500 or 15,000 BTU
- Ducted/Non-Ducted: Ducted or non-ducted
- Voltage: 110 Volts
- Wattage: 2800 Watts
- Electrical rating: 115V AC, 60 Hz, 1Ph
- Heating: No
- Warranty: 2-year protection plus warranty
Coleman 48204C866 RV Air Conditioners
- Cool/Heat Capacity: 15,000
- Delivered BTU Heating Output: 5,600
- Electrical Rating: 115V AC, 60HZ, 1 Phase
This Coleman air conditioner unit is another workhorse for cold air.
A very close runner-up and still an excellent choice, this machine is tried, tested, and proven.
With its 1/3-HP fan motor, which is one of the most powerful motors in the RV AC market, it can provide an airflow of 325 cubic feet per minute.
It has an initial cooling capacity of 15,000 BTUs, which is pretty sufficient for any kind of RV, but if you want to have some heating capacity too, you can purchase an electric heat kit produced by the same company. That way, you’ll be able to get 5,600 BTUs of heat as well.
It’s also a very high profile air conditioning unit, at 16 inches it stands even higher than the Dometic above, making it more suitable for larger RVs with ducted air conditioning systems.
It might be noisy for some, but for year-round RVers, there is hardly any better choice because of its highly capable fan motor, easy installation, and affordability.
If you own a smaller RV and are looking for something smaller in terms of cooling capacity but better in terms of longevity, we can also recommend Mach 3 by the same brand.
Its 13,500 BTUs of cooling capacity, all-copper tubing, and gas-flux brazed joints will provide for that.
Pros
- The Coleman Mach 15 boasts extremely positive reviews that refer to its high-performance, high-quality, and durability.
- There are even several users that mention the product’s absolute pristine condition upon delivery despite seemingly horrible transit conditions and packaging.
Cons
- This machine is extremely heavy. Now, all ACs you’re going to be looking at are pretty hefty devices, but this one takes the cake. For those looking to install it themselves, this might prove an additional obstacle.
Product Information
- Dimensions: 28 in x 42 in x 16 in
- BTU’s: 15,000 BTU
- Ducted/Non-Ducted: Ducted
- Voltage: 120 Volts
- Wattage: 1800 Watts
- Heating: Heater purchase separately
Dometic Penguin II RV Air Conditioners
- PREMIUM COMFORT: Dometic Penguin Air Conditioner offers premium...
- LASTING STRENGTH: The Penguin AC ensures lasting strength through its...
- SLEEK DESIGN: It's sleek design, featuring improved aerodynamics to...
This is ideal for large RVs and motorhomes due to its 15,000 BTU rating.
It features a pre-installed multizone control unit, so it’s compatible with multizone thermostats. Moreover, it is made to be a standard fit for 14-inch air vents of RVs, which adds more to its compatibility.
This low-profile unit is not only more sleek and stylish than some of the higher-profile units but will also help save you some gas money down the road.
For this reason, consider the added purchase cost more of an investment, one that distance drivers will likely get back extremely quickly.
You might think that a slimmer machine means a lighter one, too. But you’d be wrong. This unit is a heavy beast, so make sure you’re prepared to lug it up to your RV rooftop.
Pros
- This unit also comes with the standard Dometic AC warranty of 2 years, a big plus if you’re planning to use this pretty often.
- It is also customizable with variable options. You can choose the black or white version, and you can also select between the 13,500 and high-capacity models.
Cons
- This is also a rather high amperage unit. If your circuits are wired high enough, this isn’t an issue, but if you’re on a limited system this is something important to consider.
Features
- The listing for this unit claims that it “cools with R410A refrigerant that releases heat more efficiently.”
- For such a powerful device, a little bit of energy efficiency can go a long way.
Product Information
- Dimensions: 29 in x 40 in x 9.5 in
- BTU’s: 13,500 BTU
- Ducted/Non-Ducted: Non-ducted
- Voltage: 120 Volts
- Wattage: 3000 Watts
- Electrical rating: 120V AC, 60 HZ, 1Ph
- Heating: Heat strip sold separately
- Warranty: 2-year protection plus warranty
Coleman 47201A876 RV Air Conditioner
This Coleman model is a great option for low-power systems, as it operates on just 115 volts and 8.9 amps.
At only 9,200 BTUs, this will likely not be very effective at cooling larger rigs.
This may just mean you’ll need a second unit, but it also might mean you should look elsewhere for a unit equipped with the power to efficiently cool your entire vehicle.
That said, if you got a smaller vehicle, it can work perfectly fine in more temperate climates.
Pros
- This unit comes with a desirable 2-year warranty as well as Coleman’s excellent customer service.
- As mentioned, this unit is also very energy efficient, requiring only 8.9 amps to run, so it’s perfect for smaller rigs or even van-dwellers looking for some cool air.
Cons
- This unit is not extremely powerful.
Product Information
- Dimensions: 5 in x 30.5 in x 10.5 in
- BTU’s: 9,200 BTU
- Voltage: 115 Volts
- Amperage: 8.9 Amps
- Heating: No
- Warranty: 2-year manufacturer warranty
Dometic CXX1C0 RV Air Conditioner
- Fits all standard 14-inch roof vent openings.
- Works with ducted or air box installations.
- Heats and cools from the same unit
This is a big buy and you should really consider if it’s worth it for your needs.
If you’re expecting to frequently travel to areas with weather towards both extremes, this might be worth your while.
If you’re an all-season traveler or tend to visit cooler climates as often as hot ones, this unit might be a great investment.
Pros
- This machine is extremely powerful at 15,000 BTU but still runs on a limited energy circuit at just 120 volts and 1500 watts.
- The biggest advantage of this device is its built-in heater. As we’ll discuss further down in this article, some newer units take advantage of modern technology and can reverse the cooling feature to output heat as effectively as it does cool air.
Cons
- This machine costs as much as two standard units, but the fact that it’s multifunctional might mean that this one air conditioner takes the place of two separate devices you might need to purchase.
Features
- As mentioned, this unit also has a very sleek, slim profile, helping you maximize your RV’s fuel efficiency even on long hauls.
Product Information
- Dimensions: 28 in x 40 in x 11 in
- BTU’s: 15,000 BTU
- Ducted/Non-Ducted: Ducted
- Voltage: 120 Volts
- Wattage: 1500 Watts
- Heating: Yes
Important Things To Consider
It’s never been easier or more affordable to bring the luxury of fresh, cool air along on all your adventures. Nearly every modern RV comes with at least one AC unit standard.
That may lead you to think you’d never be in the market for a standalone unit, but the truth is these machines have a limited lifespan, and you’ll likely need to replace your air conditioning unit several times before your RV’s lifespan is even near complete.
So whether you’re purchasing a replacement unit or you’re looking to install air conditioning altogether, starting the search seems like a monumental task.
With the now-saturated market offering an overwhelming range of products and features, how can you know which unit is the best for you?
That’s where we come in. All the product specs in the world will only continue to overwhelm you until you know what you’re looking for.
At the end of the day, there is no one right answer for everybody, and the right unit for you depends on factors like the size/build of your RV, your electrical system, or if your AC power is connected to solar energy, your solar panels, and most importantly, your specific needs from the unit.
But before you can even start to consider a unit, you should understand the basics of them, first.
Portable AC Units Vs RV AC Units?
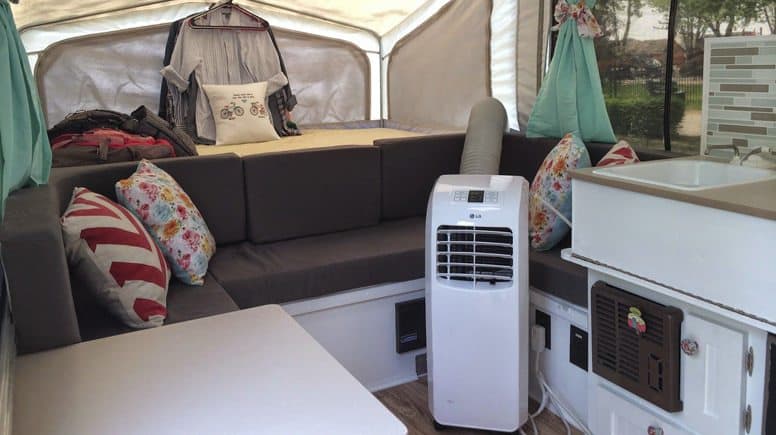
You might wonder what all the fuss is about rooftop units for RVs. There are alternate options, such as a more traditional portable one.
These can be very powerful and effective but tend not to be ideal for RV spaces as they take up a fair amount of floor space, a vital commodity in a tight space like an RV.
There are also window AC units being produced that are small enough to operate in an RV setting, but due to them being new to the market, it’s a rather risky unit to invest in.
Ultimately, a rooftop AC unit is the best choice for most RV users. But choosing that is far from the only decision you’ll have to make. There is a wide range of factors that you should thoroughly consider before making your purchase.
Size
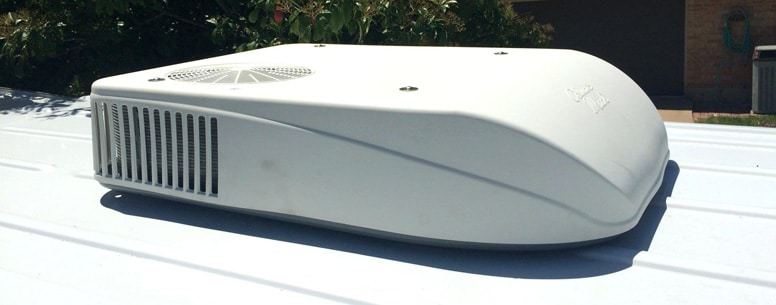
If you’re replacing an existing unit, you must purchase an RV air conditioner that will fit into the same size mounting hole that you have on the top of your RV.
This should be your absolute first consideration as you start looking for a new AC. The height of your RV’s AC unit will also affect a couple of things.
Since these units attach to your RV’s rooftop, a taller profile on the unit means a taller profile for your RV.
For some people, this consideration is a non-factor, but if your RV already makes for a tight squeeze in your garage spot or under bridges in-transit, you might want to seek out a slimmer device.
Even if those factors don’t seem that important, I hate to break it to you, but size still matters. A large unit attached to your roof makes for poor aerodynamics, the effects of which will show up on your gas bill.
Units with a more sleek design tend to be a bit pricier, but every mile you drive with it, you’ll be making that money back at the gas pump. The downside to smaller, slimmer units is that they tend to be less powerful.
This brings us to the second consideration when selecting a unit for your RV: power. As you look at various options, one of the first things to look at is their BTUs or British Thermal Units. This is the measurement for power.
The standard power is 13,500 BTUs, however, plenty of people end up preferring more or less BTUs depending on their specific needs.
How Many BTUs Do You Need?
If you frequent extremely hot locations or climates that might be particularly testing on an AC unit, you should look for a device with higher BTUs, like the Coleman Mach 15 we recommended above, which boasts a rating of 15,000 BTUs.
On the other hand, some travelers prefer a less-powerful device like Coleman Mach 3, or even Coleman 47201A876, if they don’t travel to very hot climates or if their vehicle is small enough that it doesn’t require as much power to cool.
You should also consider just how much time you intend to spend in your RV.
If you’re a more casual user, you’ll likely need a less powerful unit than someone who lives full-time in their RV.
Do You Need A Second AC Unit FOr Your RV?
If you’re concerned that even the most powerful AC won’t be enough to keep your entire rig cool, you might be right.
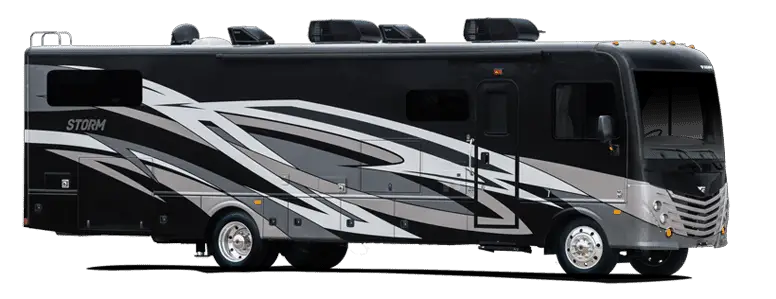
The general rule of thumb is that RVs can cool sufficiently just with one unit if they’re under 32 feet. Above that, you might want to consider purchasing a second unit.
This is mainly due to the airflow issue with such a large vehicle, and one little unit can struggle to circulate cool air throughout the cabin.
A less considered factor when choosing a second unit is, surprisingly, the color of your RV.
Darkly-colored vehicles, particularly black ones, absorb much more light and therefore heat from the sun, turning the inside of your RV into a sun-baked oven. If your RV is over 32 feet or painted with a dark, heat-absorbing color, you might want to look into a second unit.
Further than just the various specifications of different units, there are different types to consider, as well.
Different Types Of RV Air Conditioners
Ducted Vs Non-Ducted

This factor is determined by your RV, so make sure to get a unit that works with your vehicle.
A non-ducted unit features a compressor, condenser, and blower, and it simply blows the cool air out of the bottom of the unit itself, whereas a ducted AC connects to the duct system in your RV, distributing air throughout several ducts.
A ducted system is highly preferable, and can often seem much more powerful than non-ducted systems which are often much slower to circulate cool air to every corner of your rig.
They also tend to be much more energy-efficient, as they are much more effective at dispensing cool air and end up using less power.
In a ducted system, in addition to an air distribution box (ADB) between the ducts and the AC, you’ll also have better control because they feature a remote control or a wall thermostat.
Rooftop/Portable
If you already have a portable AC, it will work to cool down your RV, but as we’ve mentioned before, it may not be ideal to use in such a small space.
If giving up some extra space isn’t an issue for you – an all but nonexistent phenomenon amongst our RV crew – then this really isn’t a bad option.
For the rest of us, a rooftop air conditioner is the way to go.
You don’t have to give up a single square inch of square footage and you still get all the benefits of luxurious, cool air.
Heat Pumps

Speaking of luxuries, a heat pump can be a huge plus for all-season campers.
Some RV units, like the Dometic Brisk II we featured previously, have built-in heat pumps. Through incredible technology, they’re able to reverse the cooling features to powerfully but efficiently heat your RV as well as cool it.
This feature is especially beneficial to campers who frequent chillier climates or full-time RV dwellers who travel throughout every season.
The somewhat-obvious downside to a heat pump is the cost, units with reversible systems are often quite pricey, and ones that don’t include a heat pump will require you to purchase one separately.
Low Power Consumption
In a mobile home, power consumption is a pretty big deal.
If you’re off-the-grid, you have to be aware of your limitations and ensure you’re not exceeding your generator’s capacity.
Low power consumption ACs can be really handy in these cases, as they’re designed to provide the same cooling power but on a lower amperage.
Even for RV users who don’t spend much time off-grid, an energy-efficient unit will still be beneficial.
Almost all electrical hook-ups have their limitations, and most campsites will limit your usage, causing you to trip a circuit if you exceed the amount of power allotted to you.
A low power consumption model can help you avoid these issues, so make sure to fully consider your power needs before you purchase a unit.
Hopefully, you’re starting to feel good about the type of AC you’d like to buy for your RV, but your purchasing decisions don’t end there. You might want to consider some accessories as well.
Accessories
A cover for your RV’s AC might be a worthy investment, as they help protect your unit from the elements and therefore extend its life.
An important thing to note is that covers are not meant to be used during transit, but rather once your RV is stationary, making this a great option for people who tend to stay in one location for an extended period.
These covers can prevent draft when the temperatures drop by sealing off the vents of your air conditioner, this seal also ensures that no leaves or other debris enter the open fans of your unit.
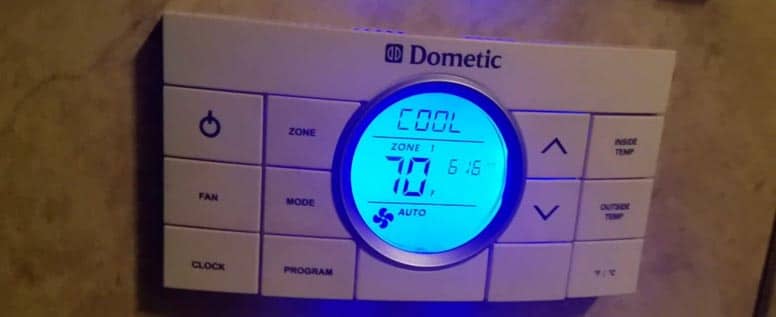
If you’re looking to increase the longevity of your AC, or if you will be using it in particularly inclement weather, a cover is a great investment. A thermostat is another accessory you might want to consider purchasing.
These devices hook up directly to your AC, monitoring both the internal ambient temperature of your vehicle, as well as powering your AC to match whatever temperature you’ve preset.
Thermostats can help you make the most efficient use of your RV’s air conditioning unit by only applying power when the temperature rises above your ideal temp.
It also takes nearly all the effort out of this from the user’s standpoint, as you simply set it and forget it. No need to constantly be turning your AC on and off to try to reach your ideal temperature.
Most modern thermostats also let you preset a schedule. This is extremely helpful if you prefer a cooler temperature at night than during the daytime, or perhaps if you’re away from the RV for the same time slot consistently.
For instance, if you work the standard 9-5 job, you can preset your AC to turn off while you’re away so you’re not wasting energy cooling an empty cabin.
In this scenario, you can also preset it to turn back on just before you’re due to arrive home, allowing you to walk into a nice, cool environment the moment you get back to your RV.
Overall, a thermostat is a pretty small investment when compared to the price of the actual AC, and for most people, the increased energy costs and ease of use more than make up for the additional cost.
Replacement Air Filters
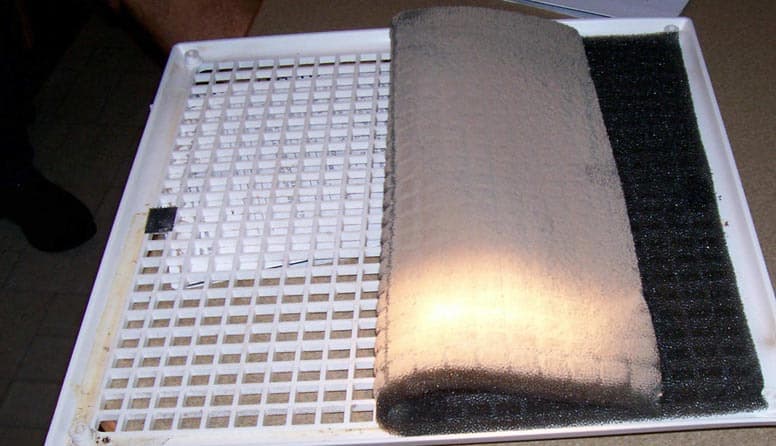
For the most part, an RV AC unit is pretty self-sufficient once it’s installed.
After a while though, you may notice it not cooling the same way as it used to, or perhaps emitting a different or strange noise while in-use. This likely means it’s time to replace your air filters.
Fortunately, this isn’t a very expensive process, and you’ll likely be able to do it yourself. Make sure to purchase replacement filters for your exact model or there’s a chance it won’t fit.
For this reason, we recommend purchasing a few filter replacements at the time you purchase your AC so that when the inevitable happens, there’s not any chance that the replacements are out of stock or out of production altogether.
Another option is to thoroughly wash and rinse out your existing air filter.
Some air filters are more or less capable of withstanding a thorough scrubbing, so this one is best left up to a judgment call.
RV Air Conditioner Maintenance And Installation
Now that you’ve learned everything you need to make an informed purchase, it’s time to take the next step. Installation.
This might sound like an intimidating endeavor, but if you’ve got a basic set of tools, some can-do attitude, and maybe a friend or assistant to help you haul the thing up to your roof, it might just be easier than you’d think.
Fortunately, we’ve put together this handy guide to help you breeze through the process, so grab your tools and read on!
Removing Your Old AC Unit
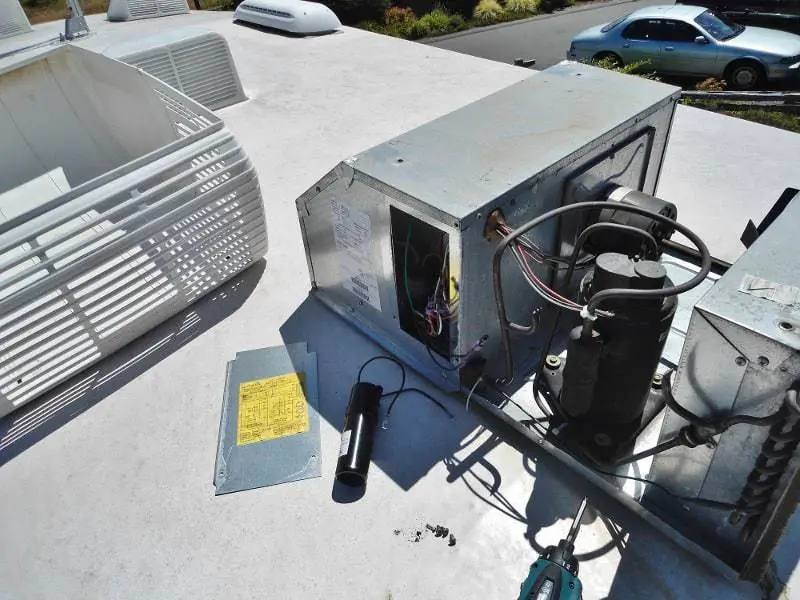
- Stop. Read the installation instructions for your specific unit. The following are general tips, but any specific installation guides should supersede any generalized guide you may find. Make sure you’ve accounted for any pieces that came with your unit as well.
- Make sure to turn off the RV’s electrical power.
- Remove the unit’s shroud from the top of the RV. This step isn’t necessary but will help make some of the following steps easier.
- From inside the RV, take off the control panel cover. This typically simply slides or pops off, but if you have a more complicated unit, you might need some screwdrivers to remove the control panel.
- Remove the faceplate from your old unit. This should be a separate thing from the control panel, and will likely involve the use of a screwdriver to remove.
- Locate the bolts that connect the unit to the roof of your RV. You’ll remove these completely once you’re on the roof, but for now, loosen them almost all the way with a crescent wrench. This will make your job much easier once you’re up on the roof.
- When you removed the faceplate, you should have uncovered some electrical wiring. There should be a live, neutral, and ground wire connected likely via wire nuts. Simply twist these off to remove and disconnect your electrical connections.
- Now it’s time to get on top of your RV. If your RV doesn’t have an access ladder built-in, you can use any tall enough ladder, just use precaution.
- Use a putty knife to strip away any caulking around the seam between the unit’s gasket and your rooftop. Depending on the adhesives or flashing used to secure your old unit to the roof, there may be a fair amount of debris built up. There also tends to be build up from roof treatments over the years securing your RV from leakage, so depending on the state of your seams, this task might take a bit of elbow grease.
- Remove the nuts that are holding the unit on the rooftop. Most of the time, there will be 4 main nuts, threaded through the 4 bolts you already loosened in step 6. Locate these once again and remove them fully. There should no longer be anything attaching the unit to the roof of your RV.
- Remember that friend or assistant I mentioned you might be needing? Now’s their chance to shine. Have them get in the RV and push from below while you lift the unit out of the rooftop. Make sure you have a solid grip on the unit before you do so, as these are typically much heavier than you’d expect, and the last thing you want is a 90 lb unit tumbling down the side of your RV, wreaking havoc along the way. Definitely not talking from personal experience.
- Have your friend come outside and carefully pass the unit down to them, again ensuring you both have firm grips on the unit before you transfer off the weight. Do not attempt to carry the unit down the ladder by yourself. These things are extremely heavy and very awkward to hold, one slip could lead to more pain than it’s worth.
Installing Your New AC Unit
- Once again, stop and read your unit’s instruction manual. Nothing in this guide should supersede the installation instructions that came with your specific unit, this is just a general reference.
- Start with a clean surface. A clean, tight connection between the unit and the roof of your RV is essential for preventing leaks and drafts. The longer your old unit was in place, the longer this step will likely take you, but it will improve not only the efficiency of your unit but also its longevity.
- Once again, you’ll need a friend or assistant to help you safely get the new unit onto the top of your RV. DO NOT attempt to climb up yourself while holding an AC unit, not only will you likely damage yourself and your RV, but also your brand new air conditioning unit. Instead, climb up first and take the unit from someone standing on the ground. Again, take your time and make sure you have a firm hold before they pass it off. Nobody wants an AC unit dropped on their head.
- Align the new unit with the mounting hole on the roof of your RV and carefully place it into the hole. You’ll want to fully seal the seam with a caulk gun. Take care to seal off any gaps between the unit and the surface of your RV, failing to do so will also lead to leaks and drafts, decreasing the effectiveness of your unit and potentially causing damage to your vehicle. Then, thread the bolts back into the unit to secure it to your roof, you can tighten these from below, so just give yourself a good start.
- All done on the roof! Climb down and head inside to finish the installation.
- Now you’ll want to connect the electrical wiring. This should be easy as they are almost always color-coded. The white wire indicates the neutral wire, and red or black typically designates the live wire. Your ground wire is probably bare. Match up the new unit’s wiring to your RV’s and twist the ends of the connections together. Screw a wire nut on the connection and you’re all set.
- Screw on your new faceplate and reattach the cover. This will likely snap or slide into place.
- Now it’s time to test it out. Turn back on your RV’s electrical and give the AC unit a try. Hopefully, you get rewarded with a blast of cool air. If not, take a deep breath, a step back, and work your way back through this guide from step one, referencing your installation manual often.
Hopefully, this handy guide has given you the confidence to select, purchase, and ultimately even install your RV’s new air conditioning unit.
If you educate yourself and arm yourself with enough knowledge to get you through, this task shouldn’t intimidate even a novice handyman.
Resources:


