From hunting to theft detection, wireless trail cameras are rising in popularity and becoming an essential part of outdoor technology.
Around for several years, hunters have found them extremely useful when hunting for wildlife. Not only this, but they are also used as home security systems to keep properties safe.
With the large selection of cameras available on the market, it becomes difficult to select a quality camera. Knowing your intended purpose and the variety of models available will help narrow down this selection.
This Trail camera 101 guide will give you an overall understanding of these tools and why they make the best pieces of equipment to use when hunting.
How Do Trail Cameras Work?
These cameras make a great addition to outdoor recreation activities. There are five important elements you need to know to fully understand how trail cameras operate.
You can consequently use this knowledge to narrow down your search.
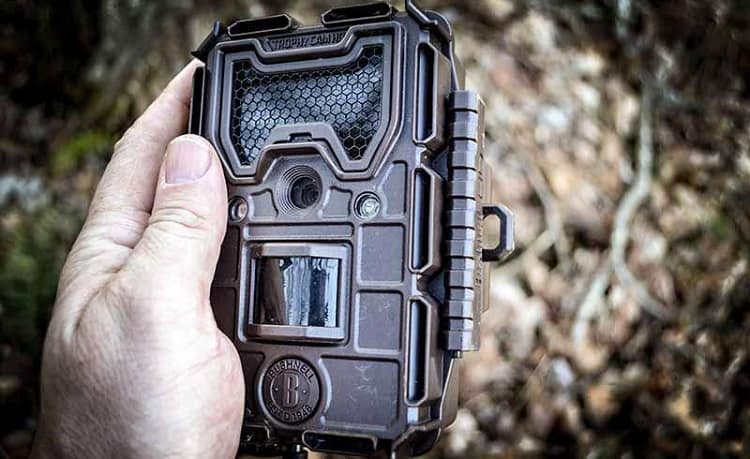
- Detection Circuit – the goal of trail cameras when hunting is to detect activity, particularly those of wild animals. When movement is noticed, this device will activate and capture an image. Most cameras send these images directly to your mobile device.
- Batteries – these devices operate on batteries, therefore, before purchasing, one you need to figure out how long the battery life is. Most offer long lifespans, eliminating the need to visit your camera too often.
- Infrared Emitters – you have a few options when it comes to this element. Trail cameras may emit a red glow infrared flash, a low glow flash, white flash, or no glow.
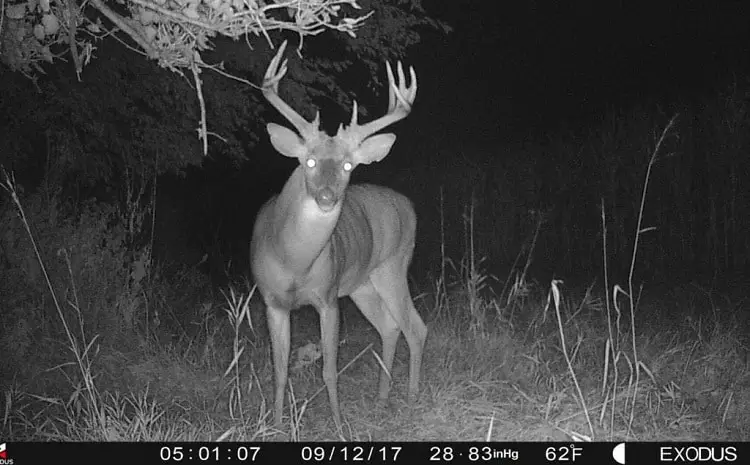
- Picture Quality – these devices were designed to give hunters quality pictures of animals and wildlife. Be sure you view sample photos from all the cameras you’re considering. While still photos offer great shots, some cameras have video options that allow hunters to catch a glimpse of how wildlife behaves.
- Setup & Viewing Screen – consider the ease with which the camera can be set up and check whether it has an internal viewing screen. Configure your settings using the manual provided as a guide. You will have to play around with it for a little bit before the trail camera setup is complete.
Trail cameras are easy to operate. New models are continuously being added to improve their overall function. Keeping in mind these five elements and what you are looking for will help you save money on things you don’t need.
For instance, higher-priced models may offer longer battery life or more megapixels. If this is something you don’t necessarily need for your intended use, go with a lower-priced model.
Also, cameras with video options may cost more. While this is a cool feature to have, if you’re not going to use it often, consider using the extra money you would have spent to protect your camera. There are several ways to do so that we’ll cover later on.
Advantages Of Using Trail Cameras

Trail cameras are so prevalent for their advanced reasons. They are handy, easy to use, and a great piece of equipment to have around during hunting seasons.
There are so many benefits to using these devices, the biggest one of them being that they allow hunters to view moments without being at the site physically.
A great benefit to game cameras is they offer hunters prolonged seasons.
They include batteries with long lifespans, which gives hunters the opportunity to enjoy hunting in the off-season.
Additionally, trail cameras are a great way to keep an eye on properties, especially those that you can’t be at regularly. With pictures being sent directly to your phone when movement is detected, catching a thief is simple.
Another benefit that hunters receive when using these devices is that they’re able to view wildlife and obtain important information regarding their natural habits.
Trail cameras give them access to a live telecast of animal habitats. This means that individuals can observe the game without physically being there, consequently, allowing them to focus on the completion of other tasks.
Lower VS Higher Priced Models
A question many hunters ask themselves is, “How much money do I have to spend on a quality trail camera?” The answer depends on your needs and budget.
Because trail cameras provide a large amount of information and insight to hunters, having one is better than not having one at all. Lower and higher-priced models differ not only in cost but also in battery life, pixels, range, flash, and trigger.
If you are considering a lower-priced model, take into consideration picture quality. Ask to see some photos it has taken.
You may find they meet your standards and expectations. If not, continue looking; there are several others to fit your budget and picture quality preference.
Consequently, most higher-priced models have batteries with longer lifespans than lower-priced models. This is beneficial for several reasons.
To begin, it means that hunters don’t have to make as many return trips to check on the memory card or change the battery.
Also, they can leave their cameras up for weeks at a time until they decide it’s time to move locations.
Finally, a major difference between lower and higher-priced trail cameras is the price.
Generally, the pricier ones will offer more in terms of battery lifespan, megapixels, range, flash, and trigger speed. When a camera offers faster detection circuits and covers a larger area, they tend to cost more money.
While you don’t have to spend an arm and a leg to obtain a quality piece of equipment it’s important to keep in mind the differences between lower-priced models and higher-priced ones.
Understanding what you need, the features you’re looking for, and the amount of money you’re willing to spend will give you the most for your money.
How To Set Up A Trail Camera
Congratulations on purchasing your trail camera! Now for the next step.
Setting up your device correctly is essential to obtaining the best results possible.
When this tool is not properly set up, it can lead to damage by animals or may lead to it being stolen by other hunters. Consequently, you’re cheating yourself out of amazing shots!
Follow these simple steps to ensure the proper setup of your new camera:
- Begin by removing all items from the box and verifying no materials are missing. The box should include a manual with an inventory list.
- Decide where you want to set up the camera. This depends on what you’re looking for or what you wish to capture on film. To capture better photos, try to place your camera facing toward the trail and away from the trampled path.
- After selecting a location, make sure the camera’s batteries are fully charged. The memory card or SD should also be installed. Make sure it’s there because without one, you won’t get any results and will result in a waste of your time.
- Configure all settings to your liking. This includes trigger speed and frequency as well as timer and flash settings.
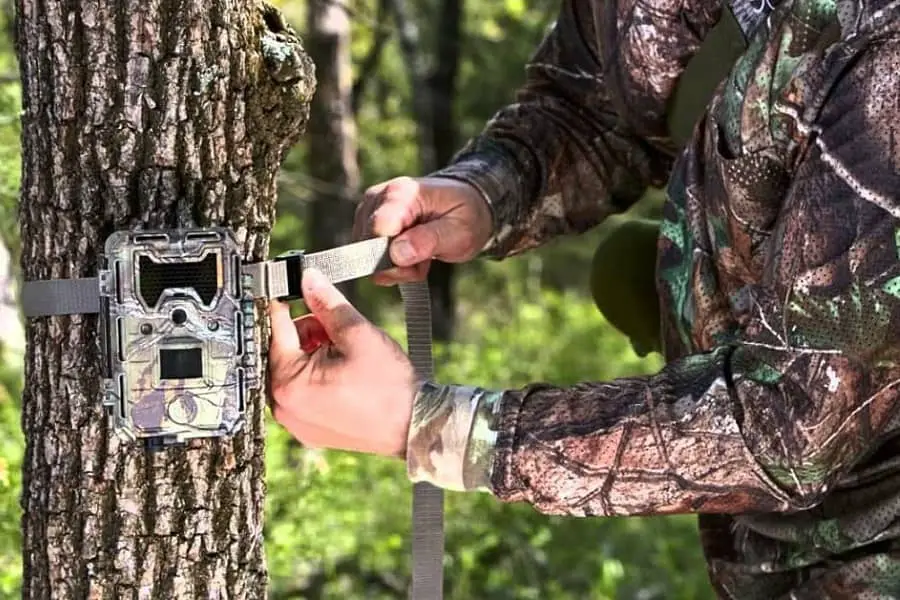
- You’re now ready to mount your trail camera. You can do this several ways (see below for complete details).
- Test your camera by activating it yourself throughout the day. Use it in the morning as well as during the night.
Compare the time each photo was taken to what’s on the SD card to ensure that everything matches. You will want to play around with the settings a little bit to properly configure and mount a functioning trail camera.
How To Place And Secure A Trail Camera
As mentioned earlier, properly securing and setting up a trail camera is essential to obtaining the best results possible.
When mounting your trail camera, you should consider your options. You need to consider the following 3 factors to place and secure your device:
- Proper mounting
- Right location
- Securing it tightly
PROPER MOUNTING
Properly mounting trail cameras decreases the chances of them being stolen. Sadly, you cannot simply rely on the hunter’s moral code.
Instead, you need to take matters into your hands to avoid being a victim of trail camera theft. You can do so by properly mounting and securing your devices.
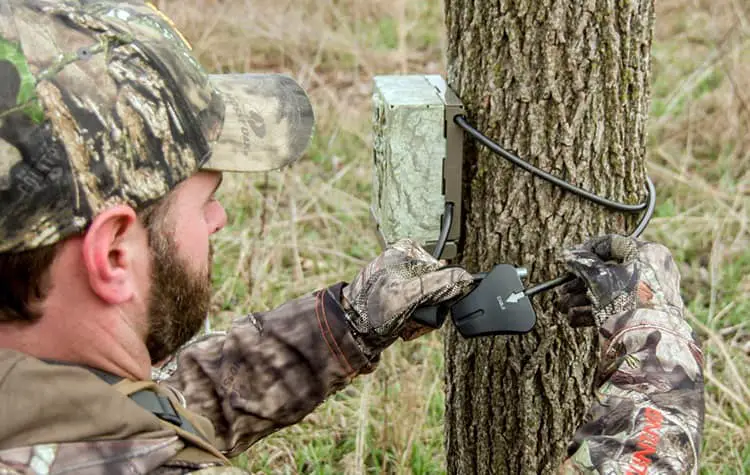
Some hunters like to wrap bungee cords around the camera and tree. Others build their own mounts using tutorials found online.
There is also the option to purchase a camera mount online.
Whichever method you decide to use, be sure that the camera is secure and in the desired location to give you the field of vision you want.
FIND THE RIGHT LOCATION
Additionally, once the camera is placed and secured, you want to protect it from being seen by placing it in a location that is not traveled frequently by humans.
Minimal human traffic is an effective way to secure your trail camera.
Not to mention, you will obtain the better photos since no one wants pictures of people walking in front of their camera. This will only serve as spam for your device, fill up memory and drain battery life.
SECURE YOUR CAMERA
Unfortunately, when trail cameras are left hanging on a tree, they are stolen.
It’s common that hunters leave their camera on its own within the woods since they are made for this purpose, but since they are not extremely cheap, precautions should be taken when securing it.
Review the mounting instructions included with your camera.
Sometimes it’s best to follow the company’s directions since they include special equipment to mount the device. Each provider has a different way of mounting their cameras.
HERE ARE A FEW OTHER WAYS YOU CAN SECURE YOUR CAMERA:
- Mount your camera correctly! By doing so you will sleep better at night knowing it won’t get stolen, thereby protecting your investment.
- Place your camera in areas with low human activity but high game traffic.
- Camouflage! Most models should already come in camouflage colors, however, adding some more embellishments like twigs and branches is a good idea. Just be sure not to cover the lens.
- Investing in security boxes will protect your trail camera. The only downfall to this option is the cost. It can cost quite a bit of money, but they are guaranteed to protect your equipment from damage or theft.
We mentioned that an advantage is that some homeowners use them to catch thieves and ensure the security of their home.
This technology is advanced enough to detect movement and keep an eye out on things to ensure the safety of your property, hence your family. If using a trail camera for your home, follow these same tips as best as you can to decrease visibility.
Following these trail camera tips and advice will allow you to sleep more soundly at night and protect your investment. You’ll decrease the chances of them getting stolen or damaged by wildlife.
Additional Advice
- Properly manage your trail camera to ensure the success of future endeavors.
- Download any updates as soon as they are available to prevent photography or memory issues.
- Because you will be visiting your device from time to time, use a scent remover before you go and spray the camera as well. Be sure to avoid the lens and then wipe it down with a clean cloth. Additionally, using neoprene gloves will help eliminate your scent.
- When moving your device to a new location, it’s recommended to change the batters and SD cards.
- We suggest that you keep a log of what your device saw at the time. Jot down what was seen and at what time. This is important especially for hunters with multiple cameras. Relying on your own memory to remember what was seen where can become messy.
References:


