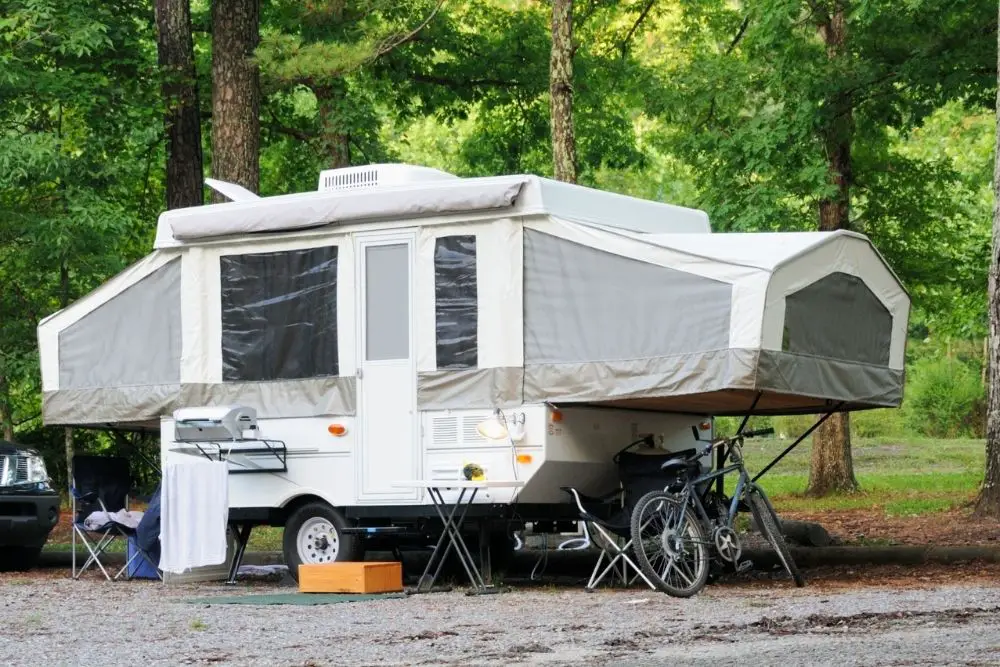
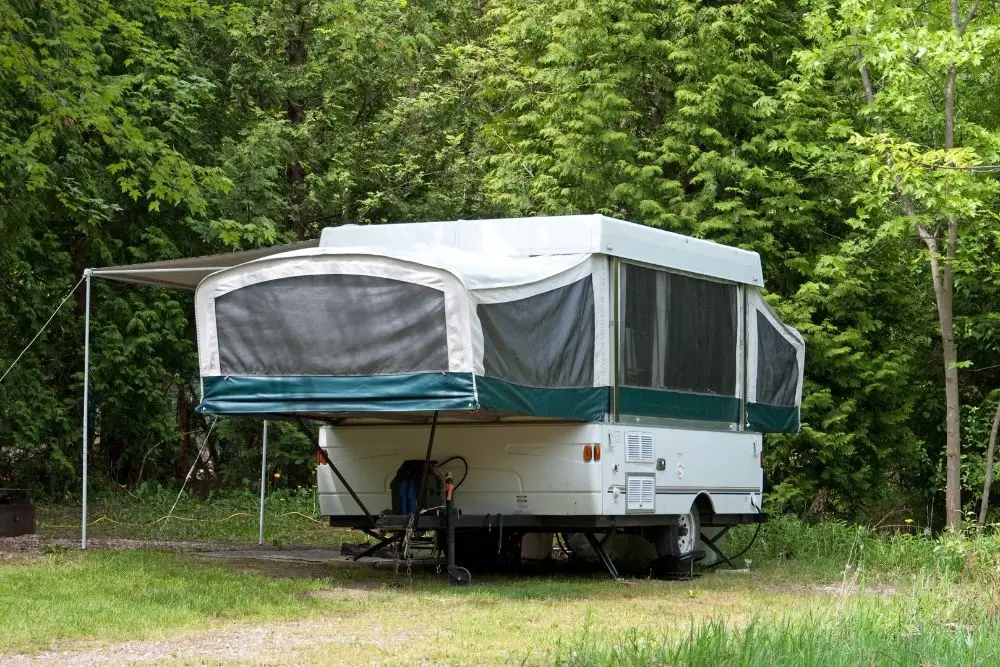
A pop-up camper combines luxury and convenience. As implied, this type of recreational vehicle can be collapsed in between uses for easy storage and setup once you have arrived at your destination. Though they may appear small, they actually boast a spacious interior and are ideal for those with a vehicle that can only pull a limited amount of weight.

If you own a pop-up camper, it is likely that you are aware of the upkeep and inconveniences associated with this type of vehicle, one of the most prominent concerns being the canvas. If you have noticed that your pop-up camper canvas is looking a little worse for wear, you may be wondering how much you should expect to pay to either completely replace it, or just replace the canvas walls.
Whilst some people may choose to purchase the canvas from a retailer, others may visit a professional who can provide the material and install it.
Generally, replacing the canvas on a standard pop-up camper can cost anywhere between $1000 to $2000. Most professionals will then charge around $300 to $500 for their service. Replacing the entire canvas may not be a necessity if it isn’t severely damaged.
Several factors will influence the cost of replacing a pop-up camper canvas and we have delved into these in our guide below.
How much should you expect to pay to replace the canvas on a pop-up camper?
First, you will need to consider whether you need to hire a professional to complete the task for you. If you are someone who has a flair for fixing things you can save money by replacing the canvas yourself.
Those who have never attempted to recanvas their camper before may find this a rather time consuming process. Without the necessary understanding of what you need to do, you may find it quite difficult and there is a risk of you damaging the canvas.
Most professionals do this as a full time occupation so they have lots of experience in recanvasing. Whilst a professional service will cost more, you can be assured that the job is going to be completed to a high standard. It will also take them much less time to do.
It is worth bearing in mind that some professionals will offer a guarantee. Should you experience any issues with the canvas, you can contact the service provider and they are obligated to fix it free of charge.
Essentially, it depends on your knowledge and experience of recanvasing and whether you feel confident enough to do it yourself. The time that you have available and your budget will also be influencing factors.
Next, you will need to assess whether the whole canvas needs to be replaced or whether you just need to replace a section. If there is only a small section that needs to be replaced, it may not be worth paying for a professional to do it. If the entire canvas requires replacement, there are a few factors that you will need to consider.
The size of your trailer is going to determine how much material you need. Most pop-up campers are pretty similar, however, you will find that the design and specifications can differ slightly between manufacturers.
Moreover, the age of your camper can also affect the design and this may cause a fluctuation in the price. It typically costs around $1000 to recanvas an older pop-up camper and around $1500 for a newer pop-up camper.
When should you recanvas your pop-up camper?
There are many reasons why your camper may need to be recanvased and having an awareness of each of these, will give you a clear understanding as to why it is necessary.
A new pop-up camper isn’t likely to require recanvasing for quite some time because it is yet to endure intense use. However, if you have invested in a secondhand pop-up camper you may need to replace it with greater immediacy.
The lifespan of the canvas will be decided by the frequency in which it is used, the climates that it is used in, and how well it is maintained.
Below, we have identified several reasons why the canvas on your pop-up camper may need to be replaced.
If you have used your camper in wet weather, you may have noticed that mold has started to accumulate. You may have tried to clean the canvas to no avail.
The sun can be damaging to this material. If it hasn’t been treated but is often used in warmer climates, it is going to be more susceptible to wear and tear.
If you are in a hurry, there may be occasions where you collapse the camper before allowing the canvas to dry thoroughly. This can be particularly problematic when the air is humid.
Over time the canvas is likely to begin to rot as it ages, especially if it has been frequently used for many years. You are also likely to notice other visible signs of wear. For example, the seals and seams may begin to fray or the zippers may start to break.
There is also a possibility that the canvas of your camper may become damaged as a result of an accident.
This list simply refers to the most common reasons why recanvasing is required. You may run into other issues aside from those that we have mentioned above. It is important to ensure that your canvas is correctly maintained because this will prolong its life.
Despite this, as the canvas ages, naturally, it will begin to deteriorate and your camper will benefit from a rejuvenation.
If your budget will not allow you to completely replace your canvas, you may choose to replace a single section at a time. This is a cost-efficient option because you aren’t spending the money all at once.

Is it possible to repair the canvas on a pop-up camper?
If the canvas isn’t completely worn and has only begun to wear in a few places, it may be possible to fix these issues, rather than replace the entire canvas.
For example, you may have noticed that the zips are starting to break or the seams have begun to come apart. In this instance, you can simply sew up the seams and remove the damaged zips to add new ones. Repairs of this nature can be quite challenging but it is likely that you will be able to do them yourself without breaking the bank.
Similarly, if you notice sections where the canvas appears to be ripped, you can repair them fairly quickly. Whilst it is possible to sew up these tears or rips, they may not offer the long term solution that you were looking for. Once you have the material that you need to hand, you will also want to equip yourself with scissors, canvas glue, and a spray on waterproof treatment.
To begin, you will need to cut the material so that it is a similar size to the patch that you need to cover. Ideally, it should be slightly larger than the section that is damaged as this will ensure that it is properly covered and there isn’t a risk of water seeping through. You will then need to apply the glue and fix this piece of material on the canvas.
Once you have done so, you can allow it time to dry. There are many canvas repair kits available that can be used for quick and convenient repairs. Should you decide to invest in one of these kits you must make sure that the material provided matches the color of the canvas that you are replacing.
Although these repairs will provide a temporary fix, at some point, you will still need to replace the whole canvas. You may also find that larger rips and tears need to be repaired by a professional.
How to clean a pop-up camper canvas
Regular maintenance plays a crucial role in enhancing the life and quality of your canvas. Not only is it important to ensure that it is cleaned correctly, but you must make sure that it is stored properly.
First and foremost, you must not collapse and store the canvas while it is still wet. If you have been camping in bad weather, you need to allow plenty of time for the canvas to air and dry before collapsing it.
Although you may think that the canvas has dried out, there may still be moisture in the nooks and crannies. If you don’t have time to dry it at your location, you must remember to reopen it once you are home to let it finish drying.
You should inspect the canvas for any signs of damage before collapsing it. If you notice any tears, frayed stitches, or rips you should fix them immediately.
Although you may think that the outside of the canvas is the only section that needs to be cleaned, you must remember to clean the inside too. If you enjoy cooking inside your camper, over time the interior will become dirty.
Avoid using chemicals that are too harsh because this can affect the quality of the material and may cause it to break down sooner. Instead, you should use gentler cleaning products. A mixture of soap and water is a viable option.
Using a protective treatment is also important. If you are likely to be camping in warmer climates the canvas is going to be exposed to the sun so a UV treatment is necessary to prevent it from getting damaged.
When it comes to storage, it isn’t recommended that you keep the camper outdoors as this can cause the canvas to get damaged. If the camper is kept outdoors in between uses it is going to be exposed to all the elements. If possible, you should try and keep it inside a garage or a shed.
Furthermore, if you are going to be investing in a second hand camper, you should inspect the canvas thoroughly to ensure that it isn’t damaged.
Final Thoughts
The cost of replacing the canvas on your pop-up camper will be decided by multiple factors. You should expect to pay a maximum of $2000 for a professional with an added fee for their service. Those who are going to attempt to do it themselves can save on costs as the only resource that will be required is the material and tools to fix it.
If you do not have the budget to completely refurbish the entire canvas, you have the option of replacing sections as and when needed. It is important to remember that enforcing the correct maintenance practices will help to prolong the lifespan of the canvas. There are several common issues that can be avoided by storing and cleaning the material properly.


