Solar energy is important, and for RVs, it can be a huge money-saving tool. The more you use your RV, the more you’ll save on energy charges with a one-time purchase of a great solar panel.
Built tough and set to last for decades, these simple and inexpensive RV solar panels offer an alternative way to keep your energy costs down without having to sacrifice using electronics. Let’s take a peek at the number one RV solar panel first.
Get The Most Energy With The Top Solar Panel On Our List
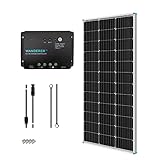
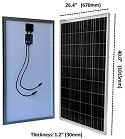
Windynation Solar Panel Kit
Why is it better?
- Comes with a solar charge controller
- Includes attachment brackets to get you started immediately
- Great output
5 Best Solar Panels And Kits For Your RV
With that in mind, let’s now take a closer look at our top picks.



Let’s dive into the specifics and review each panel and kit individually. You can use the list below to jump and review specific models, or you can read along and go through all the information.
- Windynation Solar Panel Kit
- Renogy Solar Starter Kit
- Allpowers 100W Flexible Solar Panel
- HQST Off-Grid Solar Panel
- Renogy Solar Panel
Best Solar Kit: WindyNation 100 Watt Solar Panel Kit
Amazon’s top choice and beloved by numerous RV full-timers, this system comes with a solar charge controller and gives you excellent wattage.
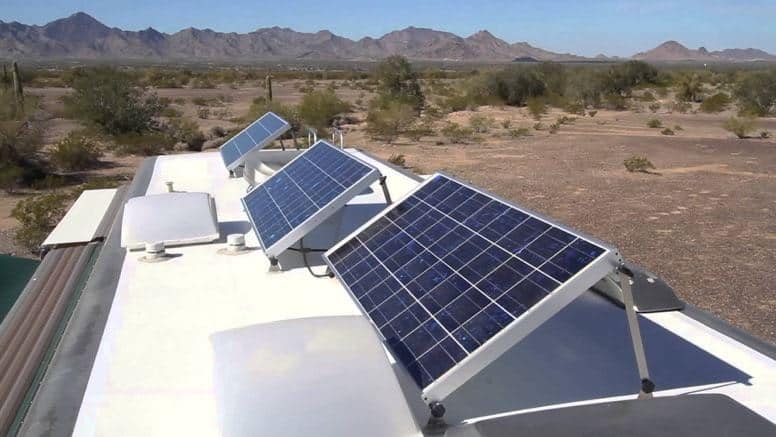
Using multiple panels could produce enough energy to 100% run your RV in ideal conditions, allowing you to seamlessly run appliances and electronics with no worry.
We picked this as the top solar panel system for the ultimate solution to getting started and getting everything you need in one package, coupled with great pricing and great electrical output.
This 24V system comes with temperature sensors, 40 feet of cable to run from your panels through your RV/around it, and an adjustable LCD display to monitor your energy intake and consumption.
On average, this WindyNation solar panel kit will provide 350 watts in a single day, taking numerous factors into consideration, with a maximum output of 1.2 kilowatts per day under prime conditions.
These are also versatile if you’re planning on going solar on your boat, but are not intended for at-home use. Includes attachment brackets to get you started immediately.
Keep in mind that the solar charge controller for this model can support up to four of this type of panel. If you exceed four, you’ll need to have two different wiring setups.
They can lead to the same place but will have to dump into/run off of different battery power banks. Getting started with the WindyNation solar panel kit is the best first step you can take.
PROS
- Adjustable LCD display
- Maximum output of 1.2 kilowatts per day
- Included attachment brackets
CONS
- Up to 4 panels only
PRODUCT INFORMATION
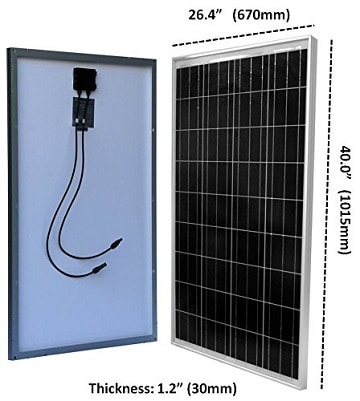
- Dimensions: 40 x 1.4 x 26.4 inches
- Weight: 10.86lb
- Watts: 100W
- Daily Output: Max of 1.2KWH in ideal conditions / standard day length
- Charge Controller: Yes
- Material: N/A
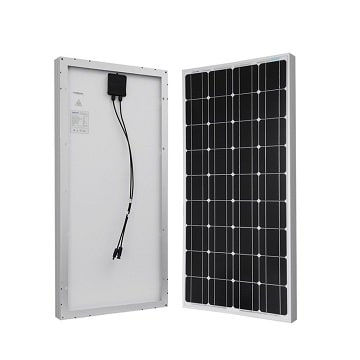
Renogy Solar Starter Kit
Everything you could ever need, all at a price you can agree with. With MC4 connectors, mounting brackets and 100 watts of power, this kit is the runner-up on the best way to get started with solar, or to add to a system you already have in place.
One of the primary benefits that come with this model is the average daily output of 500 watts per day under standard conditions, as well as the inclusive cables and charge controller.
With a negative grounding controller, you’ll get better off-the-grid use and safety. You get 8ft of 10AWG Tray Cable to connect your panels to your battery, so attention to detail in this regard is key. You want to ensure that you’re running your cables in the cleanest way possible to avoid needing an adapter or extension.
Remember: the quickest point between any two distances is a straight line.
This unit can support up to four of the same panel on a singular charge controller, much like our top model.
This will put your potential output to nearly 5 kilowatts per day, allowing you to run a lot of electric items. You also get Z brackets to attach to your boat, should you choose to make your panels versatile. This Renogy solar kit is perfect to get you going.
PROS
- Potential output to nearly 5 kilowatts per day
- Negative grounding controller
CONS
- Up to 4 panels only
PRODUCT INFORMATION
- Dimensions: 6.5x 4.1×1.9 inches
- Weight: 19.84lbs
- Watts: 100W
- Daily Output: Max of 1.2KWH in ideal conditions / standard day length
- Charge Controller: Yes
- Material: Monocrystalline
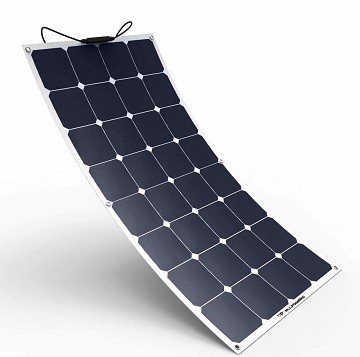
Best Panel: ALLPOWERS 100W Flexible
This unique solution is perfect for high outputs without weighing down hundreds of pounds on your roof.
These flexible panels can contour to the angle of the sun when you’re parked and setting up shop for the day; being only 4.70lbs, they’re extremely simple to move and angle to your liking.
The flexible quality actually aids in solar energy retention, adding as much as 5.0% energy efficiency over other solar panels of the same caliber. These can bend up to 30 degrees for the perfect angle, every time.
Structural integrity is always a topic for debate when products can bend and weave. ALLPOWERS ensured a water resistance that rivals its competitors, including the junction box to ensure complete and utter coverage so you won’t have to worry.
You get an 18-month guarantee on parts, as well as four metal-reinforced mounting holes for seamless hanging/installation.
Heat-dissipated, ultra lightweight and quick, secure installation – if you’re grabbing multiple panels and truly transforming your RV’s energy system, these offer you the flexibility you need.
PROS
- Can contour to the angle of the sun
- Bend up to 30 degrees
- 18-month guarantee on parts
CONS
- Small area
PRODUCT INFORMATION
- Dimensions: 41.0 x 21.0 x 0.09 inches
- Weight: 4.70lbs
- Watts: 100W
- Daily Output: Max of 1.2KWH in ideal conditions / standard day length
- Charge Controller: Yes
- Material: Monocrystalline
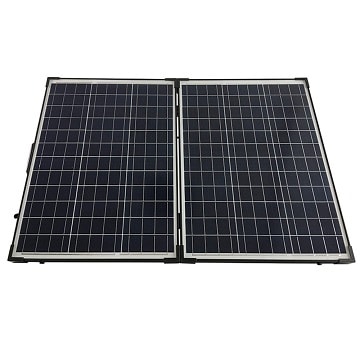
HQST Off-Grid Solar Panel
Set up shop, lean back, and you’re good to go. While you can bolt this unit down to your RV roof, this is designed for taking your RV and heading off-the-grid for as long as possible.
This folds up to a suitcase-style size, complete with an aluminum stand, traveling bag, and sturdy handles for carrying all 21.75lbs of this product around with ease.
You can pop this open and set it up either on your roof, or run your cables through your window and make a small campsite extending from your RV – the choice is yours.
You get ten feet of wiring to angle and position your panels to the sun’s position, maximizing your output as opposed to flat-laying panels on your roof.
The 20A controller is perfect for either a 12V or 24V system and comes with an easy-to-read LCD display module to track and monitor your energy intake and usage.
The excellent thing about this system is that it’s quite literally plug-and-play. It’s the most simplistic model on our list, offering a good price and great energy retention.
Setting up a few of these will ensure you’re always charged and ready-to-go when you’re off-the-grid.
PROS
- Great for a RV roof
- Lightweight
CONS
- You need few of these for optimal power output.
PRODUCT INFORMATION
- Dimensions: Unfolded, 40.0 x 27.3 x 1.5 inches, folded, 20.0 x 27.3 x 3.1 inches
- Weight: 21.75lbs
- Watts: 100W
- Daily Output: Max of 1.2KWH in ideal conditions / standard day length
- Charge Controller: Yes
- Material: Polycrystalline
Renogy RNG PV Solar Panel
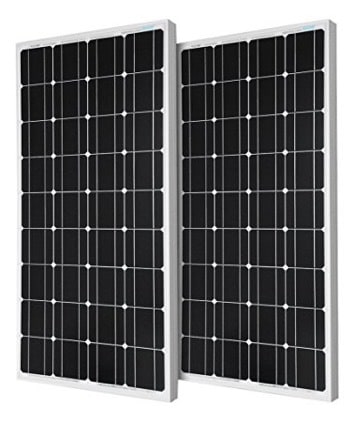
Two full-sized panels for the price of one.
These excellent Renogy solar panels provide you with 50W of power apiece, allowing you to hook up multiple panels to your roof with ease.
You can choose from two up to six panels for bulk pricing.
Your solar panels are encapsulated with multilayered laminations, which greatly improve the performance of each individual cell, and adds to the longevity of each panel.
The aluminum frame is corrosion-resistant; all these features added together make your solar panels super durable in snow and high winds, so you won’t have a thing to worry about.
Other benefits include being anti-reflective, high-transparency, and having a high-yield impact resistance.
PROS
- Two for price of one
- Lightweight
CONS
- You need a few of these for optimal power output.
PRODUCT INFORMATION
- Dimensions: 47 x 1.4 x 21.3 inches
- Weight: 16.50lbs
- Watts: 2-Piece system, 50W per panel, 100W in total
- Daily Output: Max of 1.2KWH in ideal conditions / standard day length
- Charge Controller: No
- Material: Monocrystalline
Table of Contents
Introduction To RV Solar Panels & Kits
There’s always a need to improve the function and efficiency of your RV.
As models and the market change, so do your needs.
RV solar panels are an excellent way to invest in your energy independence, save money, and greatly aid in off-the-grid living. We’re about to get into installation processes, why you should go solar, and the differences that separate solar panel designs and functions.
Let’s get started.
What Are Solar Charge Controllers And How Do They Work?
Think of solar charge controller as the heart of your solar system, aiding in pumping electricity in and out.
They host two primary functions: optimizing the energy output of your deep cell cycle batteries, which we’ll talk about in a few moments, and work as a sort of shield, blocking electricity from traveling through the solar panels when there’s no sunlight or no reason.
It’s like a surge protector for your solar panels.
By constricting certain electrical currents, they prevent blowouts or system damages.
They’re Grand Central Station for all the energy that’s being produced by your panels and used by various electronics and appliances within your RV.
What Are Deep Cell Cycle Batteries?
These are standard lead-acid batteries like you would find in a car battery.
They’re completely meant to be filled and drained on a regular basis through short, controlled bursts of electrical output. Due to the extreme nature of their use and the erratic behavior, they operate through your solar charge controller to stay structured.
All About Battery Monitors
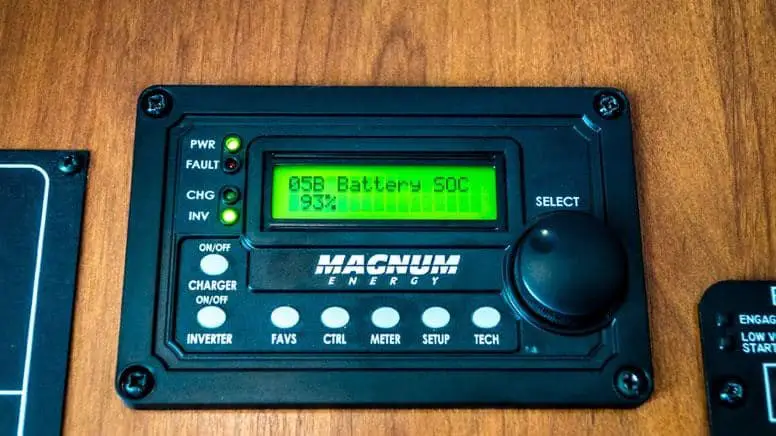
You might come across these being described as meters or gauges from time to time.
These are essentially a look into your system and its operations. Your battery monitor allows you to see when certain areas of your system become defective through extremely high or low outputs, causing malfunctions and “shuttering” across the working parts.
These are pretty crucial for maintaining your hardware, but more importantly, for maintaining your quality of life.
If you head off the grid often, such as extended camping/fishing trips, the last thing you want is for your system to die on you. Newer systems won’t require keen observation, though it’s essential to have this transparent look into how your system operates.
Main Benefits Of Solar Energy For The Full-Time RV Owner
If you’re hitting the road for the entire summer or you’re full-timing it in your RV, solar energy utilization comes with a plethora of benefits:
- Energy Efficiency: Solar energy is evenly dispersed throughout your RV, just like a standard on-site hookup. Using your battery monitor, you’ll be able to see how quickly your RV is bringing in solar electricity, and you’ll get to take a step back to enjoy the fact that you’re not spending a fortune for nightly hookups.
- Independence: If you’re strapped for cash to spend on numerous utility hookups, your solar panels will quickly come to the rescue. These give you energy independence, allowing you to stop anywhere you’d like, anytime you’d like, and truly be the master of your own destiny out on the road.
- Cost Over Time: Saving money in the short-term is great, but the first thought about a full solar panel system is, “It’s going to cost a lot in the beginning.” When you piece together the times you won’t be using utility hookups, the longevity of your standard solar system (more on that below), and the dollar-for-dollar savings on running appliances and small electronics, the numbers will stack against you. Solar is an investment with a high ROI.
Why Should Your RV go Solar?
The primary reasons to go solar are to save on your electricity costs, have greater control over your own RV, and cut down on emissions/carbon footprint.
These systems are inexpensive to repair and can last for 25-30 years, just like standard solar panels (although, even those are getting a longer lease on life as our technology increases).
Keep cash in your pocket, and control in your hands.
Differences Between Solar Kits versus Solar Panels
To best describe the difference, let’s define the properties of each:
Solar panels are just that – panels. They don’t come with solar charge controllers, cables, and unless you pay attention, they may not come with mounting equipment.
Solar kits are designed to get your feet wet. They generally include mounting equipment, smaller/multiple panels, adapters, and controllers. A solar kit could also define a small system that’s designed for a specific purpose, such as mounting to a boat or ATV.
Will Standard Solar Panels Work Fine?
Standard solar panels that one would mount on their home are not the same thing.
While electricity, in its raw form, is fairly simple to perceive, the way that it’s compressed is different between these two systems. Your PV cells are going to retain electricity either way – the key is in the wiring and the outputs in your RV.
A standard home has far more cable types and various ways that it requires electricity to be transmitted through electrical currents.
It’s safe to say that almost every home in America has a similar way that it withdraws electricity from power lines and solar energy, which all convert through the circuit breaker.
On your RV, it’s a bit different, and the wires on your RV solar panels are designed specifically for your system.
How do Solar Panels Work?
The science behind solar panels dates back over one-hundred years, way back before they were ever practical forms of energy retention (and before we had an industrial revolution to manufacture the necessary equipment).
Solar panels allow particles or shards of light to separate electrons from atoms, and this process creates electricity within the housing of photovoltaic cells.
Standard-sized solar panels have, on average, 32, 36 or 48 photovoltaic cells in them at a time. In most cases, each cell can produce one-quarter of a volt, so a 48 cell panel would create 12 volts, and so on.
Through a consistent stream of natural sunlight, photovoltaic (PV) cells continue to separate electrons from atoms, generate and transfer electricity, and the world keeps on spinning.
The second that your panels are taken out of direct sunlight, energy retention stops.
Two Types of Panels: Monocrystalline and Polycrystalline
The difference between these is fairly simple.
Monocrystalline utilizes one cell to extract electricity from solar energy, (think mono on your stereo), while polycrystalline panels have numerous cells working in their favor, like a network of sorts.
The difference here is truly cost.
Monocrystalline cells actually require about 20% more to create, while polycrystalline is the general choice that most solar energy enthusiasts go for.
Everyone wants to know which of these two is better, and the answer is pretty straightforward: for your RV, monocrystalline cells are actually better.
Yes, they can cost a bit more which you may see reflected in the cost of your preferred solar panel system, but they’re slightly higher in efficiency.
When you’re constantly moving and not getting massive space to extract sunlight, like the square footage of an entire house roof would, you need to make it count. Monocrystalline cells work faster.
Efficiency Rates on Solar Panels and What You Should Aim For
Your efficiency rating is basically how much energy your solar panels can store, broken down into percentages.
Do know that there is no such thing as a 100% solar panel.
In June of 2016, SolarCity (which is owned by the giant behind Tesla, Elon Musk), proclaimed that they were breaking the world’s understanding of high-efficiency panels by exceeding 22% efficiency. When you’re shopping for solar panels, the efficiency rating isn’t a huge deal.
Aim for at least 14% efficiency, and you’ll do perfectly fine on Kwh ratings.
There’s an industry standard, a thirst for competition that engulfs solar panel manufacturers. They’re all striving to make more efficient panels, allowing you to benefit from their race.
How Long do Solar Panels Last?
For this answer, we can look to the standard life expectancy of regular solar panels that you would use for your home.
They include similar construction, and use the same REE minerals during construction.
Modern-day solar panels will last you 25-30 years, depending on how damaged they get, and how often they see direct sunlight.
How Many Solar Panels do You Need?
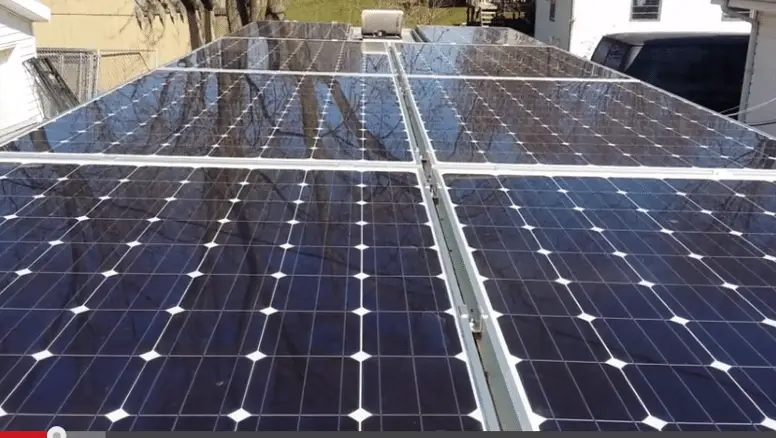
You can’t have too many solar panels.
Your solar charge controller won’t allow your deep cycle batteries to overcharge, so you could have ten solar panels on the roof, a full power bank of electricity, and still be perfectly okay.
That being said, your solar panel quantity is going to come down to how much space you have on your roof, and how much electricity you’re expected to use.
For that, let’s calculate.
Calculate Your Hourly Consumption
There’s a lot of various terms thrown around in electricity: volts, watts, amps, and so on.
The rule of thumb to determine how much you’re using each hour is actually broken down into all three of the terms I just mentioned.
You’ll have to get proper information on your items, from your light bulbs all the way down to your refrigerator and so on.
The basic formula works like this: watts x volts = amps.
If you look at the power of a small light bulb that registers as a 25 watt, 12-volt bulb, you can use those numbers to define your per-hour amp consumption. W/V=A, or better yet, divide your watts by your volts to determine your amp use. That light bulb we talked about would run as such: 25W/12V=2.1A.
It can be a bit of a chore to go around and look at every product you have and inspect all your light bulbs, but this will determine how you utilize your solar energy.
It allows you to play accordingly, so the lights don’t go off in the middle of dinner, your TV doesn’t die out, etc.
How to Install Solar Panels on Your RV Roof?
If you’ve never watched the installation guys bolt down solar panels to the roof of a home, then you haven’t seen how easy it can be.
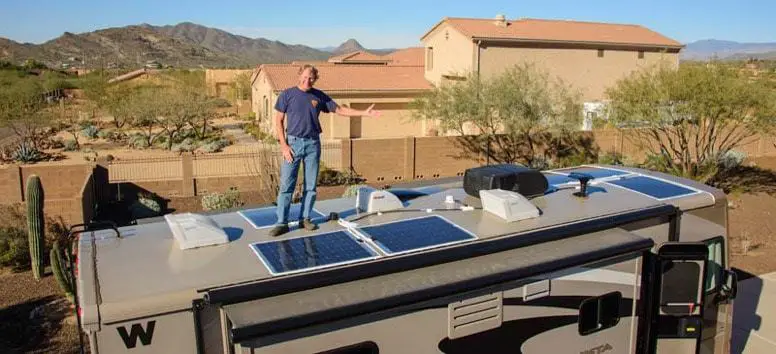
The same principle applies to your RV solar panels and how you install them on your roof.
It sounds like a redundant step, but the biggest thing you need to ensure is that your panels are going on a flat surface. Angling them is not a good idea.
Flat-laying panels also cut down on wind retention, so you won’t be dragged down by the elements while you’re driving.
Now, ensure that you’re ready to fully commit to having solar panels on your roof.
When you install them, it’s a fairly permanent process (or at the very least, a pain to remove them).
You can use two different methods for physically attaching them to the car, and we recommend the latter. It comes with a rough addition of $20 to your installation costs but doesn’t cause structural integrity issues to your roof.
Method #1 consists of you simply using the four bolts that each panel requires and bolting it directly to your roof. Keep in mind, you’re going to have to prepare for the potentiality of leaks and molding as a result, so if you know what you’re doing, then go ahead. However, we recommend the latter option for a few reasons.
Method #2 revolves around you doing a pre-installation phase first. You’re ideally going to be putting multiple panels on your roof or filling it up completely. As we said before, you want them to stay completely flat. You ’re going to measure the length of your roof and get two wooden poles to run the length of your roof. Try to keep their thickness down to 1” more than the length of your bolts, so they’re installed without going through them.
To install the wooden beams, you’ll have to drill into your roof.
However, the wood will be pressed tightly against your roof, and cover the hole entirely, allowing you to caulk and weatherproof accordingly before putting your panels over them. This minimizes risk and involves fewer holes in your roof.
Now, let’s talk about wiring.
You’re going to have to run your wires to the central system somehow. Some RV owners have run their wires through existing vent pipes, while others will drill a separate hole and run some PVC pipe through their roof.
However, you run into the problem of properly insulating and weatherproofing this area, and to be honest, it’s an absolute nightmare. We’re going with either vent pipe or finding a waterproof way to run them in a single strip down the exterior of your RV into a window, or an additional hole that you may drill on the side.
Either way, it has to run on your system.
Once you’re here, it’s all about just getting the rest of the legwork done.
You have designated spots for where you’re going to bolt down your panel(s), where you’re going to run the wires, and where your central system is going to be. Ensure that you have enough wire space, otherwise, you’ll need an adapter/extension for your wires.
Bolt them down, run the wires, and set up your central system as defined by either your kit or your additional purchase.
Now let’s get to integration.
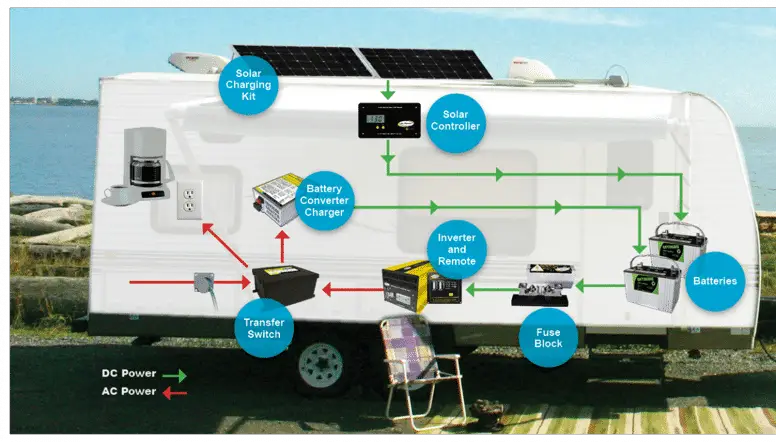
How to Implement Solar Circuits Into Your RV Life?
This is where you get your feet wet with electricity.
Your wires have to go through your charge controller, and then to your battery. As we talked about before, the charge controller is the conduit for proper electricity usage and distribution here.
From here, this will need to go to a battery or power bank.
The best way to run your solar energy is through an inverter that’s attached to your battery/batteries.
This gives you standard 110V/120V outlets to use your appliances and electronics with and doesn’t require any hardwired, technical integration into the rest of your system.
In short, it’s a lot simpler to have a designated area for your solar charge controller, batteries, and an inverter than it is to attach it directly to your interior electrical system.
That’s going to come with a bunch of voided warranties on parts and panels and turn into a hodgepodge fairly quickly unless you’re a commercial electrician for a living.
Key Features to Pay Attention to When Looking For an RV Solar Panel System
Size
How much does it weight?
Your roof can only handle so much, so it’s a bittersweet process to hook up multiple panels if your roof simply can’t handle it. We like to refer to your owner’s manual for a lot of things, which should have some basic information on your roof weight capacity.
RVs are designed to withstand hundreds of pounds, so if you’re going big (8+ 20lb solar panels), you’re not going to run into an issue with weight.
Power
It’s part of the point – how much power do you need, and how much are you expecting to get from your solar panels?
For this, we look to the kWh rating, the watts, and determine how many amps of electricity it can produce in an hour. For instance, a 100 watt, 12-volt panel is going to produce 8.33 amps of power per hour, so how many amps of power are you going to need?
Define your needs, determine your power consumption, and work forward from there.

Off-the-Grid Use
Are you going to be going full-time off-the-grid?
You’ll need multiple panels, a reliable system, and enough power to continuously run your fridge, lights, etc.
The biggest trick is planning for cloudy/rainy days. The most power you can store, the better.
For full-time off-the-grid use, you’ll need a large power bank system.
Assessing Your Needs for Solar Panels on Your RV
So, after all that, do you really need to go solar?
We’re willing to bet that if you’ve made it this far down the guide, your mind is already dedicated to the task of going solar at least partially.
Here are the main things you’re going to need to think about, a little list of questions to ask yourself, to determine your needs for a solar panel system for your RV
- How many people will be in your RV on average?
- Do you enjoy running the television for 4+ hours per night?
- Can you get into good habits with shutting the lights out, turning items off, unplugging etc.?
- Do you plan on running your fridge or simply bringing a cooler for shorter trips?
- Do you have multiple small electronics/need to be connected at all times?
- Will you use them enough to offset and cost and make them an investment?
What other questions can you think of to properly assess the needs of solar panels in your RV? Let us know in the comments below.
Are You Ready to Bring Your RV Into the Future?
Solar energy is a constantly-expanding industry that’s positively infecting every part of our lives, bringing clean and sustainable energy into the present.
Are you ready to make the commitment to solar power for your RV? We’ve chosen the five best solar products to get you started, and harnessing free energy for the future.



You forgot a very important step that have to be addressed or you can have big problems .
When you power up your 110/120 volt AC system with your inverter you will also start charging your batteries with your batteries unless you disarm (“turn off “) your converter (“ battery charger “) also if your inverter puts out less watts than you converter demands it simply will shut down .
Our company, makes a product makes disarming your converter automatic !!
I have 2 100W Renogy Solar on mine and i camp 9 months of the year in Canada, I don’t even bring a generator anymore as I’ve never had to worry about power since i installed them. The heater and lights will run all night at -20C and by the time i wake up, batteries are fully charged. Build quality and fit/finish are excellent.