After getting to your campsite destination it’s time to settle in.
That’s when you notice that the camper is not straight. If this happens, you will have to level your RV. But how?
Now, some of the fancier motorhomes will have a button, marked “Level.” This button will automatically make the motorhome level itself. Some will even be able to raise the RV off its tires.
Unfortunately, we don’t all have that kind of convenience. Luckily though, the whole process of leveling your motorhome is relatively easy and quick.
In this article, I’ll share a few leveling tips and tricks with you. As well as my side-to-side DIY leveler that costs under $15. Interested? Let’s go.
Why Is Leveling Important?
First of all, if the motorhome’s level is off, it could interfere with the passengers’ comfort. It might throw your balance off, even if the level is only slightly out.
It might also make it difficult to sleep soundly if your left side is higher than the right, or vice versa.
Then there are the appliances.
Refrigerators that are gas absorbing need to stay level in order to function properly.
In the evaporation coils, there is ammonia fluid, this is what enables the fridge to cool. This must be level to flow correctly.
If the camper or RV is not leveled correctly, you might also notice that the water tank level readings are off. This could result in either the meter saying you need to empty tanks, or that you still have more room, which could end in backflow.
When it comes to leveling, bear in mind that you can’t just stick a piece of wood under the tire and call it a day.
The leveler used has to accommodate the whole area of contact between the ground and the tire to support all the weight correctly.
Also, for safety reasons, it’s important not to stack blocks higher than five inches.
How To Level An RV
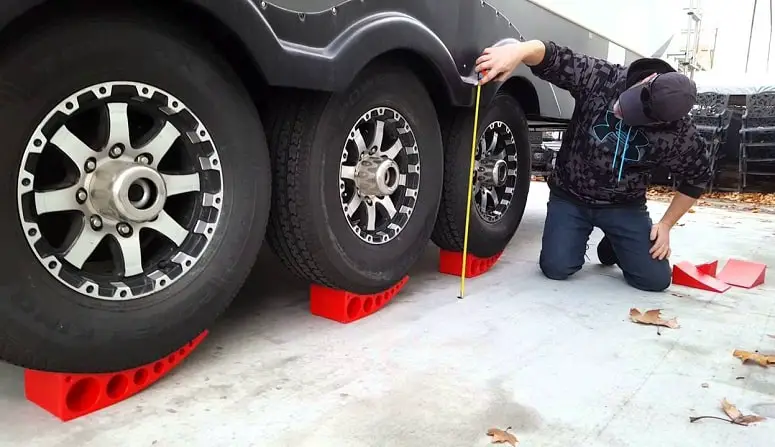
There are a few ways you can go about leveling:
- Using hydraulics.
- Leveling blocks.
- Planks of wood.
Hydraulics
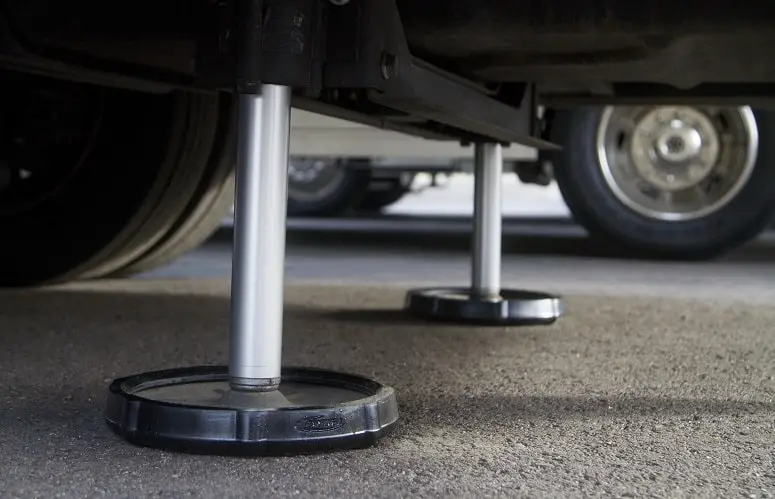
Hydraulic leveling systems are an easy way to get precise leveling for your RV. The system will raise or lower a section of the RV, as needed.
It can move single corners independently, however, it is better to lift a whole end or side simultaneously. Moving single corners excessively can twist the frame of your RV.
It’s also important to consider the surface your RV is on. This should preferably be a hard surface, such as concrete. If the RV is on a soft surface, such as dirt or even soft asphalt, it could cause the jacks to sink into the ground.
Leveling Blocks
Leveling blocks are an inexpensive, yet efficient, way to stabilize your motorhome.
If you loved playing with building blocks as a child, you will like these. Most leveling blocks can be locked together to form an incline. This will make it much easier to keep them in place as your RV drives onto them.
These use an interlocking system that enables them to support a tremendous weight, up to 40,000 pounds to be exact. They will set you back just under $30 dollars.
Wood Levelers
Using wooden planks is probably the cheapest way to level your RV. However, it does have its downsides. Planks of wood can quickly rot or decay when exposed to the elements.
They also dislodge if the RV weight isn’t distributed evenly. In saying that, knowing how to make your own correct wooden leveler, you can avoid those problems.
My DIY Side-To-Side Wood Leveler
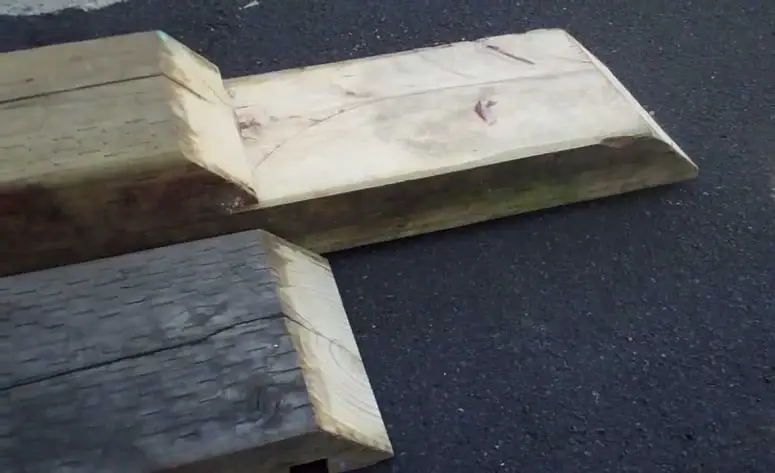
Now that we know the different ways to level your motorhome, we need it cheap and fast. As we mentioned above, wood is the most economical way to do it.
What You Need:
- Two 8-foot lengths of 2×10 planks of timber.
- A measuring tape.
- A saw. (a reciprocating one if you can find it)
- A belt sander.
- Screws and a screwdriver.
- Heavy-duty glue.
How To Do It:
First of all, you have to get the right measurements, this is crucial.
You need to measure the axles from center to center (A).
Then measure the ground distance between the tires (B).
- Saw a piece from one of the planks, to match the measurement of the distance between the tires (B).
- Using the belt sander, bevel this piece at both ends.
- Saw another similar piece the same size, and bevel just one end.
- One end of the long board should also be beveled to make it easy to drive the RV onto it.
- Locate and mark the center of the two short pieces (on the side edge).
- Place the short piece with one bevel onto the long board, aligning both straight edges. Find that center mark on the small wood, then make a similar mark on the long board.
- Measure the center-to-center distance (A) from that mark on the long board, then make another mark.
- Align the second short piece to this second mark on the long board.
- The two small pieces on the long board should have the bevel sides facing each other. Make sure the marks on the long board match the center marks on the small boards.
This leveler will give you the chance to level your RV at one and a half inches.
But if you need a little more height, you can simply drive the RV up onto the small boards, giving you a three-inch lift.
Leveling It Out
There you have it, my side-to-side DIY RV leveler. It’s reasonably easy to make and definitely inexpensive.
If you want to save a few extra bucks, look for untreated wood.
You can always do a little work with a sander if desired. But it’s also okay if you leave the wood as is. Just make sure the wood is strong enough, and isn’t old or decaying.
Do you know any other tricks for leveling an RV?
Have any questions about my DIY leveler?
If so, leave us a comment below.



Do you have a diagram of the following?
I am not understanding what you are asking me to measure and you say this is crucial.
You need to measure the axles from center to center (A).
Then measure the ground distance between the tires (B).
I am thinking “B” is if you have a dual/triple axle – correct?
Mine is single axle.