Most good-weather campers are apt to shiver at the mere thought of extending their outdoor adventures into the year’s colder months.
With such hassles and hardships as sub-zero temps, icy trails, howling winds, and far heavier gear par for the course when camping at this time of year, it all just seems to be a lot less fun than camping and hiking in more cordial, welcoming conditions.
Contrary to the expectations of most, however, hiking and camping in the winter can be equally if not more rewarding than camping in more clement seasons.
With quieter trails, gorgeous snow-covered landscapes, and the hugely satisfying crunch of snow beneath your feet with every step you take to look forward to, there’s a lot to love about winter-time backcountry wandering.
But don’t go strapping on those snowshoes just yet!
Before heading out on your first camping or hiking trips in the snow, there are a handful of skills that must be mastered and a lot of know-how to be learned to ensure you stay safe.
With such problems as frostbite, hypothermia, and avalanches in store for the unprepared, this is one time of year you most definitely don’t want to mess around or take a more lax approach as regards safety.
In this article, we’ll introduce you to the most important safety measures you need to take to make the most of your time hiking or camping in the snow and to help ensure you return from them with all toes, fingers, and other body parts still intact!
Pre-Trip Prep: Safety Starts at Home
The most significant steps you can take toward ensuring your safety when camping and hiking in snow begin at home.
Below, we’ve listed the most important of them:
Route Selection
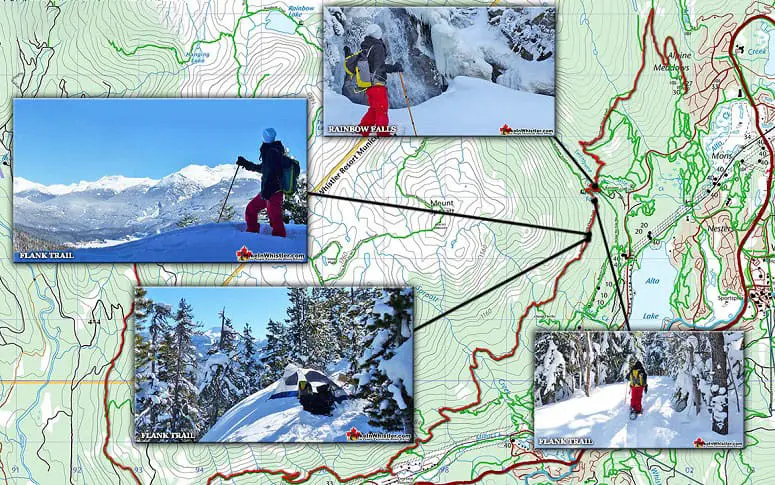
Before setting off, be meticulous with your route planning.
First of all, be careful not to overstretch yourself time-wise.
Many newcomers to winter hiking are unaware that traveling in snow-covered terrain can often take a lot longer than on snow-free terrain and benightment in the year’s colder months is a far more serious issue than in summer months, particularly if you had planned on returning to your vehicle before nightfall and don’t have adequate camping equipment.
It is also wise to do some more detailed research on your route, poring over maps to identify any particularly steep or avalanche-prone sections you would like to avoid.
Gear
In most outdoor activities—whether high-risk or low-risk—the dangers posed by the activity are minimized by a combination of experience, adequate gear, and know-how.
The same is true when hiking or camping in the snow, and gear requirements fall into two categories: camping equipment and safety equipment.
Camping Equipment
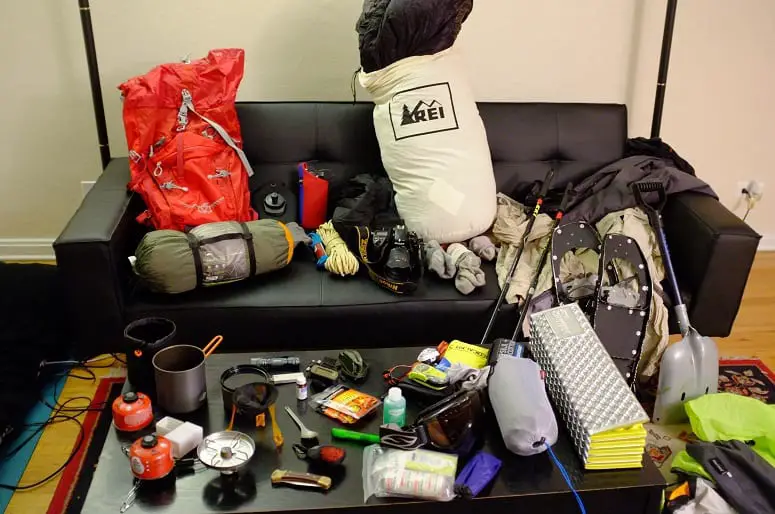
Camping in cold conditions and snow can be just as cozy and comfortable as camping in warmer months with just a few tweaks of your camping kit and sleep setup.
The two biggest contributors to your well-being in cold-weather camping are your sleeping bag and your tent.
While winter conditions naturally vary from one location to another, a good rule of thumb when buying a sleeping bag for camping in winter conditions it to plump for a bag with an EN (European Norm) temperature rating at least 10 degrees lower than the lowest temperatures you expect to encounter on your trips.
It is, after all, far easier to cool down when too hot inside your sleeping bag than it is to heat up when you’re too cold.
In most locations, a standard three-season tent won’t cut it in snowy conditions, so anyone planning on taking their camping trips onto the white stuff should look for a double-layered, four-season model with a high hydrostatic head rating, storm flaps around the base of the rainfly and over the zippers, and a geodesic or semi-geodesic design to provide stability in high winds.
Finally, when choosing a tent for camping in the snow, we’d highly recommend opting for a smaller model rather than a larger one.
Although the bulkier gear required for winter camping would make it seem logical to choose a larger tent to accommodate all the gear, smaller tents have less interior space to be heated by your body and so offer superior thermal efficiency.
Other campsite gear items that can greatly improve your comfort and safety include a beefy sleeping pad, tent slippers, and an additional tarp to bolster the insulation of your groundsheet or peg out over your rainfly to provide a further layer of protection in especially foul weather.
Safety Equipment
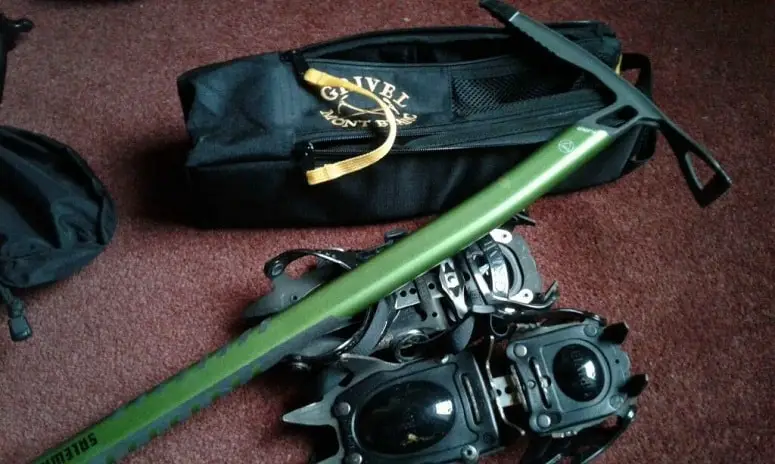
The most important gear items in contributing to your safety on snow trails include:
- Crampon
- Ice-Axe (Piolet-style walking ice-axes or hybrid, slightly curved models are best for hiking)
- Avalanche Safety Gear
- An avalanche beacon, which allows you to locate team members (or be located yourself) in the event of your party being caught in an avalanche
- A snow probe, snow shovel, and snow saw to locate and rescue anyone caught in an avalanche and to dig a snow pit to gauge the stability of the snowpack before setting off
- An inclinometer, which allows you to measure the angle of any snow slopes and steer clear of any that fall into the 25-45 degree bracket most prone to avalanches
- An all-in-one smartphone app—the Avalanche Lab App or Mammut’s Safety App come highly recommended—which double up as both an inclinometer and avalanche beacon and also provides GPS navigation and avalanche forecast updates
Clothing
The consequences of poor clothing choices when hiking or camping in snow is far more severe than in more clement conditions, but by following the standard layering system and adding a few tweaks to optimize your attire for winter excursions, there’s no reason to worry about falling foul of the weather or being uncomfortable when doing your cold-weather hiking and camping.
For more on how to layer your clothing for hiking and camping in cold weather, check out our comprehensive guide.
In addition to a full complement of winter-appropriate layers, some other must-have items in your winter hiking and camping clothing kit include:
- Gaiters: To prevent snow from sneaking in above the collar of your boots and saturating the boots’ insulation, your socks, and your feet
- Gloves: Two pairs, with a liner glove underneath and a meatier, insulating, weather-proof glove on top
- Hat: Times two in case one happens to get lost or wet
- Neck buff: To prevent drafts entering around your collar or to pull over your mouth in biting winds or particularly cold conditions to facilitate and ease breathing
- Winter boots: In sub-zero temps, three-season boots will have little in the way of insulation and are unlikely to cut the proverbial mustard. Look for a pair of well-insulated, waterproof, robust four-season boots with crampon compatibility
Timing
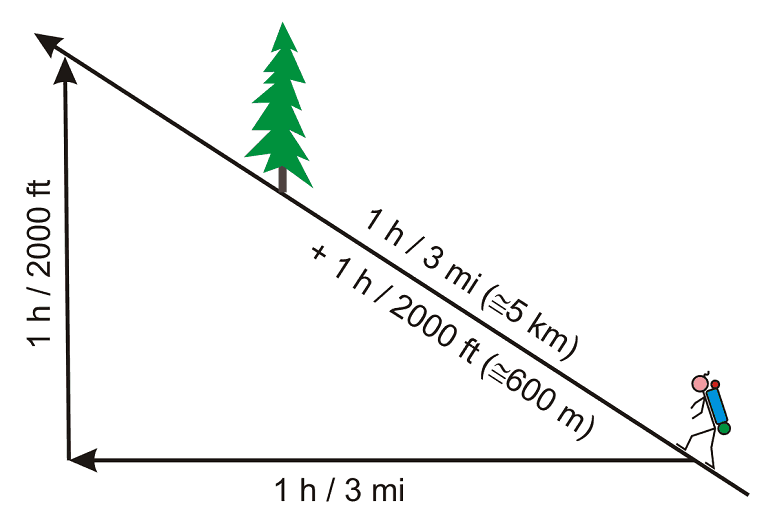
Naismith’s rule tells us that the average hiker should allow one hour for every 3 miles of hiking plus an additional hour for every 2,000 feet of ascent.
In winter conditions, we should be prepared to adjust our timing estimations to account for conditions underfoot, heavier pack weight, and navigation difficulties.
Giving yourself enough time to reach your campsite is all the more crucial in winter months because of the sharp temperature drops when the sun sets and the risk of benightment (and all the fun and games that might entail if you happen to be far from your campsite or car).
Weather Forecasts
As with at any time of year, camping and hiking in winter require paying close attention to weather forecasts before you set off on your trip in order to avoid any nasty, unwelcome surprises.
While a slight change in weather conditions might not affect your plans a great deal in summer months, in winter conditions they can make a huge difference as regards your enjoyment of your trip and your safety.
One particular point of note with regard to weather forecasts is that general forecasts rarely offer an accurate picture of what conditions will be like in mountainous terrain, and the difference between temps and conditions at your trailhead or the nearest town can differ greatly from those just five hundred feet up, never mind—as the case may be on your hiking trips—several thousand feet up.
One of the best resources out there is offered by mountain-forecast.com, which provides detailed forecasts at varying elevations for over 11,000 mountains in various ranges around the globe.
Avalanche Forecasts
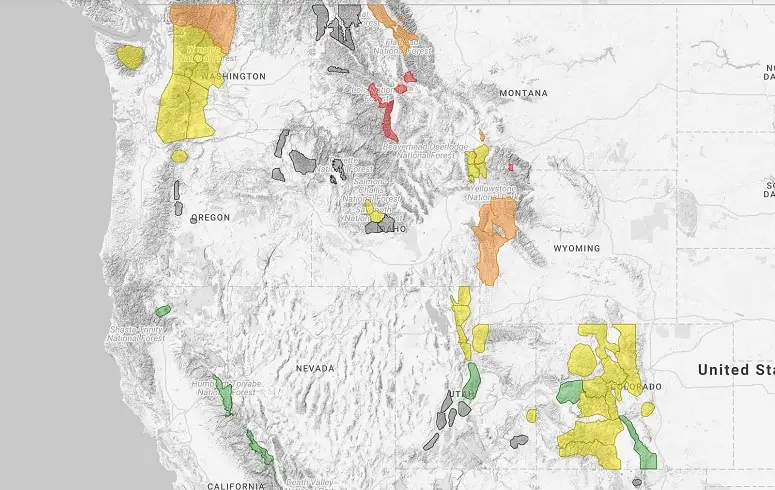
In addition to checking weather forecasts, winter hikers and campers should always check all available snow forecasts for their route prior to setting off.
A good place to start is avalanche.org, but most mountainous regions will also have more detailed—and perhaps more reliable—forecasts given by local authorities.
Notifying a Friend
Always leave a detailed route description with someone at home before setting off and be sure to establish a return time after which, in the event that you have not contacted them, they should notify the authorities and mountain rescue services.
Should things happen to go seriously south on your trip, this small precaution could well turn out to be a lifesaver.
On the Trail
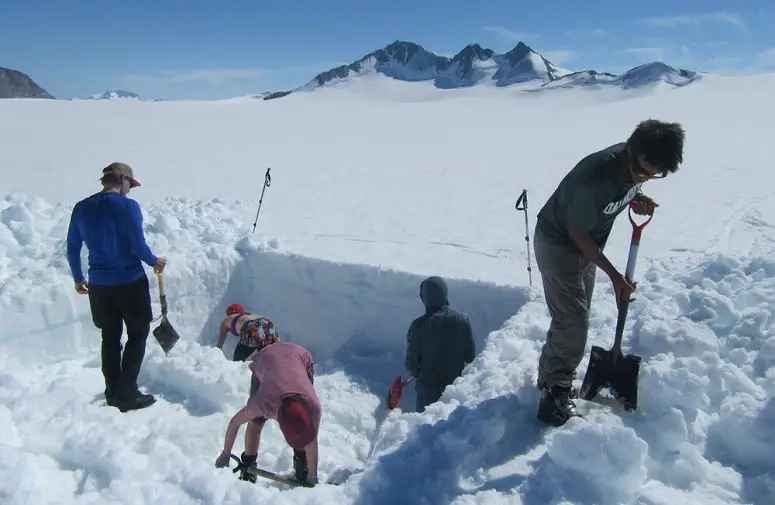
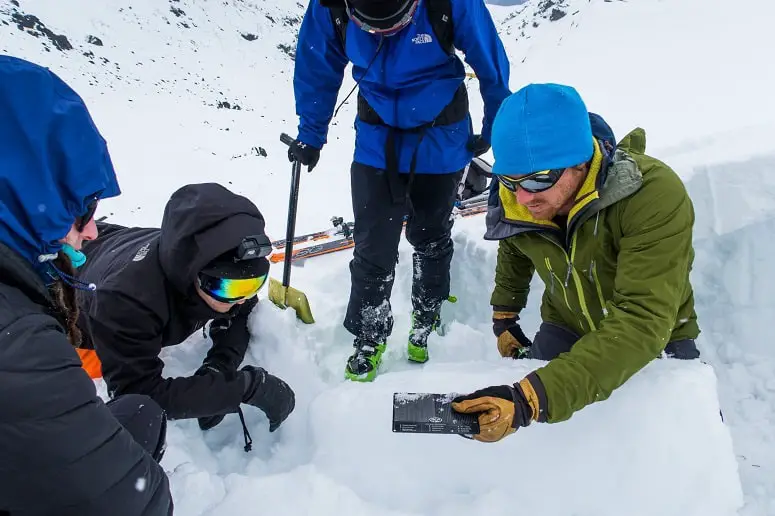
Digging a snow pit is an easy and fairly quick way of assessing the stability of the snowpack.
Here’s how it’s done:
- Start by digging a hole in the snow approximately two yards wide and five feet wide on any snow-covered slope
- Pat down or smooth out the walls of the pit with your snow saw or shovel
- Get in there with your hands, running them up and down the wall of the pit to feel for any noticeably weak or particularly harder layers
- If there are no exceptionally soft, slushy, or crusted layers, then the snowpack should be adequately stable
- If you have any doubts or happen to come across an iffy-looking layer, we recommend taking the time to perform either a Rutschblock test or Extended Column Test (ECT)
Rutschblock Test (a.k.a. “The Sliding Pack Test”)
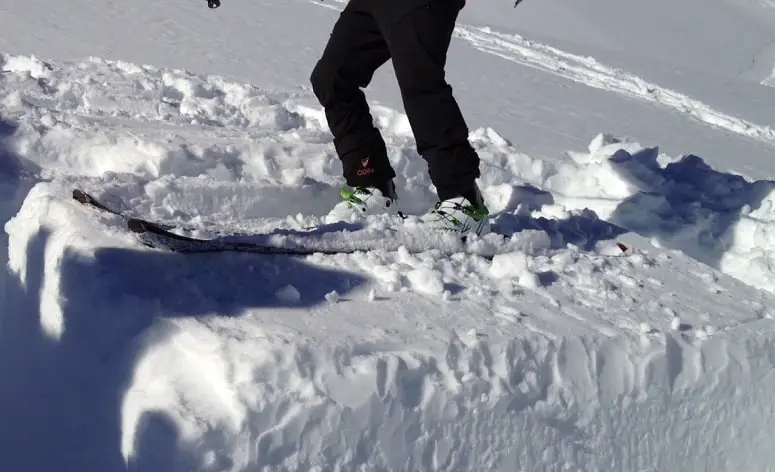
The Rutschblock or Sliding Pack test allows you to determine how much pressure can be placed on the snow on any given slope before it will start to slide and, therefore, whether or not it will be stable enough to hike on:
Here’s how to do it:
- Use your snow saw to cut lines roughly four feet up either side of the corners of your original snow pit—the lines should be almost vertical but angled so as to be a little narrower at the top
- Make a third cur across the top of the two original cuts to make a roughly square column
- Test the stability of the snow by climbing above the cuts and stepping onto the snow, kneeling on it, and then jumping up and down on it three times
- If the section of snow you have isolated with your saw crumbles, disintegrates, or collapses then the snowpack is now stable; if, however, you are able to jump on the snow multiple times before it collapses, then slopes at a similar angle and with a similar aspect (north, south, east, or west-facing) should be adequately stable
Extended Column Test (ECT)
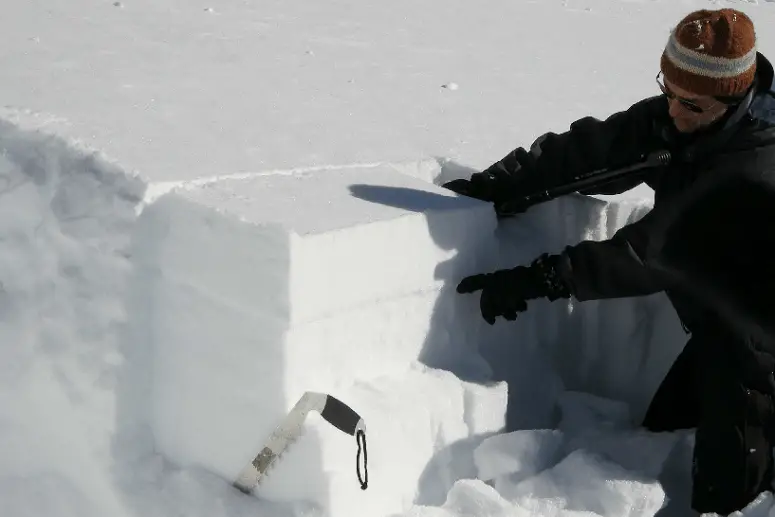
The Extended Column Test offers a slightly simpler and quicker means of testing the snowpacks’ stability than the Rutschblock Test.
Here’s how to do it:
- Using your original snow pit, use your snow saw to cut out a column around 90cm wide and 30cm deep
- Isolate the column with your saw by cutting downwards at the back of the column so left with a large, almost freestanding, square or rectangular-shaped block
- Test the stability of the column first by tapping it with your wrist ten times at various points, then with your elbow (applying more force), and lastly with your shoulder: the sooner the column collapses, then the less stable the snowpack will be
Crampon Use
Along with your ice axe, crampons are one of the two fundamentals of safety equipment required for hiking in snowy conditions.
The first consideration with regard to crampons is the question of compatibility.
As different crampons are compatible with different boots, be sure to check the crampons you plan on buying will be compatible with your boots before handing over your cash.
Learning how to use your crampons is something best done out in the field, but novice crampon users can give themselves a head start by reading up on the varying techniques that can be used beforehand.
Ice-axe Use
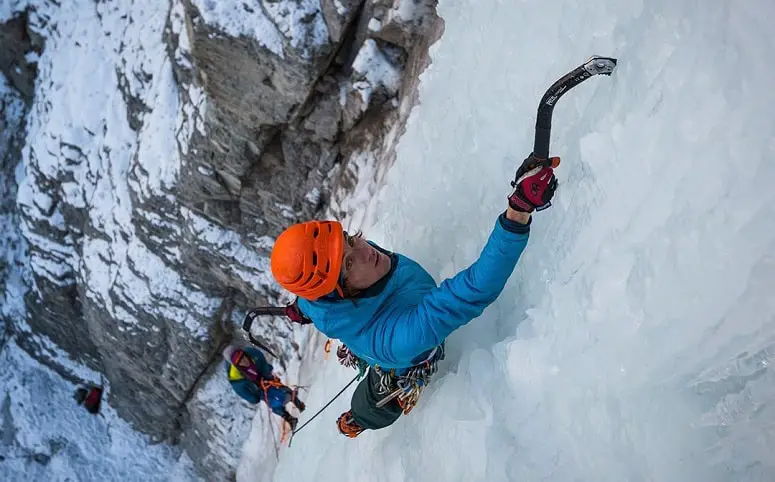
In addition to your crampons, an ice-axe is the most important means of negotiating snow-covered terrain safely.
It is used both for stability when hiking on snowy slopes and as a “braking device” in the event of a slip or fall.
Ice-axes come in a variety of forms, but for non-technical hiking routes a Piolet-style snow-axe or hybrid model featuring a more subtle curvature to the shaft than an out-and-out ice tool is your best bet.
Ideally, and depending on how tall you are, your ice-axe should be in the 60-70cm range, or long enough that it can be easily planted above your “leading” knee on the high side of the slope to provide stability or to aid balance on less steeply inclined snow slopes.
When hiking with your ice-axe, hang the leash over your wrist to avoid dropping it. Plant the axe into the snow on the high side of the slope, roughly parallel to your leading knee.
If you happen to slip or fall and begin sliding down the slope, turn your body around so as to face the slope, grip the axe with one hand on the base of the shaft and the other on the “adze” so you are holding it diagonally across your body with the “pick” or point digging into the snow, and position as much of your body weight as possible over the ice-axe until you halt the slide.
Decision Making
Staying safe when hiking and camping in the snow requires a high degree of flexibility and an ongoing effort to “read” and reassess the landscape and conditions while on the move.
If you happen to come across an unstable-looking snowpack, a slope that looks “loaded” and likely to avalanche, a steep section of iced-over snow that looks particularly sketchy, or if weather conditions should take a turn for the worse, don’t be too rigid with your plans or route choice and be prepared to make even a lengthy diversion or turn back in order to avoid taking unnecessary risks.
At Camp
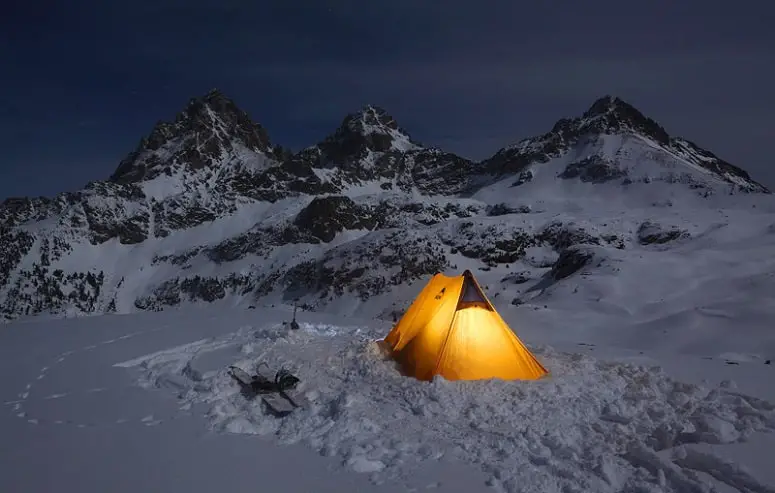
When camping in snow-covered terrain, you have to exercise extra care to ensure you don’t inadvertently put yourself at risk by choosing an unsuitable spot for your tent. Ideally, your pitch should be:
- Far from any slope (or the run-out avenue of any slope) that might potentially avalanche
- Sheltered from the wind by scrub, hillocks, boulders, or trees
- Not under any trees with any large branches that might break under the weight of snowfall or in strong winds and potentially land on your tent during the night
- In a spot where it will catch the morning sun (that is, east-facing)
Prepping the Terrain
You can optimize your pitching point further by doing the following:
- Creating a small wall or surround with snow in order to protect your tent from the worst of the wind
- Stomping out a “footprint” for your tent will give it a more solid foundation and also position it lower in the snow, thereby minimizing its exposure to the wind
Winterizing Your Tent and Sleeping Setup
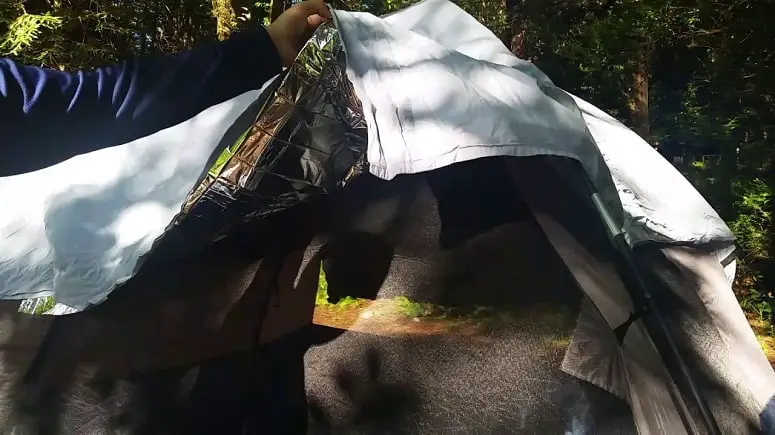
In addition to getting your hands on a reliable four-season tent, four-season sleeping bag, and a beefy sleeping pad, there are a few other measures you can take to ensure you stay safe and warm when camping in the snow:
- Bring a tarp to use as a second groundsheet and provide further insulation on the bottom of your tent
- Lay any spare clothing under your sleeping pad to form an added buffer between you and the frozen ground beneath your tent
- Bring all of your gear inside the tent to improve thermal efficiency by reducing the amount of space to be warmed up by you body heat
- Lay rocks on the material at the bottom of your tent to prevent drafts entering the tent under the flysheet
*A word of caution: No matter how bad conditions may be outside, never attempt to do any cooking inside your tent or attempt to heat up your tent using a stove or fire as this can easily result in carbon monoxide poisoning
14 Tips for camping in the snow
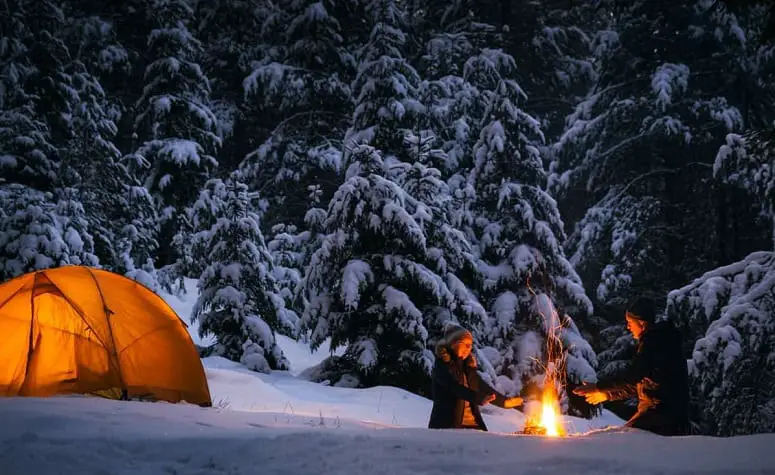
- Don’t allow your core temperature to drop excessively before taking action—keeping yourself warm is much easier than trying to restore body heat once you have cooled down Pack plenty of firewood if headed to a tree-free area (or when deadwood is likely to be damp or buried in snow).
- Drink plenty of fluids and eat regularly — our bodies generate heat when digesting food in a process known as diet-induced thermogenesis.
- If your extremities are cold, this is typically a sign that your core temperature has dropped and can be remedied, in most cases, by adding an extra insulating layer such as a fleece or down jacket.
- Wear liners gloves under your shell gloves so you will be able to carry out more intricate tasks (using your map and compass or GPS device or taking photos, for example) without getting cold hands.
- Leave all sharp gear (crampons, poles, ice-axes, and snowshoes) outside your tent at night—any rips in your tent’s fabric could result in a very uncomfortable night!
- Warm up before going to sleep by doing a short workout to raise your core temperature—star jumps, burpees, squats, and push-ups should all do the trick.
- While out on the trails, keep your breaks short (5 minutes max) to prevent allowing your body temperature to drop excessively.
- Consider using a bottle instead of a hydration bladder to carry your water as the tubes on hydration sacks can easily freeze over and prevent you getting your fill of H20.
- Add a few degrees of warmth to your sleeping bag by using a sleeping bag liner.
- Considering using liquid fuel or propane, both of which work well in freezing conditions, instead of butane, which can stop working in lower temperatures.
- Douse a few cotton balls in petroleum jelly to use as a firestarter, stow them in a waterproof bag, and pack a few lumps of coal inside an egg carton to use as kindling.
- Use snowshoes if you anticipate hiking in deeper snow to avoid wading knee-deep and adding hours to your travel time.
- Stow your batteries close to your body while hiking and inside your sleeping bag at night as sub-zero temps sap battery power rapidly.
- Throw a hot water bottle in your backpack to use in case temps drop particularly low.
Conclusion
It may be ever so slightly daunting to those considering it for the first time, but there’s no reason to be overly apprehensive about hiking and camping in snow as long as you take the precautions required to maximize your chances of staying safe, warm, and comfortable on your trips.
By reading the above article, you’ve already put yourself one step ahead of the game and following the above advice will, we’re sure, will help to ensure you stay safe and sound on many a happy hiking camping trip in the snow in the future.
References:


![9 Final Thoughts And Items For Your First Camper Adventure [Checklist] 17 RV Camping Checklist](https://kempoo.com/wp-content/uploads/2018/11/first-camper-adventure.jpg)
