The days grow short and brisk as another great RV season rolls to a stop.
For those of us in the snow-belt states, winter’s arrival also brings about a lengthy to-do list, from shoveling and salting to collecting enough wood to last the cold nights, it takes a lot of preparation and work to make it through these cold winters.
Your RV is no exception.
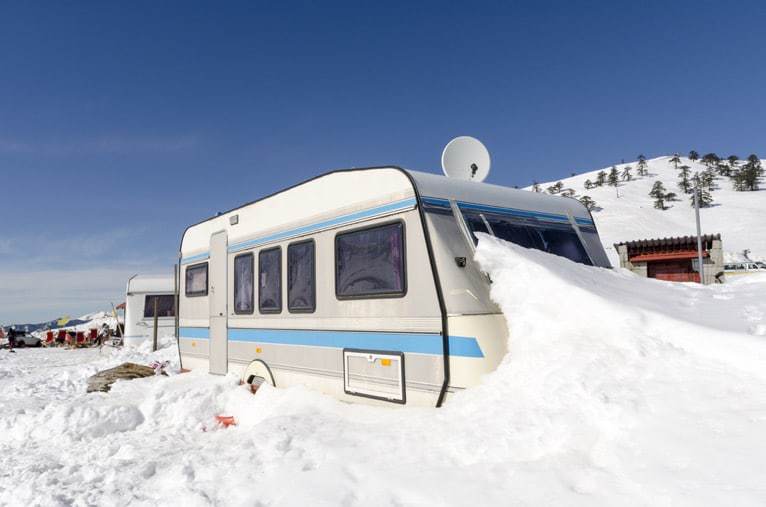
Winterizing your RV is an essential process that RV owners should get comfortable with.
The earlier in the season you can complete this process, the better, so if your camping season ends at the end of summer, plant to winterize in early autumn to avoid any unexpected cold fronts.
It’s also essential to fully understand the scope of winterizing.
Most people recognize the potential hazards lying within freezing water lines, but your plumbing system is just the starting block in the process of winterizing your RV.
Before you start
If you’re anything like us, you prefer to dive straight into a project and get your hands dirty.
When it comes to winterizing, hold the phone for just a moment and get all your tools and plans in order.
Fortunately, we put this handy list together to help you breeze right into things.
- RV antifreeze: Make sure to get a non-toxic antifreeze, RV antifreeze is pink, and make sure to get enough for your specific plumbing layout. If you’re unsure, 2-3 gallons should do the trick.
- Water heater bypass kit: Some vehicles will already have this installed if so, you’re good to go!
- A wand for cleaning out various holding tanks
- A set of basic hand tools: You’ll need these to access everything and remove drain plugs.
- Water pump converter kit: Otherwise, you can use tubing to connect to the water pump.
Step by step
Stop.
Before following ours or anyone’s instructions on winterizing your RV, read your owner’s manual.
Lot’s of RVs have specific winterizing guidelines which should supersede any general advice you may find. Otherwise, read on…
Drain the plumbing system
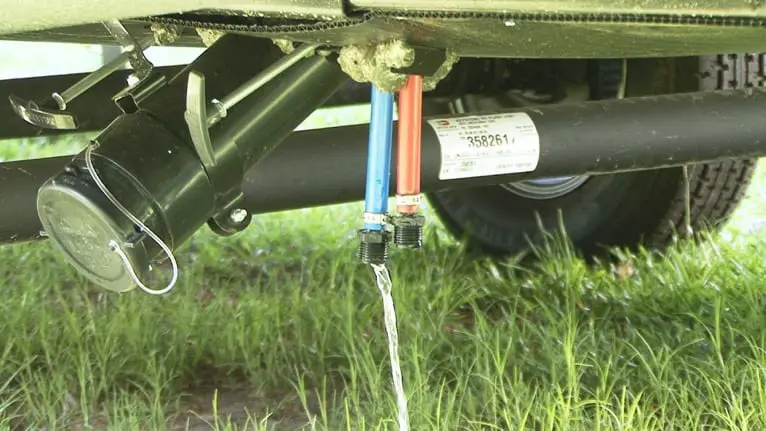
This is the most well-known aspect of winterizing your RV, and rightly so!
Failing to drain your plumbing system can wreck absolute havoc on your RV as water freezes and expands; splitting apart and even exploding your pipework.
Even the tiniest bits of remaining water can lead to devastating consequences, so it’s imperative that you drain every drop of water from your plumbing system.
One way to do this is through the use of compressed air.
While this method is the easiest, it’s also somewhat risky, because you can’t be absolutely sure that you’ve all of the water from your system. Because of this, we recommend using RV antifreeze.
This way, you can ensure that you’ve expelled all possible water.
- Step 1: If you have any inline water filters, remove them before you start and bypass.
- Step 2: Drain your freshwater holding tank, drain and flush your grey and black water holding tanks. Clean the later two out with a wand if you don’t have a built-in flush system. Drain the water heater tank (make sure it isn’t hot or under pressure first).
- Step 3: Open up all hot and cold faucets, including outdoor showers and toilet valves. Flush the RV toilet a few times and run your water pump to remove any excess water, but make sure to turn it off as soon as it’s done to avoid damaging the pump.
- Step 4: Close all faucets and recap drains.
- Step 5: Bypass the water heater. Most RVs come with a water heater bypass kit built in, and you can also have one installed. If you don’t have a water heater bypass kit, you’ll have to fill your water heater tank with antifreeze before it disperses to the rest of your system, this will waste about six gallons of antifreeze.
- Step 6: Install a water pump converter kit. Another option is to use a piece of clear tubing to connect to the inlet side of the pump. The other end of the tubing goes in a one-gallon container of non-toxic antifreeze.
- Step 7: Turn the water pump on. This will pressurize your system and start pumping the antifreeze throughout your system. Start with the faucet closest to the pump and turn it on, allowing antifreeze to flow through. Slowly go through each faucet, replacing the antifreeze as needed, and ensure each faucet flows with antifreeze, including any outdoor showers. Also, flush the toilet until antifreeze appears.
- Step 8: Turn the water pump off. Open a faucet to relieve the pressure. Pour a cup of antifreeze down each drain and flush some more down the toilet.
- Step 9: If you have an electric heating element in your water heater, make sure to turn it off.
- Step 10: Close all faucets.
- Step 11: Winterize any ice makers and washing machines. These procedures are specific to each unit and can be found in your owner’s manual.
- Your plumbing system is winterized!
Don’t forget…
As we mentioned, the plumbing system isn’t the only thing you need to winterize in your RV. Take the following steps to guarantee a pain-free winter.
Food
Remove any food that can spoil and attract mice and other vermin. Also remove any canned goods, even if their shelf life lasts through the year, as the liquids trapped within can expand when frozen and leave behind a massive mess.
Pest Control

Even a cold RV is a welcoming environment in an even-colder winter. Check for any cracks or holes where insects or rodents might enter. Caulk where you can, and use screens and plugs elsewhere to ensure a proper barrier.
Tires
Your tires have a hard job through the winter, carrying all that weight.
Leveling jacks can help alleviate some of this stress and prevent flat spots on your tires. Alternatively, you can rotate your tires every few months through the winter.
Roof
Close all roof vents. Check for and repair any small leaks.
Awning
Fully extend your awning and clean it with awning cleaner. Do not use other products such as dish soap as it can remove valuable oils from the fabric.
Stabilize
Make sure your RV is stable to walk throughout. Place wooden blocks beneath your stabilizing jack’s feet to prevent it from freezing to the floor.
Propane
Fill all propane tanks and remove any external ones to protect from harsh weather. Do not store them inside the RV.
Emergency Brake
Park with your emergency brake on and make sure to use wheel chocks.
Batteries
Remove all batteries of any type, do not store them inside the RV.
Moisture Control
The last step before locking up, don’t forget to leave an open container of moisture absorbent product on a flat surface inside your RV. This will help prevent humidity and the corrosion, mold, and mildew that come with it.
—
So there you have it, a comprehensive guide to winterizing your RV.
If your eyes are glazing over or you didn’t make it past the first step, don’t worry, you don’t have to winterize your RV yourself.
There are plenty of locations that will winterize your RV for you for a cost, so if all this seems a bit too intimidating, there’s nothing wrong with reaching out to an expert.


