You’re moving a big RV, and no matter how good you are at anticipating your distance from the car or the parking spot behind you, it’s easy to misjudge and make a mistake (especially after a bad night’s sleep).
Take all the hassle out of it with an easy-to-install backup camera to enhance your field of view.
We’ve gone over the industry-leading brands and features you absolutely need and broken them down into this top five list.
This Is the Best RV Backup Camera in a Nutshell
Furrion FOS07TAPT
Why is it better?
- Night vision up to 26 ft
- Climate-tested to withstand extreme temperatures and function properly
- Five-minute installation process
Five Best Backup Cameras For Your Rv
With that in mind, let’s now take a closer look at our top picks.


Let’s dive into the specifics and review each backup camera individually. You can use the list below to jump and review specific models, or you can read along and go through all the information.
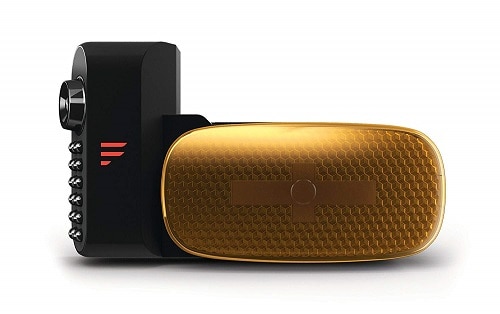
Best Overall: Furrion FOS07TAPT
First and foremost is the prime Furrion backup camera model that everyone is talking about.
Furrion intended to make a cost-effective RV backup camera system that fulfills your needs but does cut corners on a few other design elements.
For instance, there is an option of this model with a display monitor of only 4.3” to save on costs. But, if you don’t want to be economic, there is a 7-inch monitor model with 4 cameras, too.
The picture is high quality, providing you with up to 39 feet of field of view behind you at a 170-degree viewing angle.
It gets a bit grainy when you flip it into night vision mode, but that’s just the thing: at this price point, you get night vision. They included a few other excellent features that really put this a notch above the rest.
Not only do you get an IP66 waterproof rating, but there’s also vibration stabilization hardware included for when you hit bumpy roads or dirt paths. Thanks to that, the camera maintains a clear view as much as possible.
While installation is a breeze and takes just five minutes, putting the monitor in your cabin isn’t so easy. The quality of the suction cup along the bottom for mounting is fairly poor and the cup will get distorted after a few attachments. Just be sure you have a clean surface when you apply it.
Last but not least, what pegged this as the best backup camera, in our opinion, is the overall value when you look at the entire purchase: one-year warranty, 100 ft wifi range, night vision, 4-camera split-screen, and easy installation.
It’s a package deal and the very best wireless backup camera system for your money and your travel trailer.
PROS
- Night vision up to 26 ft
- Climate-tested to withstand extreme temperatures and function properly
- Five-minute installation process
CONS
- Antenna needs to be adjusted after every stop
- Mounting suction on the monitor is of poor quality
EXTRA FEATURES
- Includes necessary mounting brackets
- Vibration resistance maintains clarity and quality throughout your ride
- Simple navigation through monitor settings
TECH SPECS
- Wired/Wireless: Wireless
- Wireless Range: 100 ft
- Wireless Frequency: Bluetooth
- Viewing Angle: 170 degrees
- Display Size: 4.3” to 7” LCD
- Waterproof: Yes, IP66 rated
- Warranty: 12-month limited warranty (information not available from Amazon)
- Sensor: CMOS
ZEROXCLUB Digital Wireless Backup Camera
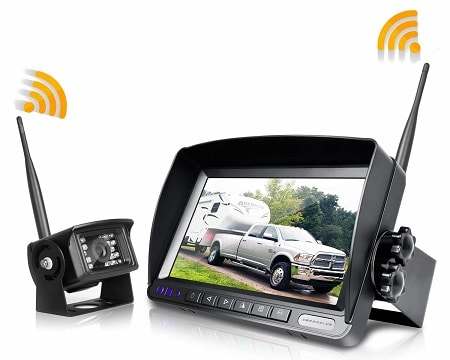
Taking the silver medal in this race, we have ZEROXCLUB’s rendition of a proper backup camera.
First of all, we’re big fans of the price and the fact that they were able to include a 7” split-screen monitor with 1080p video quality in it.
Connection is the main drawback of this model.
You get the maximum of the wireless signal for about 30 ft, and it gets shaky after 27. If you have a class A motorhome (average 40’ body), you’re not going to get much use out of this. The transmission will be shaky.
Setting it up is very simple. Apply the camera to the back, mount the screen on your dash, and you’re ready to go. The whole process takes about three minutes. The only bad part about it is that the connection cable to the lighter port is a bit shaky and doesn’t fully connect.
There’s an IP69 waterproof rating alongside an 18-LED night vision camera function. In addition, its power range between 12-volt and 24-volt makes it compatible with every vehicle you might have – from a basic pickup to a 5th wheel.
It’s worth noting that it’s not designed for extreme weather conditions, so if you’re RVing from Florida into Maine and there’s frost on the ground, you might experience issues.
This is the best wireless backup camera if you’re in between budget and quality; it’s affordable and durable.
PROS
- Includes lifetime support even after your warranty expires
- Maintains a stable picture up to 75 MPH
- Average three-minute installation process
CONS
- Low receiver range, will not work on class A motorhomes
- Loose connection to lighter port
EXTRA FEATURES
- Unit can swivel 360 degrees, you won’t be stuck with one affixed angle
- Night lens contains 18 LEDs
- Screen screws into your dashboard, easy to swivel
TECH SPECS
- Wired/Wireless: Wireless
- Wireless Range: 30 ft
- Wireless Frequency: Bluetooth
- Viewing Angle: 140 degrees
- Display Size: 7” LCD
- Waterproof: Yes, IP69
- Warranty: 12-month limited warranty, lifetime support, 30-day money-back guarantee
- Sensor: CCD
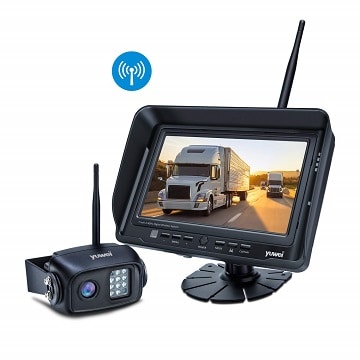
Yuwei YW-17211
Competitively priced against the ZEROXCLUB model we just took a look at, Yuwei packs a serious punch.
First and foremost, the display is spectacular. From the contrast adjustment options right on down to the configuration, it’s made to provide high-quality images.
There is a long installation process, though. Even though it’s a wireless unit, pairing the monitor to the camera takes quite some time.
Following the instructions will eventually land you at a fully put-together system, but compared to installation procedures averaging five minutes or less on other models, it leaves room for improvement.
But that’s more of an afterthought because, above all else, you want it to function properly. Yuwei made the product incredibly temperature-resistant: there isn’t anywhere on earth that’s too hot for your camera to handle, and on the flip side, it can go as low as -4 F without a problem.
While it doesn’t include night vision, it does have multiple LEDs in the back to assist the camera for nighttime reversing. There’s a fair range of 140 degrees on your viewing angle, giving you an excellent depth of about 33 feet.
Some of our favorite touches are the edges of the screen to prevent glares, as well as the fact that you can sync this system up to an additional three cameras if you also want a camera on each side.
In short, due to its state-of-the-art LCD monitor, high levels of durability, and amazing wireless technology that can receive stable digital signals up to 150 ft, this is one of our favorite RV rear view camera systems.
PROS
- Operates from 158 F to -4 F, including wind chill
- Backup infrared LEDs for nighttime reversing
- The entire system is lightweight
CONS
- Long installation process for a wireless system
- Pairing the camera and monitor takes a while
EXTRA FEATURES
- Numerous picture quality adjustment options via the monitor controls
- Sun shade lip prevents screen glares
- Ability to sync up to four cameras to one monitor (good for class A, giving you two side cameras as well)
TECH SPECS
- Wired/Wireless: Wireless
- Wireless Range: 328 ft
- Wireless Frequency: Bluetooth
- Viewing Angle: 140 degrees
- Display Size: 7” LCD
- Waterproof: Yes, IP69K
- Warranty: 12-month warranty w/ lifetime support
- Sensor: CCD
Rear View Safety RVS-770613
You can look at any Rear View Safety review and get mixed responses; we found that both sides, the negative and the positive reviews, hold some merit after testing it ourselves.
Know that this isn’t a Rear View Safety wireless model and you will need proper tools to install it. That being said, the mounting bracket that you get with the kit is fairly wobbly once you exceed 65 MPH.
Even if it were to buckle, you still have the wire and its separate mounting rubber keeping it in place, but this is still something we didn’t like seeing.
However, there’s a lot to love about this wired camera, including the 20-LED night vision along the back. While it’s not going to flip into that traditional green night vision mode, this allows for even better clarity and a visible distance of up to fifty feet behind you.
On top of that, there’s an auto-dim feature to properly transition in varying lighting conditions. Think of entering a tunnel then exiting it one minute later: your backup camera will adjust within 1-2 seconds, returning those crystal clear pixels.
It’s waterproof but doesn’t hold up well against low temperatures. We don’t recommend purchasing this if you’re looking for a wintertime camera.
Out of all the Rear View Safety backup cameras on the market, this one was the all-around best choice.
Even with the few gripes, they’re few and far between when stacked against the benefits. It’s cost-effective, powerful, and includes airplane mechanic-grade backup camera wiring for a flawless connection.
PROS
- Automatically dims, adjusting to certain levels of light
- 20 LEDs give you up to 50 ft of viewing at night
- Built-in microphone for you to get an audio feed of what’s going on behind you
CONS
- Operates poorly below 50 F, not built for wintertime use
- Mounting brackets are standard quality, wobbly at high speeds
EXTRA FEATURES
- Includes 66ft of cable, adequate for most installations
- Three-channel connector included; screws down, allows you to mount up to 3 cameras
- Adjustable screen w/ glare protection
TECH SPECS
- Wired/Wireless: Wired
- Wireless Range: N/A
- Wireless Frequency: N/A
- Viewing Angle: 130 degrees
- Display Size: 7” LCD
- Waterproof: Yes, IP69K rating
- Warranty: One-year warranty
- Sensor: CCD
ERapta ER0202
The eRapta backup camera is our last one on the list, but it has plenty of excellent features in store.
For one, it has one of the most impressive night vision modes available, utilizing infrared lighting.
The camera doesn’t include an auto dimmer like our top wired pick, but it does include a varied amount of options to color correct as you see fit.
Your monitor comes with a quick menu setup for adjusting the RGB settings, and it’s simple enough that you could walk your passenger through the settings while driving should you need an adjustment.
eRapta hasn’t had the best history of customer support, though.
As of mid-2017, that appears to have been corrected, but there are far too many stories of inconsistent customer support replies floating around to put us at ease.
Granted, when we called, they responded quickly and helpfully, but their history is still something to be wary of.
Last but not least, as the most inexpensive option on our list, you’ll be able to reduce your costs or even go for two cameras at once. eRapta replaced the standard plastic lens that most models have over the camera and put glass in its place. Less maintenance – a tougher build.
The 12-24V range of required power supply to run it makes it compatible with almost all vehicles.
The bottom line is that the camera works well in adverse temperatures, it’s waterproof, highly compatible, and has a crisp display with little to no grain, presenting a low maintenance option for the budget-conscious full-time RVer.
PROS
- 18 infrared lights
- Includes mirrored mode
- Simple installation process for a wired unit
CONS
- Mounting platform for the screen system is very flimsy
- History of poor customer service (resolved in recent years)
EXTRA FEATURES
- Glass lenses replace standard plastic that most brands use and require less maintenance
- All plug-and-play; you won’t find yourself installing backup camera software anytime soon
- Color correction options in the monitor controls
TECH SPECS
- Wired/Wireless: Wired
- Wireless Range: N/A
- Wireless Frequency: N’A
- Viewing Angle: 130 degrees
- Display Size: 7” LCD
- Waterproof: Yes, IP69K
- Warranty: Two-year factory warranty
- Sensor: CMOS
Table of Contents
Introduction To RV Backup Cameras
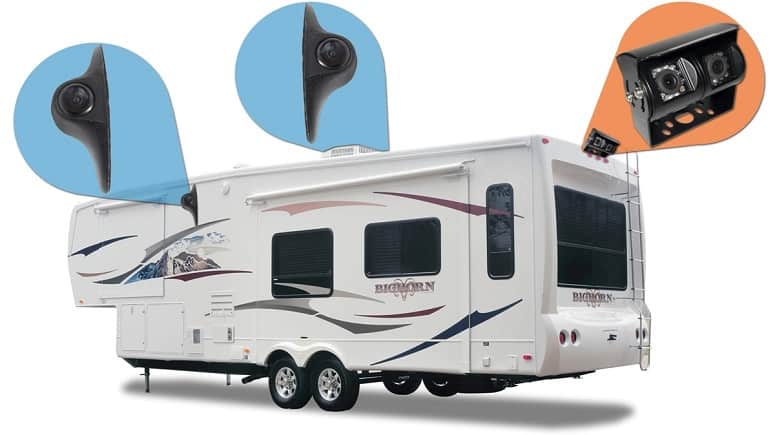
It’s stressful to focus on backing up your RV, especially when you have a compact group of cars huddled around you at a gas station, or when they look at you funny because you took up multiple spots in a department store parking lot.
It’s even more difficult to get used to it if you’re regularly commuting to work in a smaller vehicle and you’re switching back and forth each week.
We tested the very best backup camera models on the market to showcase them, explain how they work, and delve into the subjects of installation, as well as the key features you should be looking for.
So what exactly is an RV backup camera?
Whether you go with a Bluetooth backup camera, a Furrion observation camera, or an analog one, they all focus on the same primary function: helping you see your blind spots and make sound decisions based on feedback.
Using a monitor inside your cabin, you’ll be able to have an extra set of eyes to help evade issues that might have otherwise happened.
Some RV veterans have gone through the process of backup camera installation solely for insurance purposes as well.
Many insurance companies look at this as preventative measures, allowing you to lower your premiums each year. We don’t have to tell you how expensive those annual rates can get; it’s good to pinch every penny that you possibly can along the way.
What Are The Benefits Of Having A Backup RV Camera?
These apply to both wireless rearview mirror backup camera types as well as wired models. Simply put, the benefits are the same no matter which type you go with.
- Collision Prevention: Quite simply, if you have a wireless camera hooked up to your RV, you’ll have better control over your movements. With RV backup cameras, you can set them to constantly display even when you’re driving. Monitor your blind spots, prevent collisions when lane changing, and understand when other drivers are being reckless; it’s an all-around safety precaution.
- Insurance Premium Reduction: Backup cameras were first conceptualized by Buick in 1956-1957, and once they became mainstream, vehicle insurance companies started offering discounts to drivers who had them properly installed in their vehicles. Companies who offer RV insurance might offer this discount, though keep in mind that not all do. It’s worth checking out your current insurance provider or shopping around for a potential replacement.
- Eliminate Property Damage Possibilities: There are over 100,000 hours of footage on YouTube alone dedicated to big rig, RV, and large vehicle accidents caught on camera. You may be an excellent RV driver, but there’s no need to take unnecessary risks. Having one of these on your RV can help you better pinpoint awkward angles and structures, and prevent property damage when backing up or maneuvering out of a parking lot/tight area.
- Better Parking: This one is straightforward. With a camera, you’ll do better when parking between the lines at truck stops. No more second attempts at parking when you pull into the RV park, either.
- Vehicle Security: The average class A RV costs around $78,000, which is four times as high as most new, low-end sedans. Thieves will target your expensive RV over the Camry sitting in the parking lot, and it should come as no surprise that if the thief can be detected, the thief will be deterred nine times out of ten. This is especially useful if you and your family are camping out for the night and you’re not at an RV park.
What To Look For In An RV Backup Camera
We know why they’re a good idea, but slapping any ole camera on the back of your RV isn’t going to do the trick.
We’ve outlined the main features that give you the best elements of owning an RV backup camera, as well as information on the installation process.
WIRED VS. WIRELESS
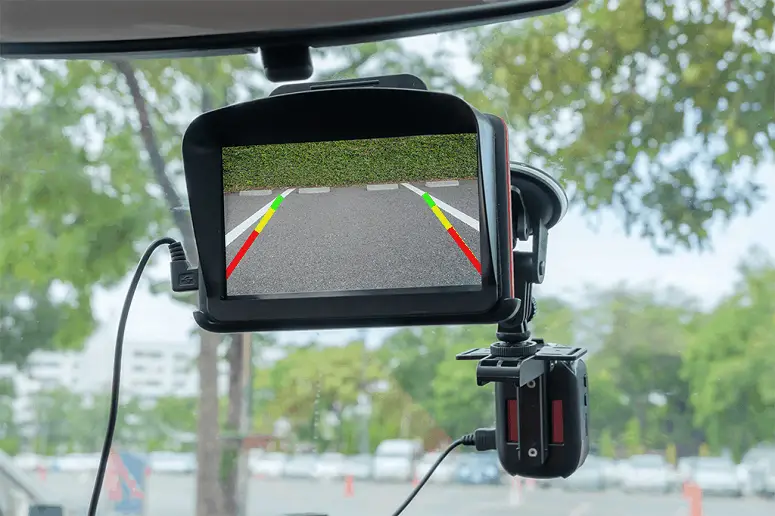
Whether you go with a Furrion wireless observation system or find something that’s hardwired to your 12V electrical source is entirely up to you.
Whether a unit is wired or wireless doesn’t impede its function, so long as you pay attention to the battery life on your wireless models.
The only difference is their price: wireless systems tend to cost more than wired.
COMPATIBILITY
Is it compatible with your vehicle?
Many manufacturers list specific makes, models, and other information regarding the best RVs that their systems work well with. With a bit of ingenuity, you can use just about any backup camera on any RV.
The main issues of compatibility that you’ll run into are focused around wireless receiver distance (if you’ve got a class A motorhome, you’re averaging 42 feet of distance between the console and the camera, so check the wireless range carefully).
INSTALLATION PROCESS
Rear camera installation doesn’t have to be a nightmare.
While it’s true that wireless system installation takes far less time on average than a wired setup, it also depends on how the brand approached the subject.
We avoided brands that don’t include proper instructions with their kits, so you won’t have to Google “How to install wireless backup camera” after you receive the product.
VIEWING ANGLE
This is extremely important and depends on the width of your RV.
You want enough of a view so that you can see directly behind you and a bit into the other lanes (especially if you’re on a six-lane highway and you need to swap lanes). The average viewing angle is 130 degrees, which is good enough to map out your environment and make sound decisions.
DISPLAY SIZE
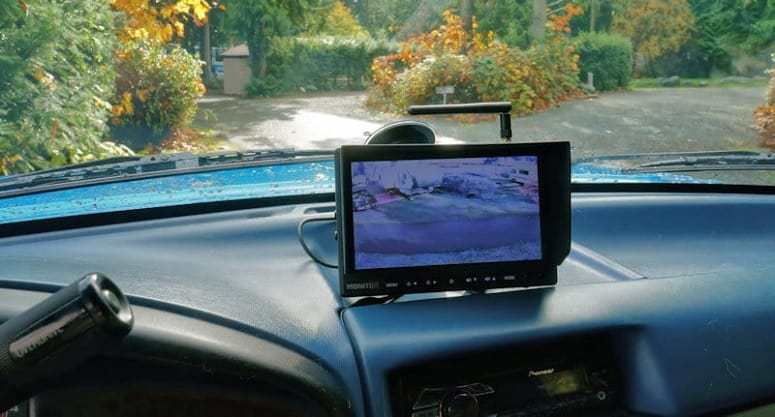
You run into a difficult choice here: bigger displays mean a better view, but also require more dashboard space and can sometimes be a little too much.
This comes down to the size of your RV’s dash, as well as your own eyesight. Most of the models on our list have 7” LCD displays, but our top pick has an economic 4.3” display. It’s there when you need it without being completely in your face. If that’s not something you prefer, feel free to take a better look at the other options we provided. Each driver has their own preferences.
WARRANTY
We can’t stress the importance of a good warranty.
Most of these models come with a twelve-month guarantee, some with thirty-day money-back guarantees, so don’t waste a single minute.
What we mean by that is that you should install backup camera monitors first, then the camera, and test your unit as quickly as possible. Even if you’re just prepping for a trip that’s a few months away, it’ll be worth it.
More often than not, problems exist in the connection (on wireless models) than anything else, requiring you to try everything out in order to detect a potential problem.
Types Of Backup Cameras
The type of RV backup camera you go for is going to depend on how handy you are and what you’re looking for.
We’ll go over the main benefits and some drawbacks of each camera type to help you whittle down your decision.
WIRED SYSTEMS
Your wired backup camera installation is going to be more involved and may require a bit of drilling (more on this during the installation walk-through later).
Whether you’re actually shopping for your RV, or you’re looking for a backup camera system for trucks, you’re still going to have the same amount of work to do. You’ll just be running less wire.
Wired systems don’t lose connectivity like wireless models can, eliminating an entire category of potential problems.
Although they’re subject to longer installation, they offer a trustworthy connection and the wires are usually crafted from airplane-grade materials. That makes for a solid investment that upgrades your RV’s resale value.
WIRELESS SYSTEMS
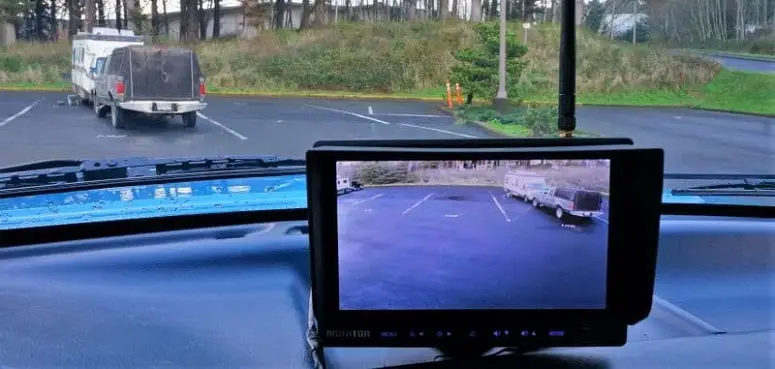
You can look at wireless backup camera reviews all day long, but you’re going to see the same issues, more or less: connection dropping over a certain speed, different connection ranges for class A motorhomes, and things of the sort.
However, they’re still a viable choice.
If you grab a Bluetooth rear view camera, you’re going to have maybe three minutes of installation time. They’re extremely easy and sync to one another with ease.
You also get the option to eventually sync up more cameras (dependent on the brand) to the same monitor, so you can see everything on all sides, no additional wiring needed.
SINGLE CAMERA
Single camera models are the most sought-after.
You have one lens with a 130 – 170 degree angle, giving you plenty to look at directly behind you.
These options cost less than dual camera units and it’s easy to add more. For example, if your brand allows it, you can hook up a rear and two side cameras for a full 360 experience. For dual cameras, this feature is hard to come by.
Getting a portable backup camera allows you to bring it with you when you leave your RV dormant between trips. While having an affixed camera means that you run less of a risk of vandals messing with your RV, bringing in your wireless camera ensures that it won’t be taken either.
DUAL CAMERA
Dual backup cameras have a much wider range, usually doubling the average 130-degree angle to 260.
You’ll be able to see widely into each lane on either side of your vehicle, as well as have a clear shot of the traffic directly behind you.
The reason these models aren’t as popular comes down to cost. Single camera models are less expensive and offer a similar experience. If you glance over our list, you’ll notice that they are all single camera models.
How To Install RV Backup Cameras
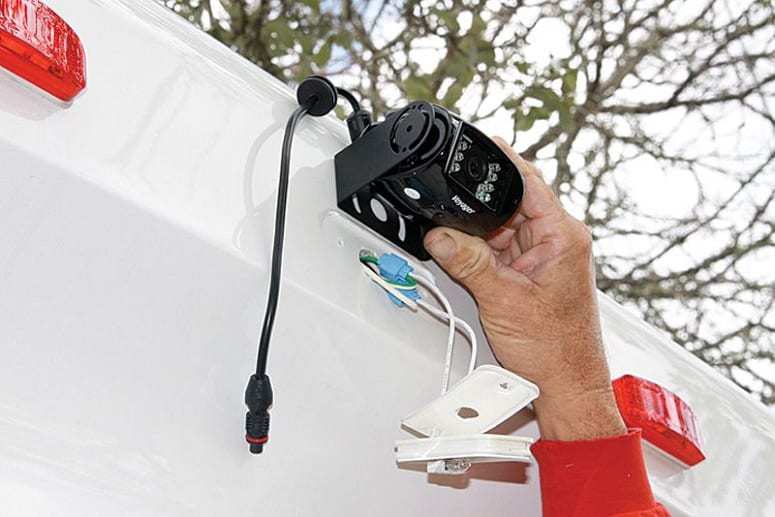
We’re all guilty of one thing: waiting until the last minute to really look at the installation process for something we’ve purchased.
Then we end up typing “How to install a backup camera” on YouTube and spend 45 minutes without learning anything.
Let’s avoid that.
Before you make your purchase decision, we want to go through the installation procedures, step by step, so you know what you’re getting into. No surprises, no gimmicks, just information, and a sound installation guide.
Let’s go over wired and wireless installation processes.
WIRED INSTALLATION PROCESS
For a wired rear view camera installation, you’re going to need an electric drill, sealant, tape measurer, your screwdriver set, and we recommend getting some zip ties as well. Bring something along to cut the excess.
- You’ll be placing this along the top of your RV’s rear. Most of these models aren’t intended to be placed along the bottom half like you usually see with SUVs and minivans (better known as a trailer hitch camera). Use a tape measure to find the midway point of your RV’s rear, and find your bracket.
- You want to place the bracket up against the area, keeping it as centered as possible. Use a pencil or train your eye on the spot where the brackets are going so you know where to drill into.
- Three holes are required for your backup camera. Two that are usually 1/8 slots (refer to your specific purchase to figure out the exact numbers, these are just the most common measurements). You’ll most likely need a 3/8 hole in the center where the camera cable is going to run.
- Prepare your zip ties. You’ll have to find a good spot to run your wire through. In some cases, you might put your camera high enough that you’re feeding the wire into the roof, and you’ll have to find a way to access it through the interior of the RV. Locate the cable, and run it to your 12/24V DC system.
- You’ll receive the proper wiring in your kit to rig everything up. Once you’ve connected the wires accordingly, it’s time to attach your monitor. There will be steps with your kit; each monitor hookup is different. They will most likely require you to hook up a connector for the cable coming from your camera, feed that into the monitor, and the monitor will run off of the same power source
- Coil up any extra wiring. Most kits come with 50+ ft of wiring, which may be way more than you need. Coil it, zip tie it, and retrace your previous steps to zip tie any hanging wire. This secures it and prevents it from rattling around while driving in the future.
WIRELESS BACKUP CAMERA INSTALLATION
Wireless backup cameras are far easier to set up.
It involves you setting up the mounting bracket, placing your charged unit where it belongs, setting the monitor up in your cabin, and using Bluetooth to sync the two devices together.
It’s a quick enough process that it doesn’t even require a numbered list. You should receive instructions in your package as well, outlining the entire process.
Just in case you’re a visual learner, here’s a video on how to install our top wireless pick: Furrion RV backup camera:
Main Features Of RV Backup Cameras
Here are the five most mentioned features for backup cameras for recreational vehicles/campers.
HD PICTURE
It’s not 1990 anymore: every electronic we purchase has the capability of being high-definition.
Your HD backup camera shows you a clear picture of what’s behind you in 1080p, so you’re not stuck with low resolutions and improper visuals on what’s lurking behind you. HD also has a hidden purpose, which coincides with another feature we’re going to talk about in a moment.
If someone rear-ends you, you’ll have the most vivid photo of their license plate (most states require dual license plates).
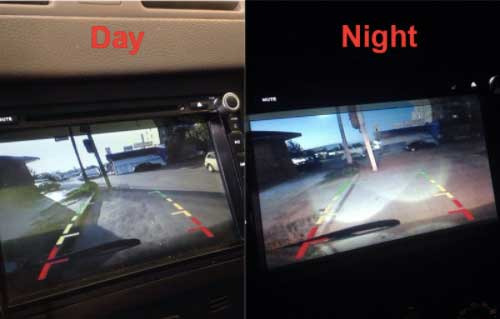
NIGHT VISION
I don’t know about you, but planning out an RV trip with a set destination in mind usually means leaving at night in low light.
We’ve all taken very early morning or late night starts to our journeys, which is where night vision comes in handy. This may come in traditional night vision, where the screen displays a green hue over everything, but it might also include LED lights positioned within your camera’s lens.
The infrared lights paint a picture behind you and let you see clearly without that fuzzy gradient that traditional night vision often has.
RECORDING
This comes in handy with HD cameras.
Whether you want some amped-up security while you’re sleeping or to keep an eye on your campsite equipment, this will work excellently.
Recording features usually work like car dash cams: they’re rigged to the internal power (so we’re usually looking at wired backup cameras here), and run on a loop, constantly rewriting old data so you don’t have to switch out USB sticks.
CONNECTIVITY
If you’re siding with a wireless RV backup camera, you need to know about a little thing called vibration control.
As you hit higher speeds of 70-80 MPH, your frequency (whether it’s Bluetooth or traditional RF) has to cut through the ripping wind to push a signal through. Think about windy weather messing with your car’s radio: this is the same thing, more or less.
Features in wireless models include connectivity stabilization, so you can use your camera at certain speeds without worry.
AUTOMATIC SWITCHING
You can wire these to run even when you’re just cruising on the highway, but if you don’t want the distraction of the lit-up screen, that’s okay.
By running the appropriate wire to your taillight, you can configure your system to only become of use when you flip into reverse and you’re backing up. This is usually done manually and not a direct feature that’s pre-installed in most of these models.
Can You Really Lower Insurance Premiums With A Backup RV Camera?
Yes, you absolutely can.
In truth, you could put a backup camera on just about any vehicle and receive a reduction in your monthly or annual premium.
More and more vehicles are being manufactured with backup cameras, and as a result, we’ve seen a steady decline in auto collisions and property damage incidents from vehicles produced in 2013 to current.
But we like to take a practical look at exactly how it’s going to affect your RV insurance. We both know that your premiums can rise fairly high. You’ll find this question being asked on new insurance policy applications: “Does your motorhome have a backup camera?”
Because of the way RV insurance works, you can expect to see a $122 – $177 deduction on an annual rate, where the RV is being used more than 140 days per year. If you full-time it and you’re not just a weekend warrior, then that could be the cost of your entire camera over the course of one year.
If your insurance premiums are based on a part-time use bracket, (under 140 days of use per year), you may only see deductions from $37 to $57.
You didn’t come here just for a deduction on your premiums, so either way, you’re getting the ease of use that comes with an RV backup camera, while also saving a bit of money, no matter how you use your RV.
Will My RV Backup Camera Require A Backup Sensor?
You’ve probably seen commercials for minivans with backup sensors.
They show grid lines, beep when you reach a certain distance, and look pretty fantastic.
There are a few reasons why you don’t need that in your RV.
For one, you already know how to drive an RV. You’re acutely aware of the different issues you run into while on the road and parking. Your backup camera is just there to help you out a bit, and make those tasks a little easier.
Not only that, but most current technology (2019-era tech) with backup sensors are designed around the diameter of the vehicle. For example, Kia and Toyota would need two different technologies, designed around their specific vehicles.
Installing something like that on your RV would be nearly impossible, and would have to be included with the RV when you purchase it, designed by the manufacturer.
Can I Install My Monitor Into My Dash?
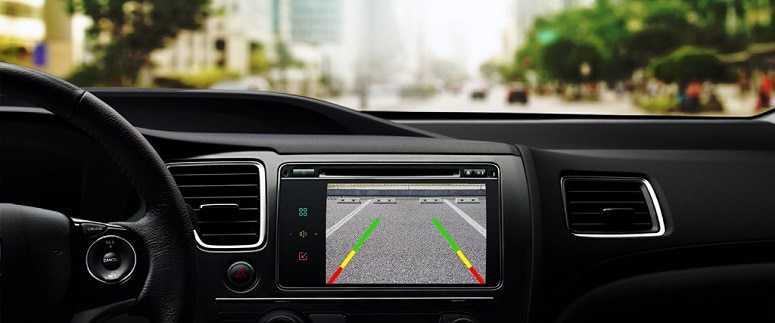
If you look at vehicles that come with included backup cameras, they have a small monitor built into their dashboard, which makes it a little easier to maneuver when you’re on the road.
The problem with most RV backup cameras is that you have a 4.3” – 7” screen just sort of staring at you. It takes up additional room and can be quite awkward at times.
If you’re thinking about installing it in your dash, you can absolutely do that. You just need the right brackets and a bit of know-how.
You’ll need to either have a preconfigured area that you can mount this, or you’ll have to cut into the plastic of your dashboard to make room. Let’s assume that you’ve gone with a wireless model, so you’ve got to keep it wired to the cigarette lighter adapter.
You’d have to measure the area, ensure there’s no wiring behind it that would be severed from using an electric jigsaw, and make a hole that’s slightly smaller than the screen’s width (to give it a pre-installed look).
Next, you would need some brackets and mounting screws, and a conduit for the cable to run to the lighter. If you’re using a wired model, hiding the cable will be easier to achieve.
That’s all a lot of work to put in, and we personally find it better to mount it using the stand you received with your purchase, and finding a suitable way to position it that works for you.
How Much Easier Will Your Next RV Trip Be?
We’ve all encountered parking and logistics issues at one point or another.
With the best wireless backup camera in your arsenal, there’s no obstacle or tight spot you won’t be able to maneuver out of properly.
Thoroughly review this guide, look at our selection of the best backup cameras on the market, and enhance your RV experience like never before.


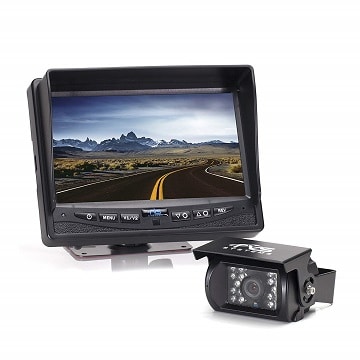
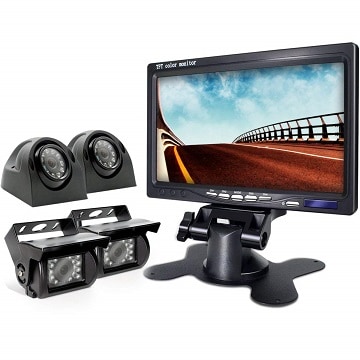



I am using Digital Wireless Backup Camera. Easy to set-up despite the instruction manual is a little thin. So far has been working for me well, the display is clear and wide enough to see even without glasses. Those of you, a “little” older, like me, would definitely appreciate this advantage over other more “compact” models!
Before buying a Digital Wireless Backup Camera, I used the Backup Camera Monitor Kit. This backup camera works well once installed but is very difficult to install. After completely uninstalling it I had the camera tested and the videophiles could get no response to indicate the camera would ever work.
I’ve had the Rear View Safety Backup Camera System for over a year now and am thrilled with the difference it’s made. I mounted the screen just above the rearview mirror in my class C and it is very effective at seeing what is right behind me as well as the hitch area. Works well at night and the wired solution means no noise or wavy lines. The only issue would be that when you turn up the volume loud enough to hear someone guiding you backward… You have to remember to turn it back down or you hear road noise when you’re driving. I haven’t added another camera yet, but hope to someday. A great unit for the price point!!!