A perfect campfire is at the heart of every good campout.
The warm glow, crackling flames, and smokey aroma strike a chord deep within us that dates back to the dawn of man.
Every camper should know how to make a roaring campfire that’ll keep the campsite warm throughout the night.
I’ve put together an easy-to-follow guide full of safety tips, fire structures, and step-by-step instructions to make your campfire awesome.
Included in this guide is everything you need to know about building the perfect campfire.
I’ll also cover the process of building a fire from start to finish, the science behind campfires, and the benefits of fire you may not have known about.
Practice Fire Safety
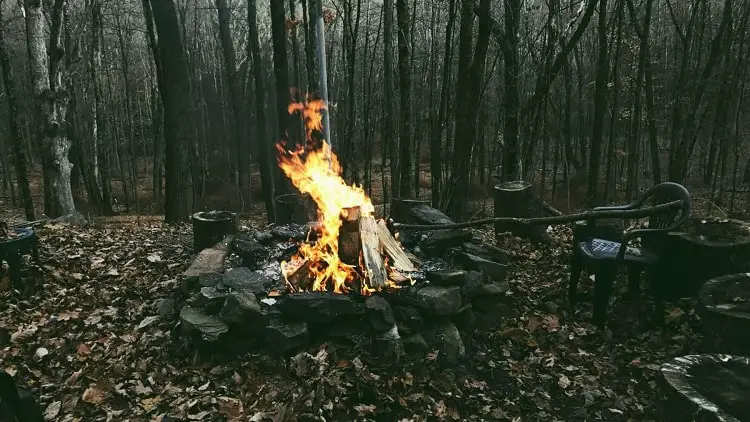
We here at Kempoo encourage you to be safe and responsible when building a fire.
Build a proper fire pit with a fire ring, and build your fire slowly and cautiously.
Keep the area clear of flammable debris and avoid wearing synthetic polyester clothing that will light up like a match.
Never add gasoline to a fire or use it to start a fire, it will quickly get out of control and damage the ecosystem, others, and yourself. Keep a water supply immediately ready in case any fire emergencies arise.
84% of all wildfires are started by humans which go on to cause major damage to both human life and the ecosystem.
Our team here at OGOutdoors wants you to be safe with your to ensure the well-being of the environment, others, and yourself.
Gathering Fuel
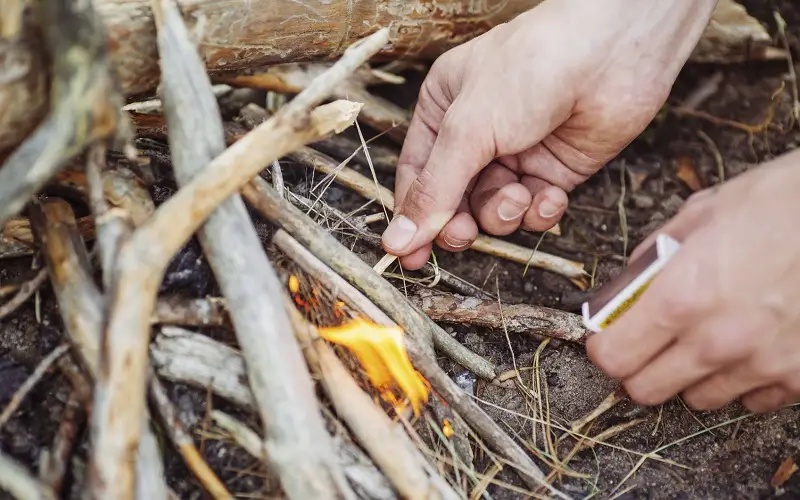
The first thing is to gather fuel for the fire.
You’ll want to gather tinder, kindling, and fuel wood.
It’s recommended to collect all of your fuel beforehand and pile it far enough away from the fire to prevent uncontrolled burning but sufficiently close to allow easy access.
It’s also recommended that you gather double the amount of wood you expect you’ll need for your fire.
Wood can burn quicker than you expect, and you don’t want to be left out in the cold frantically trying to gather more wood for a dying campfire flame.
Here’s a brief guide on the types of wood to gather.
Tinder
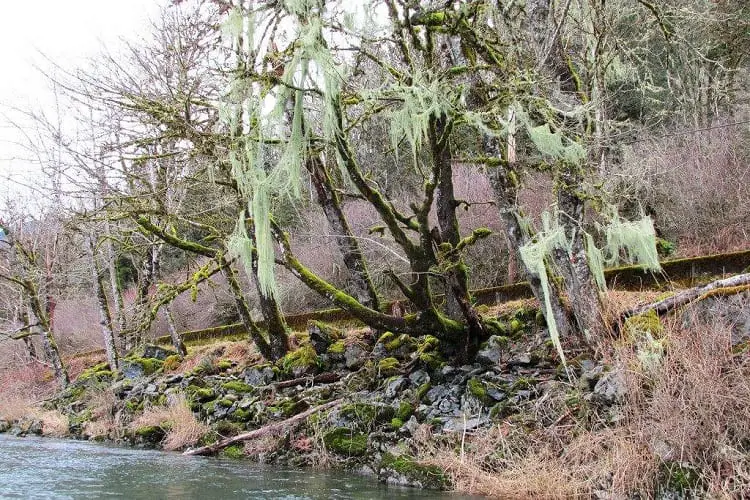
Tinder will be the starter for your campfire and burns easily but fast. Any fine dry materials such as Old Man’s Beard (lichen), leaves, grasses, wood shavings, twigs, or even corn chips can all make good tinder.
If you wish to prepare your survival gear ahead of time, it’d be wise to pack things such as cotton balls or newspapers.
Packing tinder ahead of time is especially smart when poor weather wets everything in your environment.
And if you plan on cooking, adding a good wood-burning backpacking camp stove to your pack will make things much easier.
Two handfuls of tinder are plenty to make a tinder bundle that will burn long enough to light the kindling.
For tinder that is super-effective at lighting fires, even in wet conditions, I would recommend picking up some chemical fuel tabs or alcohol pads.
Alcohol pads light with even the slightest spark and come in small sealed packages that you can take anywhere.
One or two sparks from a ferro rod will set the alcohol pad ablaze and work wonders for lighting wet tinder and kindling.
Never use gasoline to start a fire.
Gasoline is extremely flammable, dangerous, and uncontrollable. You will hurt the ecosystem, others, and yourself if you add gasoline to a fire.
Kindling
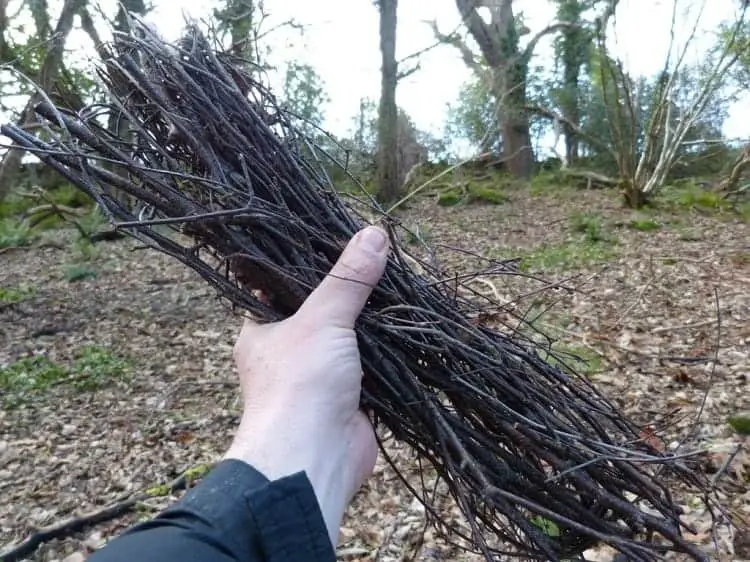
Kindling is denser than tinder and ranges from the size of a pencil to the size of your thumb. Examples of kindling are smalls twigs, branches, or dense dry grasses.
A reliable source of kindling comes from small to medium-sized dead tree branches. Good dry kindling will make a crisp ‘snap’ when broken.
Gather plenty of kindling to feed the fire for an ample amount of time.
If you have a camping axe or bushcraft hatchet, you can split larger logs into smaller pieces of wood to use as kindling.
Fuel Wood
Fuel wood will be long burning and the hottest fuel. Fuel wood is typically larger dense, dry logs.
Charcoal and coal can also be used as fuel because of their long burn time and hot burn temperature.
Because fuel wood is so large, you need to be careful not to smother the campfire’s flame when adding fuel wood to it.
Green wood doesn’t burn as hot or as easily as seasoned wood, contrary to the common proverb that “Green wood makes a hot fire”.
This is because green wood has moisture trapped within the cells that make it difficult to light and a heat suck to dry out.
Fire Starting Techniques
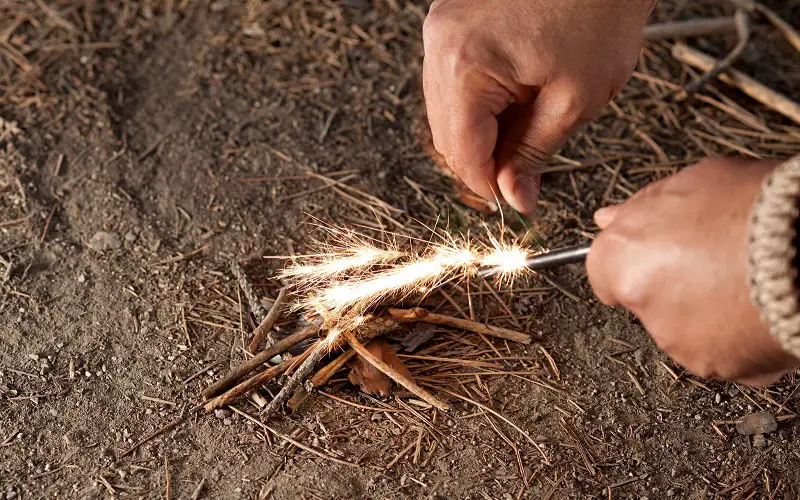
There are a near-endless amount of creative and resourceful ways to start a fire. We assume you already know how to start a fire with lighter or waterproof matches.
We want you to learn new ways to start a fire, so we’ll cover some lesser-known gadgets and resourceful techniques to start a fire.
Ferro Rod
A ferro rod is a magnesium rod that creates sparks when struck with steel.
A steel camping knife or steel scraper is included with the ferro rod to strike the magnesium and create sparks.
These sparks are incredibly hot and can light a pile of tinder. When using a ferro rod, break the tinder into finer pieces to aerate it and increase the chance of ignition.
Fire Piston
A fire piston compresses air inside of a tube to create heat and ignite tinder. A piece of tinder such as fine cotton, charcoal cloth, or an alcohol pad is placed inside the tip of the fire piston.
The fire piston is then placed inside of the included piston shell and smacked down to ignore the tinder. The piston can then be pulled out and pushed into a tinder bundle to ignite it as if you were using a cigarette lighter.
Fire pistons work in all weather conditions and will never run out of fuel like matches or a lighter.
Battery and Steel Wool
Any battery such as a car battery, phone battery, or standard-sized 9 volt is great for igniting steel wool. Using the steel wool to bridge the positive and negative electrodes will cause it to ignite and burn very hot.
The steel wool can then be placed inside of a tinder bundle to ignite the tinder bundle and start your fire.
This method is very resourceful, as any charged phone or flashlight can be combined with steel wool to create fire.
Lens and Sun
A lens can be used to concentrate sunlight to create an incredibly focused beam of heart and light. This beam of focused light can be used to ignite tinder and start your campfire.
This method works best with dark-colored materials such as a charcoal cloth that absorbs the light’s energy better than lighter shade materials.
Any kind of lens that can focus the light into one concentrated point will do. The most iconic example of this is a magnifying glass.
By orienting the magnifying glass, you can focus the sun’s energy into a singular point. Other items that can be used as lenses include a water-filled clear plastic bag or water bottle.
The obvious disadvantage to this method is that it will not work in low light conditions such as during sunset or a cloudy day.
Reflective Surface and Sun
Another way to harness the power of the sun to start your fire is to use a semi-sphere reflective surface.
Items like a flashlight reflector or the polished bottom of a soda can. Both of these surfaces capture the power of the Sun and reflected back into a singular point that is hot enough to start a fire similar to the lens method.
This method works better with darker shade tinder that absorbs light and heat, similar to how black asphalt gets hotter than light concrete on a hot day. This method also won’t work in low light conditions, as the light isn’t intense enough to ignite the tinder.
Fire Drill
A fire drill is a great way to turn rotational energy into heat through friction. Knowing how to make a fire drill is a great skill in case you need to use it as a last resort. This method can be very labor-intensive and hit-or-miss until you master the technique.
A fire drill is made of two parts: a drill and a drill platform. When you rate the drill, friction The drill is rotated to create friction against the drill platform. Once the friction from the drill creates enough heat, the base will begin to smoke and eventually burn to create embers.
These embers can then be dumped into a tinder bundle and blown on to ignite the tinder and start your campfire. It may take multiple attempts to create an ember that can light your tinder.
One Improvement to make to the fire drill technique is to use a bow to rotate the drill. Instead of spinning a stick between your hands, you can instead work a bow back and forth.
The bow uses a piece of paracord, vine, or tough dry grass as cordage which is wrapped around the fire drill. When you work the bow up and down, the fire drill spins very fast and creates lots of heat from friction.
Using a bow is much quicker and more efficient than rotating a fire drill between your hands.
Use these techniques when you don’t have access to a lighter or waterproof match. Being resourceful and versatile can make up for supplies that weren’t packed or lost.
Knowing how to start a fire isn’t always a sure path to a fire. Lighting a fire is difficult when everything around you seems to be wet and damp. So how do we light our fire if our firewood is wet?
How to Deal with Wet Firewood
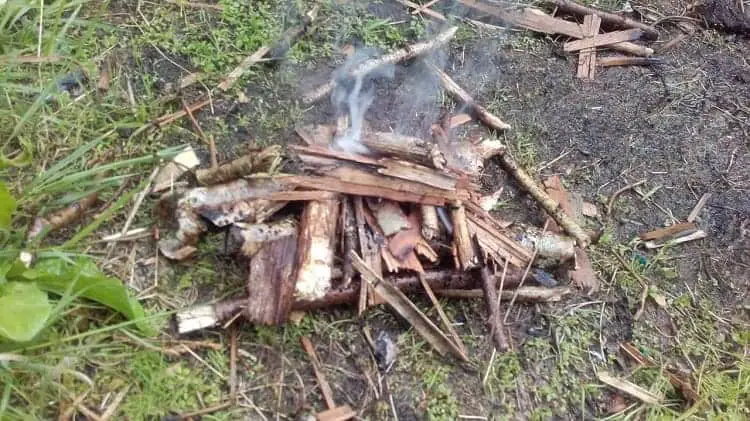
If any of your firewood is wet, one trick is to use four times as much kindling and tinder as you normally would.
Another trick is to build a wooden platform off the damp ground to keep your fire high, and dry, and give it more airflow.
When picking your tinder and kindling for fire in a wet environment, avoid fuel that rests on the ground. Fuel that rests on wet ground is likely soaked to the core and will never be worth its time to ignite.
Instead, try to pick tinder and kindling from dead trees or sources suspended off the ground. Snapping twigs off of dead hanging branches and dry tall grasses are great tinder.
Pine cones and pine straws are helpful also because they’re full of energy-rich pine resin that ignites easily and burns hot, even when wet.
The extra fuel generates much more heat and allows your larger woods to dry rapidly when put on the fire and light after to build a sustainable warm fire.
If you’re in the unfortunate situation of having damp tinder but have an alcohol pad or sealed chemical fuel tablets, you can light these to create a hot flame that will dry out and ignite your tinder. Once your tinder is lit, you can dry out and light larger firewood for your fire.
If you have wet tinder and don’t have an alcohol pad, look around on trees and try to find some tree sap or gum.
Tree saps are energy dense and full of easily combustible chemicals that work almost as good as chemical tablets when starting a fire.
Now that you know plenty of ways to start a fire and can handle wet tinder, let’s build a fire pit to contain your fire and protect your campsite.
Building a Fire Pit & Fire Ring
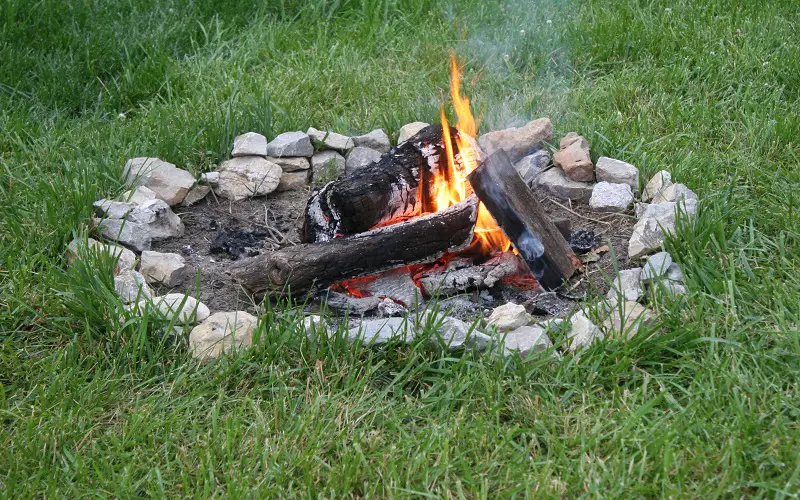
The first step to making any fire structure is to build a fire pit.
Fire pits contain the fire to concentrate the heat of the coals and prevent embers from flying away and starting wildfires.
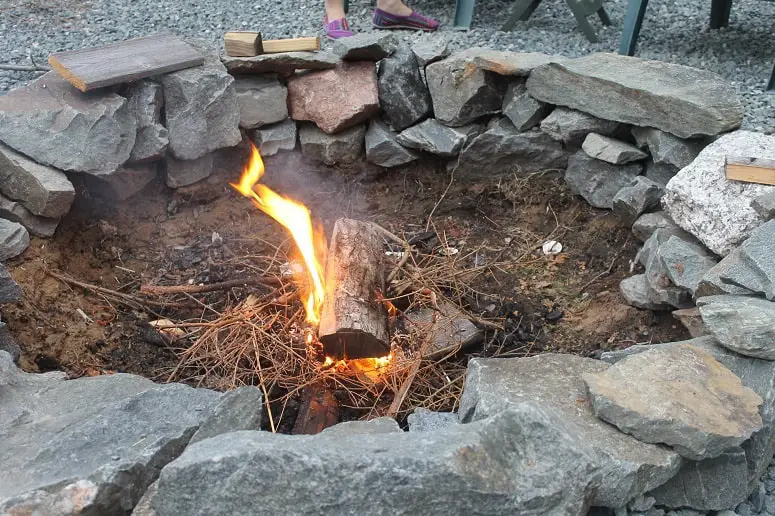
The easiest way to build a fire pit is to dig a hole roughly 4 inches deep into the ground and the diameter you want your fire to be. Remove the dirt and put it aside to replace when you’re done with the fire.
The second step to building a fire pit is to build a fire ring. Look around the area for non-porous stones with a diameter of 4″+.
After you have found 15-20 stones, place them in a ring around your dug-out fire pit. Create a ring around the fire with the ends of the stones touching.
If you need more stones, look around the area for more. Use only non-porous stones, as porous rocks can hold water inside that created steam when heated. The pressure created by the steam can cause the rock to explode, sending rock shrapnel everywhere.
Fire rings keep campfires contained and manageable by preventing creating a wall that contains embers and hot coals. Building a fire ring creates an extra barrier that separates you, those around you, and the ecosystem from the fire.
Digging out a fire pit and building a fire ring around the outside is one preventative measure to preventing forest fires.
Please be very careful when building your fire, as fires can outgrow their fire rings if they are not build in a safe and manageable manner. Add your firewood reasonably and never use gasoline to start a fire.
Fire Structures
Now that you’ve built your fire pit, it’s time to choose a fire structure to build. Each fire structure has advantages and disadvantages associated with it.
We’ve listed the pros and cons associated with each fire below and included a short guide with a community-sourced video on how to build them.
Teepee Fire
Pros
- Quick to start
- Breathes easy and burns hot
- Easy to maintain
Cons
- Assembling sticks that interlock make it harder to set up than simpler fire lays
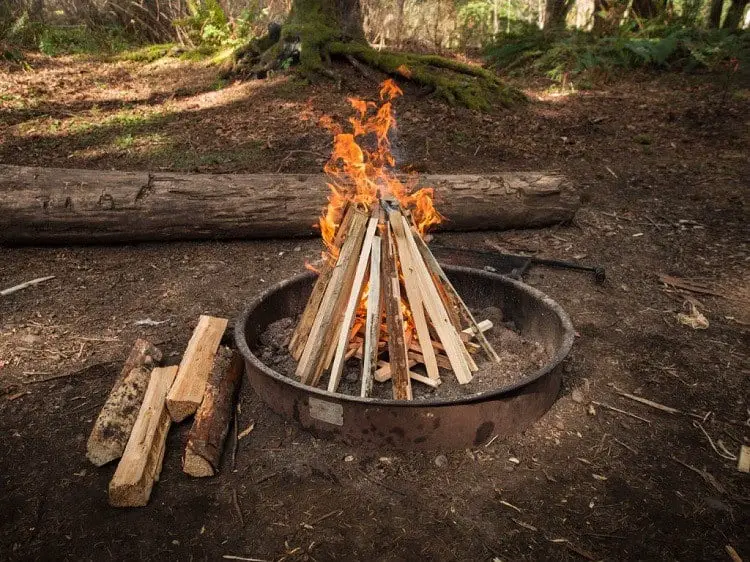
The teepee is one of the most iconic and recognizable fire lays. The teepee fire structure features a cone of interlocking sticks.
The cone shape lets the fire breathe to quickly light fuel wood and radiate heat outwards, making it great for keeping warm.
Eventually the fire will collapse into a bed of coals that you can stack or lay wood across to keep the fire going.
How to Build the Tepee Fire
- Place your bundle of tinder in a small pile on the ground.
- Stake seven to eight pieces of kindling in the soil around your tinder to form a teepee point.
- Lay kindling into a layer on the downwind side of the kindling you previously stuck in the ground. Leave the up wind side of the fire open for lighting the tinder and airflow.
- Keep adding sticks around the outside to form the tepee while being sure to leave the up wind side open.
- Lay smaller fuel wood pieces onto the outside of the teepee.
- Keep adding sticks around the outside to form the tepee while being sure to leave the up wind side open.
- Lay smaller fuel wood pieces onto the outside of the teepee.
- Light the tinder bundle inside the teepee.
- To maintain the fire, add fuel wood to the outside in a log cabin or crisscross way when the starter wood burns to coals.
Log Cabin Fire
Pros
- Breathes easy and burns hot
- Burns for a long time
- Great for heating a large area
- Easy to light and maintain
- Able to stack a large amount of fuel on the fire
Cons
- More time-consuming to set up than simpler fire structures
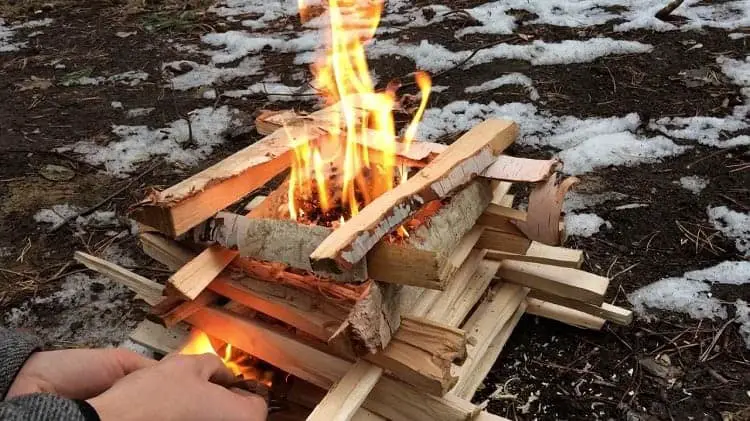
The log cabin structure burns hot, has good airflow, and works great for heating a large area.
The log cabin structure gets its name from the way the wood is stacked. The logs stack interlinking in the same fashion that a log cabin is built.
This structure allows the fire to breathe easily and burn hot while still having a large amount of fuel available to burn.
By utilizing vertical space, the fire allows for much more wood to be stacked on that traditional fires. The large amount of wood on the fire means you don’t need to spend as much time throwing logs on the fire.
Once wood burns from the bottom to the top, a large number of coals begin to accumulate in the bottom of the structure that radiate heat outwards, making it the perfect natural space heater.
How to Build a Log Cabin Fire
- Lay two large pieces of fuel wood on the ground parallel to the wind direction.
- Put a bundle of tinder and kindling between the fuel logs on the ground
- Build two to three layers of fuel wood criss-cross to each other on top of the two bottom fuel logs.
- Continue building perpendicular layers using larger fuels first and moving to smaller fuels to finish.
- Complete the structure when it becomes a few feet tall or you run out of wood. If you run out of wood, I’d recommend you gather plenty more before lighting the fire to maintain it.
- Light the tinder on the bottom of the log cabin and wait for the fire to start burning.
- As the original wood burns to coals, place wood around the fire or lay wood across to maintain it.
Lean-To Lay Fire
Pros
- Easy to set up
- Quick to light and get burning
- Easy to maintain
- Can place a pot or pan on the fuel log for easy cooking
Cons
- Doesn’t breathe as well as other structures if the lean log isn’t parallel with the wind direction
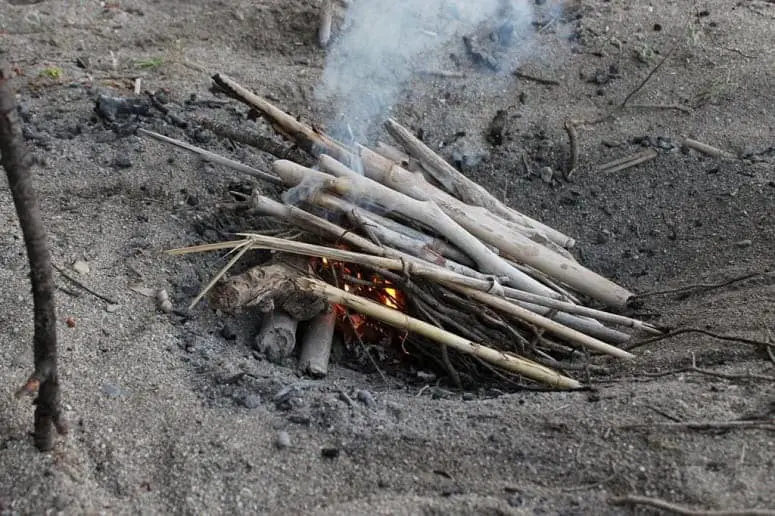
Lean-to-lay fires are great for situations where you’re in a time pinch.
The structure makes a simple and effective campfire that can be set up and burning within a minute.
The best way to make a lean-to lay is to use a large fuel log that you can lay the other fire material on. The log acts as a winder barrier or wind scoop depending on the direction.
It’s recommended that you build the fire parallel to the wind direction to help the fire breathe.
You can place a pot or pan on the first fuel log if it has a flat top.
Scoot over the firewood leaned on it to make room for holding your BBQ grill fork and cooking utensils.
Within no time, you’ll have a warm meal ready to eat.
Another advantage of using a large fuel log to lean the fire material up against is that the fuel log will light faster than with other fire structures. The fuel log is right in the fire the whole time and lights quickly.
Once the fuel log starts burning to coals, you can toss on another fuel log and lean more fuel logs against it. When combined with the bed of coals, you’ll have a hot fire that will burn for hours on end.
How to Build a Lean-to-Lay Fire
- Lay a large fuel log on the ground parallel to the wind direction.
- Put a tinder nest next to the log on the side closest to your camp.
- Lean kindling sticks perpendicular across the log to the ground while leaving the sides open for wind to travel through.
- Lean larger fuel wood on top of the kindling to complete the fire.
- Light the tinder inside and wait for the fire to catch.
- Lay more fuel wood across the fire as necessary, using a new log for a lean-to lay once the primary fuel log burns.
- If you wish to cook over the lean-to-lay fire, place a pot or pan on a flat section of the fuel log parallel to the wind direction.
Star Fire/Indian Fire
Pros
- Easy and quick to set up
- Burns for a long time
- Burns hot and breathes great
- Easy to light and keep lit
- Good for cooking over
Cons
- Pushing logs into the fire may be hard if the fire gets very hot
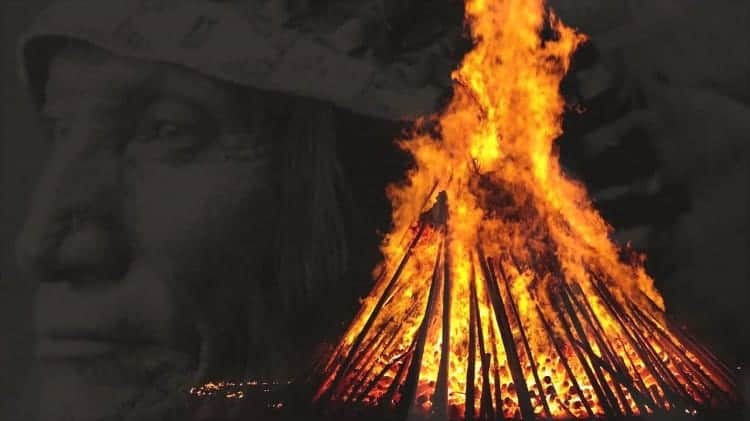
The star fire gets its name from the orientation of the fuel logs on the ground.
The fuel logs are arranged like the spokes of a wheel to create a “star” shape on the ground with an open ring in the center for kindling and tinder. You can place a pot or pan over the center ring to cook a hot meal.
As the ends of the fuel logs burn, push them into the fire to accumulate a fiery mass of coals to keep the area warm. Star fires can be set up extremely quickly and adding wood to the fire is simple.
Push fuel logs into the center along the ground to feed and grow the fire.
The logs will progressively burn and build a hot bed of coals in the center which will radiate heat and warm your campsite.
How to Build a Star Fire
- Arrange six to ten fuel logs touching ends together in a wheel-spoke formation to form an open center ring.
- Place a tinder bundle and kindling in the center ring.
- Light the kindling in the center to start the fire.
- As the fuel logs burn, push them further into the center to build a bed of coals.
- Add extra fuel logs and push them into the center of the fire as necessary.
- If you wish to cook over the star fire, place a pot or pan over the center ring of the fire to easily cook a hot meal.
Pyramid Fire/Inverse Fire
Pros
- Burns hot and breathes easy
- Burns for a long time
- Lots of fuel can be stacked on
- Easy to set up and stack
- Tinder and kindling are easy to light
- Easy to maintain
Cons
- Can be harder to get fuel logs started when compared to more conventional fires
- Takes longer to get hot
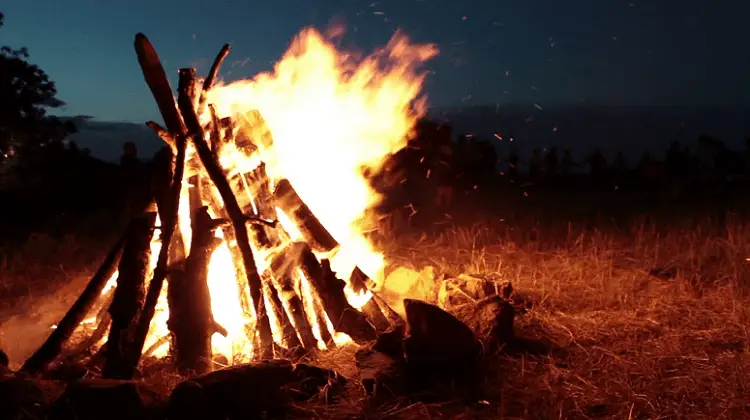
A pyramid fire goes against the conventional design of having the tinder and kindling on the bottom to ignite the denser fuel logs on top.
Instead, the pyramid structure places the tinder and kindling on top of a stack of fuel logs.
The benefit to this structure is that the fire lasts longer and creates and even burn that accumulate to a pile of hot coals.
The result of the pyramid structure is a fuel pile that burns longer and hotter as the fire progresses.
The downside of this structure is that the kindling has to ignite material below it.
Regardless, this fire is still effective and scores very good marks for a long burn time and easy maintenance since you can just stack more material on top as the fire burns downwards.
How to Build a Pyramid Fire
- Lay a row of large fuel logs on the bottom of your fire pit.
- Lay a perpendicular layer of smaller fuel logs on top of the previous layer.
- Work your way up the pyramid with smaller and smaller fuels in perpendicular layers
- At the top of the pyramid structure, lay a tinder bundle and kindling pile.
- Light the tinder on top to ignite the kindling and start the fire.
- As the kindling burns, the firewood below should burn and create coals.
- As the primary logs begin to burn to coals, stack or lay more wood across the structure to feed and maintain the fire.
Parallel Fire
Pros
- Great for cooking over
- Burns hot and breathes easy
- Simple to set up and maintain
Cons
- Harder to scale up to bonfire sized
- Requires a larger fire pit
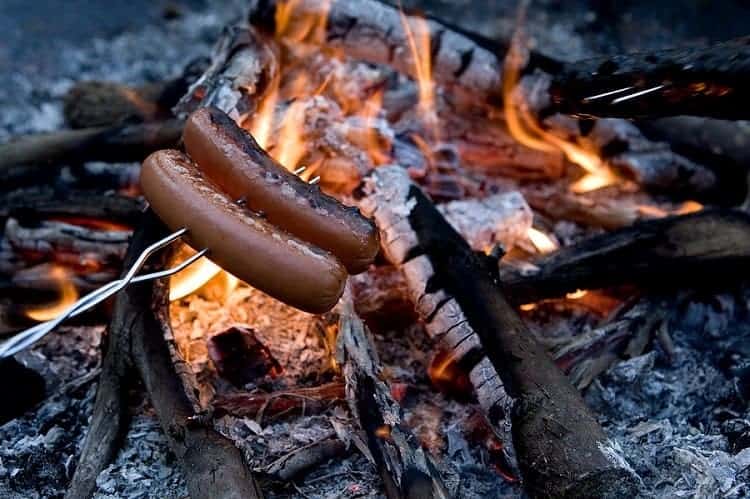
The parallel fire is great for cooking over because of the channeled upwards heat of this fire.
The two parallel logs on the side serve as a rest for a cooking pot of pan while also channeling the fire’s heat upwards and sucking in oxygen.
Once the kindling burns down to coals, you can add larger fuel woods to the middle to feed the fire.
You can also rest a pot or pan on the logs to quickly heat it up and be perfect for cooking.
How to Build a Parallel Fire
- Place two large logs parallel to each other in the fire pit. The logs must be close enough together to support your pot or pan while also being far enough apart to make room for the fire beneath.
- Place a tinder bundle in between the logs and lay a decent amount kindling across the logs’ gap over the kindling.
- Light the tinder to start the fire and wait for the kindling to burn to coals
- Once the kindling burns to coals, place larger fuels over the coals to feed the fire.
- To maintain the fire, place fuel logs in between the gap between the parallel logs where the coals and fire lay.
- If you’re cooking over the fire, rest your pot or pan on the parallel logs for a perfect cooking platform.
Swedish Fire Torch/Candle
Pros
- Burns hot and breathes easy
- Burns for a long time
- Great for cooking
- Little maintenance once the log starts burning
- Looks amazing
- Conserves firewood and burns efficiently
Cons
- Requires a chainsaw
- Hard to grow the fire larger, but you can make multiple Swedish fire torches instead
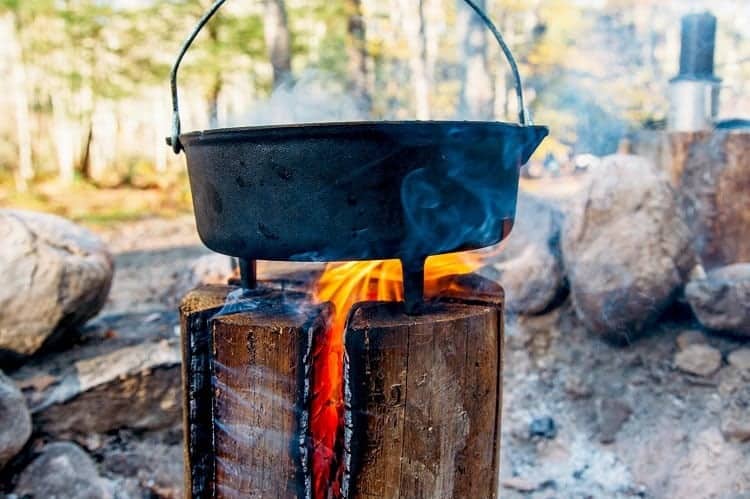
The Swedish fire torch is a great structure for cooking on and warming a small crew for several hours.
The top of the log can support a pot or pan and still burn plenty hot because of the cuts inside the log that always feed it oxygen. The larger the log, the longer the Swedish fire torch will burn.
After a few cuts with a chainsaw, setting up the fire is easy and requires no maintenance to burn for several hours once lit.
You can also make several fire torches and light them side by side for a campfire that will last for many hours with no maintenance whatsoever.
How to Build a Swedish Fire Torch
- Make three cuts from the top to ¾ down the log with a chainsaw to create six equal connected wedges of log.
- Stuff plenty of tinder inside the top face of the log cuts and lay kindling on top of the log.
- Light the tinder and feed more kindling to the fire until the log ignites.
- Sit back and enjoy the flame for many hours to come. The larger the log, the hotter and longer the fire will burn.
- If you wish to cook over the Swedish fire torch, place your pot or pan on top of the log for a perfect cooking surface.
Siberian Survival Fire/Long Log Fire
Pros
- Burns hot and evenly for a long time
- Takes advantage of larger logs
- Requires little maintenance once set up
- Great for cooking over
- Easy to grow larger by adding logs on the side
Cons
- Requires a larger fire pit
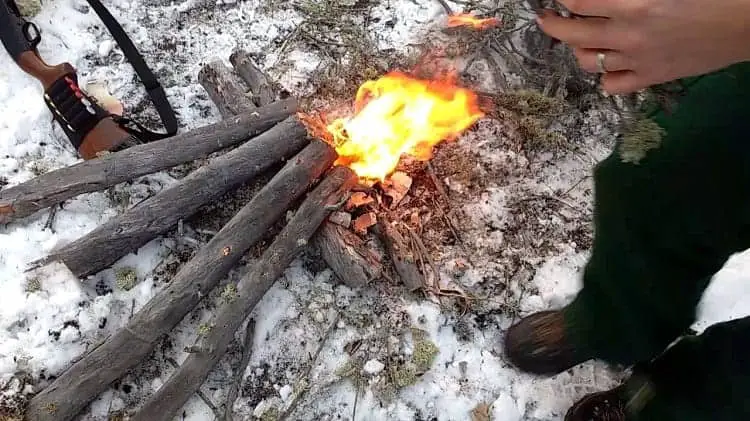
The long log fire structure is great for heating a large area and cooking over. The long log fire is a lengthy stack of fuel that burns hot into the night.
The fire has two long logs on the bottom with a long log on top with tinder and kindling in the middle.
Once the fire is lit, you can push the top log towards the downwind side to create a cooking surface on the bottom two logs.
Place your pot or pan on top of the two bottom logs and you’ll be ready to cook.
How to Build a Siberian Survival Fire
- Place two long fuel logs in your fire pit parallel to the wind direction.
- Lay two bundles of tinder and kindling perpendicular across the logs. These serve as spacers to allow airflow and ignite the larger logs. For bonus points, use green wood chunks as added spacers.
- Place a long fuel log on top of the tinder, kindling, and two bottom logs to create a triangle stack.
- Light the tinder bundles and wait for the logs to ignite.
- Once one of the logs burns to coals in roughly 4-8 hours (depending on quality of wood), add another log to the triangle stack to replace it. Add new logs to the fire as needed.
- If you wish on the long log fire, push the top log towards the downwind side to create an exposed space on the bottom two logs. Place a pot or pan on the exposed surface of the bottom two logs to create a cooking surface.
How to Put Out a Fire
Be sure to put out any open flames to prevent forest fires.
Fully extinguish the embers by sprinkling water on top while stirring the coals and ashes to prevent any wildfires.
If you wish to stay warm when sleeping, you can put out the fire and cover the coals with two or three inches of dirt. The coals will stay hot into the morning and keep you warm all night.
If you set up a stone wall around your fire earlier you can take the still warm rocks and put them around your bedding. The stones will stay warm long into the night and keep your bedding cozy until the morning.
After leaving the fire site, be considerate and return the area to how you found it. Disperse any ash throughout the area and put back any dirt that you may have removed to make a fire pit.
Requirements for a Fire
Now that we’ve covered everything about how to start a fire, let’s get into some fire science to help you better understand and improve your fire.
Fire requires three main ingredients: an oxidizer, heat, and fuel. If one of the three elements is missing, you can say goodbye to your campfire flame.
Approaching a fire with the proper knowledge to join all three ingredients is 90% of the battle.
Oxidizer
Fire requires that you have some oxidizer available for chemical combustion to occur. In most cases, this will simply be the air in our atmosphere.
By building a fire structure that allows airflow through channels to the fuel, your fire will burn hotter and not starved for oxygen.
Adding then an oxidizer such as anything containing potassium nitrate (KNO3) can be used to kick-start a fire in any conditions. KNO3 is commonly found in stump removers.
If you find yourself in the nastiest, wettest conditions, add some potassium nitrate to your tinder bundle to guarantee a flame.
Oxidizers are so great at creating fires because in potassium nitrate, three oxygen molecules break their bonds from the molecule when heated, making them available for combustion.
These free oxygen molecules crank the heat of your fire to way beyond what you can achieve with just firewood. It’s similar to using bellows to stoke your fire, just instead doing it chemically, and a lot more effectively.
Only resort to this method as a last resort attempt. Use common sense before adding chemicals to a fire.
Heat
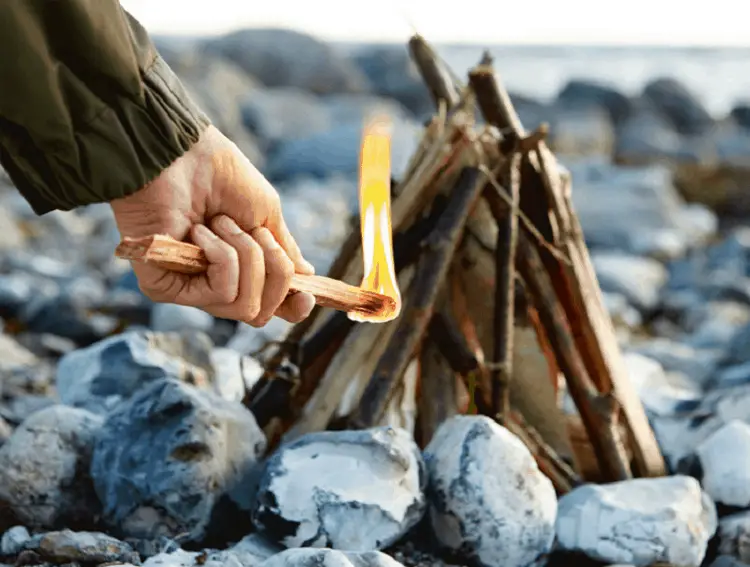
Heat is needed to start the exothermic reaction known as fire.
Whether it’s a lighter, matches, a magnesium fire lighter or even a car battery.
Whatever your available method of ignition for a fire is will be sure to do. If your ignition source can light your tinder, it will suffice.
Heat breaks down the bonds between molecules and sets energy free. This happens in the chain reaction of chemical processes known as fire.
Bonds release energy that is great enough to break the bonds of other molecules and release even more energy. Fire is sustained until either the heat or fuel source is removed from the reaction.
Fuel
Gathering fuel for the fire is a necessary task that is best completed before the fire is even started. What makes a good fuel though?
An excellent fuel will be something such as a split log, coals, or other energy-dense substance that can burn for extended periods of time. Not all fuels are equal. Starting a fire with a large log isn’t as easy as starting a fire with pine straw.
The reason for this is the greater surface area to volume ratio that makes them easier to ignite and perfect for tinder.
Other sources of tinder include small twigs, dry mosses, dry grasses, tree saps, cotton, leaves, old man’s beard, etc. Any fine dry organic material works as an effective tinder.
Kindling is larger than tinder and a good middle ground between ease of ignition and burn time. Kindling is no larger than 2 inches in thickness, or else it becomes harder to catch fire when put over tinder.
The purpose of kindling is to nourish the flame and allow it to grow large enough to start producing significant heat. One way to think about kindling is to bridge between kindling and fuel woods.
The largest size of fuels are energy dense resources such as coal, charcoal, or heavy pieces of wood larger than 2 inches in thickness.
Adding larger fuels once you have kindling lit will grow your fire into a proper campfire that radiates heat and warmth.
Cooking on fuel wood is much easier due to the hotter flames.
Benefits of Having a Campfire
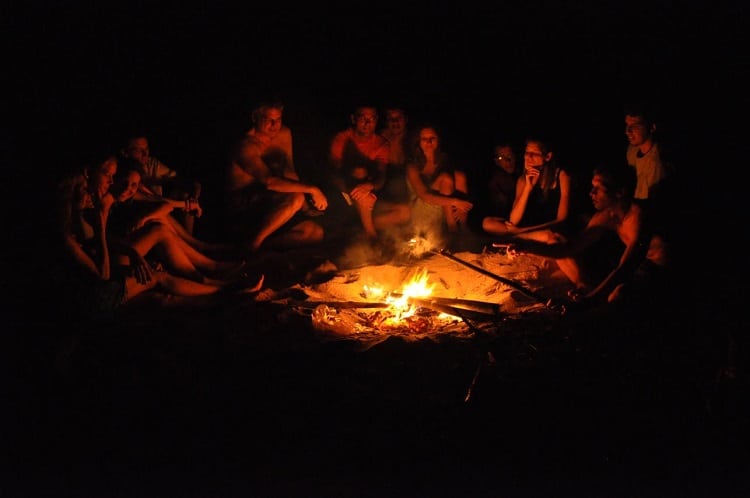
Now that we’ve covered everything to know about starting a fire, let’s cover the benefits of having a campfire.
The most obvious benefit of having a campfire is heat. Campfires provide unmatched warmth that can make even the coldest nights in double-digit negative temperatures bearable and comfortable.
The warmth provided by the fire keeps your internal body temperature up during cold nights to help you sleep comfortable and preserve calories that would otherwise be burnt shivering to keep you warm.
The heat from the fire also releases chemical signals in your brain to boost your morale and put your mind more at ease.
The heat provided by the campfire can also be used to cook food. Cooking food is an important survival skill that dates back to when man first discovered fire 1 million years ago.
Fire cooks food to make it easier to digest and offer more available energy to our bodies. Cooking food also warms our insides.
Eating a warm cooked meal releases neurotransmitters that relax the body and make you happy.
The light provided by a fire is also very beneficial to our well-being. The firelight causes releases neurochemical signals in our brain that calm our fears and comforts us.
Having a light source such as a fire to illuminate the area makes it easier to perform tasks at night as opposed to doing them in the darkness of the night.
This is especially helpful when there’s no light pollution or full moon in the sky to illuminate the environment.
The smoke produced by the fire is helpful in many ways. Smoke wards off mosquitoes, insects and dangerous large animals.
Smoke messes with mosquitoes’ senses for detecting carbon dioxide and heat, which is how they normally find animals to bite on. Insects avoid smoke as a survival instinct to prevent being burned by fire.
Large animals avoid fire and keep their distance as opposed to wandering into your camp.
The smoke produced by a fire can also be used for smoke signals.
If you hear or see a plane, helicopter, motorized vehicle or any kind of search party, you can throw materials such as green leaves or tires onto the fire to create large visible columns of smoke and show your position.
This makes it very easy for potential rescuers to see your campfire and figure out your location. Smoke signals are arguably the best way of signaling for survival.
Smoke can work over long distances unlike audible signals, and doesn’t rely on a clearing to signal through direct light such as with a signal mirror.
Smoke signals work great since they are easily visible in all conditions except for night and heavy rainy conditions. In these conditions, the light made by your campfire will serve as a better signal that you’re in the wilderness and potentially need rescue.
Conclusion
Thank you so much for reading our post about how to build a fire! We hope we answered all of your questions and that you learned something new.
If you have any questions, comments, concerns, or think we missed something, let us know in the comments below.
References:


![9 Final Thoughts And Items For Your First Camper Adventure [Checklist] 21 RV Camping Checklist](https://kempoo.com/wp-content/uploads/2018/11/first-camper-adventure.jpg)
